
In this tutorial, we will walk you through the process of serving large language models (LLMs), providing step-by-step instruction.

Introduction
In recent years, large language models (LLMs) have become increasingly popular, with open-source models like Mistral and LLaMA gaining widespread attention. In particular, the LLaMA 3 model was released on April 18, 2024, is one of today’s most powerful open-source LLMs.
However, serving these LLMs can be challenging, particularly on hardware with limited resources. Indeed, even on expensive hardware, LLMs can be surprisingly slow, with high VRAM utilization and throughput limitations.
This is where vLLM comes in. vLLM is an open-source project that enables fast and easy-to-use LLM inference and serving. Designed for optimal performance and resource utilization, vLLM supports a range of LLM architectures and offers flexible customization options. That’s why we are going to use it to efficiently deploy and scale our LLMs.
Objective
In this guide, you will discover how to deploy a LLM thanks to vLLM and the AI Deploy OVHcloud solution. This will enable you to benefit from vLLM‘s optimisations and OVHcloud‘s GPU computing resources. Your LLM will then be exposed by a secured API.
🎁 And for those who do not want to bother with the deployment process, a surprise awaits you at the end of the article. We are going to introduce you to our new solution for using LLMs, called AI Endpoints. This product makes it easy to integrate AI capabilities into your applications with a simple API call, without the need for deep AI expertise or infrastructure management. And while it’s in alpha, it’s free!
Requirements
To deploy your vLLM server, you need:
- An OVHcloud account to access the OVHcloud Control Panel
- A Public Cloud project
- A user for the AI Products, related to this Public Cloud project
- The OVHcloud AI CLI installed on your local computer (to interact with the AI products by running commands).
- Docker installed on your local computer, or access to a Debian Docker Instance, which is available on the Public Cloud
Once these conditions have been met, you are ready to serve your LLMs.
Building a Docker image
Since the OVHcloud AI Deploy solution is based on Docker images, we will be using a Docker image to deploy our vLLM inference server.
As a reminder, Docker is a platform that allows you to create, deploy, and run applications in containers. Docker containers are standalone and executable packages that include everything needed to run an application (code, libraries, system tools).
To create this Docker image, we will need to write the following Dockerfile into a new folder:
mkdir my_vllm_image
nano Dockerfile
# 🐳 Base image
FROM pytorch/pytorch:2.3.0-cuda12.1-cudnn8-runtime
# 👱 Set the working directory inside the container
WORKDIR /workspace
# 📚 Install missing system packages (git) so we can clone the vLLM project repository
RUN apt-get update && apt-get install -y git
RUN git clone https://github.com/vllm-project/vllm/
# 📚 Install the Python dependencies
RUN pip3 install --upgrade pip
RUN pip3 install vllm
# 🔑 Give correct access rights to the OVHcloud user
ENV HOME=/workspace
RUN chown -R 42420:42420 /workspaceLet’s take a closer look at this Dockerfile to understand it:
- FROM: Specify the base image for our Docker Image. We choose the PyTorch image since it comes with CUDA, CuDNN and torch, which is needed by vLLM.
- WORKDIR /workspace: We set the working directory for the Docker container to /workspace, which is the default folder when we use AI Deploy.
- RUN: It allows us to upgrade pip to the latest version to make sure we have access to the latest libraries and dependencies. We will install vLLM library, and git, which will enable to clone the vLLM repository into the /workspace directory.
- ENV HOME=/workspace: This sets the HOME environment variable to /workspace. This is a requirement to use the OVHcloud AI Products.
- RUN chown -R 42420:42420 /workspace: This changes the owner of the /workspace directory to the user and group with IDs of 42420 (OVHcloud user). This is also a requirement to use the OVHcloud AI Products.
This Dockerfile does not contain a CMD instruction and therefore does not launch our VLLM server. Do not worry about that, we will do it directly from AI Deploy to have more flexibility.
Once your Dockerfile is written, launch the following command to build your image:
docker build . -t vllm_image:latestPush the image into the shared registry
Once you have built the Docker image, you will need to push it to a registry to make it accessible from AI Deploy. A registry is a service that allows you to store and distribute Docker images, making it easy to deploy them in different environments.
Several registries can be used (OVHcloud Managed Private Registry, Docker Hub, GitHub packages, …). In this tutorial, we will use the OVHcloud shared registry. More information are available in the Registries documentation.
To find the address of your shared registry, use the following command (ovhai CLI needs to be installed on your computer):
ovhai registry listThen, log in on your shared registry with your usual AI Platform user credentials:
docker login -u <user> -p <password> <shared-registry-address>Once you are logged in to the registry, tag the compiled image and push it into your shared registry:
docker tag vllm_image:latest <shared-registry-address>/vllm_image:latest
docker push <shared-registry-address>/vllm_image:latest
vLLM inference server deployment
Once your image has been pushed, it can be used with AI Deploy, using either the ovhai CLI or the OVHcloud Control Panel (UI).
Creating an access token
Tokens are used as unique authenticators to securely access the AI Deploy apps. By creating a token, you can ensure that only authorized requests are allowed to interact with the vLLM endpoint. You can create this token by using the OVHcloud Control Panel (UI) or by running the following command:
ovhai token create vllm --role operator --label-selector name=vllmThis will give you a token that you will need to keep.
Creating a Hugging Face token (optionnal)
Note that some models, such as LLaMA 3 require you to accept their license, hence, you need to create a HuggingFace account, accept the model’s license, and generate a token by accessing your account settings, that will allow you to access the model.
For example, when visiting the HugginFace Gemma model page, you’ll see this (if you are logged in):
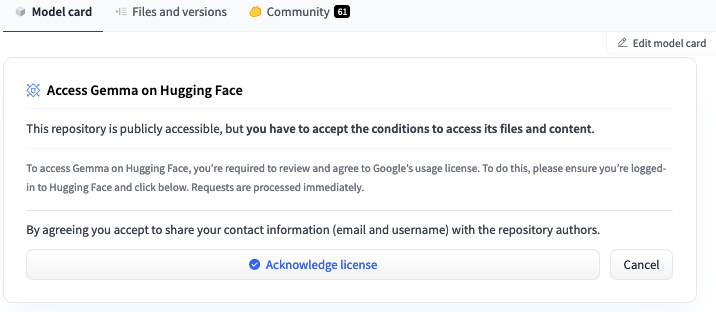
If you want to use this model, you will have to Acknowledge the license, and then make sure to create a token in the tokens section.
In the next step, we will set this token as an environment variable (named HF_TOKEN). Doing this will enable us to use any LLM whose conditions of use we have accepted.
Run the AI Deploy application
Run the following command to deploy your vLLM server by running your customized Docker image:
ovhai app run <shared-registry-address>/vllm_image:latest \
  --name vllm_app \
  --flavor h100-1-gpu \
  --gpu 1 \
  --env HF_TOKEN="<YOUR_HUGGING_FACE_TOKEN>" \
  --label name=vllm \
  --default-http-port 8080 \
  -- python -m vllm.entrypoints.api_server --host 0.0.0.0 --port 8080 --model <model> --dtype half
You just need to change the address of your registry to the one you used, and the name of the LLM you want to use. Also pay attention to the name of the image, its tag, and the label selector of your label if you haven’t used the same ones as those given in this tutorial.
Parameters explanation
<shared-registry-address>/vllm_image:latestis the image on which the app is based.--name vllm_appis an optional argument that allows you to give your app a custom name, making it easier to manage all your apps.--flavor h100-1-gpuindicates that we want to run our app on H100 GPU(s). You can access the full list of GPUs available byrunning ovhai capabilities flavor list--gpu 1indicates that we request 1 GPU for that app.--env HF_TOKENis an optional argument that allows us to set our Hugging Face token as an environment variable. This gives us access to models for which we have accepted the conditions.--label name=vllmallows to privatize our LLM by adding the token corresponding to the label selectorname=vllm.--default-http-port 8080indicates that the port to reach on the app URL is the8080.--python -m vllm.entrypoints.api_server --host 0.0.0.0 --port 8080 --model <model>allows to start the vLLM API server. The specified <model> will be downloaded from Hugging Face. Here is a list of those that are supported by vLLM. Many arguments can be used to optimize your inference.
When this ovhai app run command is executed, several pieces of information will appear in your terminal. Get the ID of your application, and open the Info URL in a new tab. Wait a few minutes for your application to launch. When it is RUNNING, you can stream its logs by executing:
ovhai app logs -f <APP_ID>This will allow you to track the server launch, the model download and any errors you may encounter if you have used a model for which you have not accepted the user contract.
If all goes well, you should see the following output, which means that your server is up and running:
Started server process [11]
Waiting for application startup.
Application startup complete.
Uvicorn running on http://0.0.0.0:8080 (Press CTRL+C to quit)
Interacting with your LLM
Once the server is up and running, we can interact with our LLM by hitting the /generate endpoint.
Using cURL
Make sure you change the ID to that of your application so that you target the right endpoint. In order for the request to be accepted, also specify the token that you generated previously by executing ovhai token create. Feel free to adapt the parameters of the request (prompt, max_tokens, temperature, …)
curl --request POST \
  --url https://<APP_ID>.app.gra.ai.cloud.ovh.net/generate \
  --header 'Authorization: Bearer <AI_TOKEN_generated_with_CLI>' \
  --header 'Content-Type: application/json' \
  --data '{
        "prompt": "<YOUR_PROMPT>",
        "max_tokens": 50,
        "n": 1,
        "stream": false
}'
Using Python
Here too, you need to add your personal token and the correct link for your application.
import requests
import json

# change for your host
APP_URL = "https://<APP_ID>.app.gra.ai.cloud.ovh.net"
TOKEN = "AI_TOKEN_generated_with_CLI"

url = f"{APP_URL}/generate"

headers = {
    "Content-Type": "application/json",
    "Authorization": f"Bearer {TOKEN}"
}
data = {
    "prompt": "What a LLM is in AI?",
    "max_tokens": 100,
    "temperature": 0
}

response = requests.post(url, headers=headers, data=json.dumps(data))

print(response.json()["text"][0])
OVHcloud AI Endpoints
If you are not interested in building your own image and deploying your own LLM inference server, you can use OVHcloud’s new AI Endpoints product which will make your life definitely easier!
AI Endpoints is a serverless solution that provides AI APIs, enabling you to easily use pre-trained and optimized AI models in your applications.
Overview of AI Endpoints
You can use LLM as a Service, choosing the desired model (such as LLaMA, Mistral, or Mixtral) and making an API call to use it in your application. This will allow you to interact with these models without even having to deploy them!
In addition to LLM capabilities, AI Endpoints also offers a range of other AI models, including speech-to-text, translation, summarization, embeddings and computer vision.
Best of all, AI Endpoints is currently in alpha phase and is free to use, making it an accessible and affordable solution for developers seeking to explore the possibilities of AI. Check this article and try it out today to discover the power of AI!
Join our Discord server to interact with the community and send us your feedbacks (#ai-endpoints channel)!

I am anengineering student who has been working at OVHcloud for a few months. I am familiar with several computer languages, but within my studies, I specialized in artificial intelligence and Python is therefore my main working tool.
It is a growing field that allows me to discover and understand things, to create but also as you see to explain them :)!