
A tutorial to create and build your own Speech-To-Text Application with Python.

At the end of this second article, your Speech-To-Text application will be more interactive and visually better.
Indeed, we are going to center our titles and justify our transcript. We will also add some useful buttons (to download the transcript, to play with the timestamps). Finally, we will prepare the application for the next tutorial by displaying sliders and checkboxes to interact with the next functionalities (speaker differentiation, summarization, video subtitles generation, …)
Final code of the app is available in our dedicated GitHub repository.
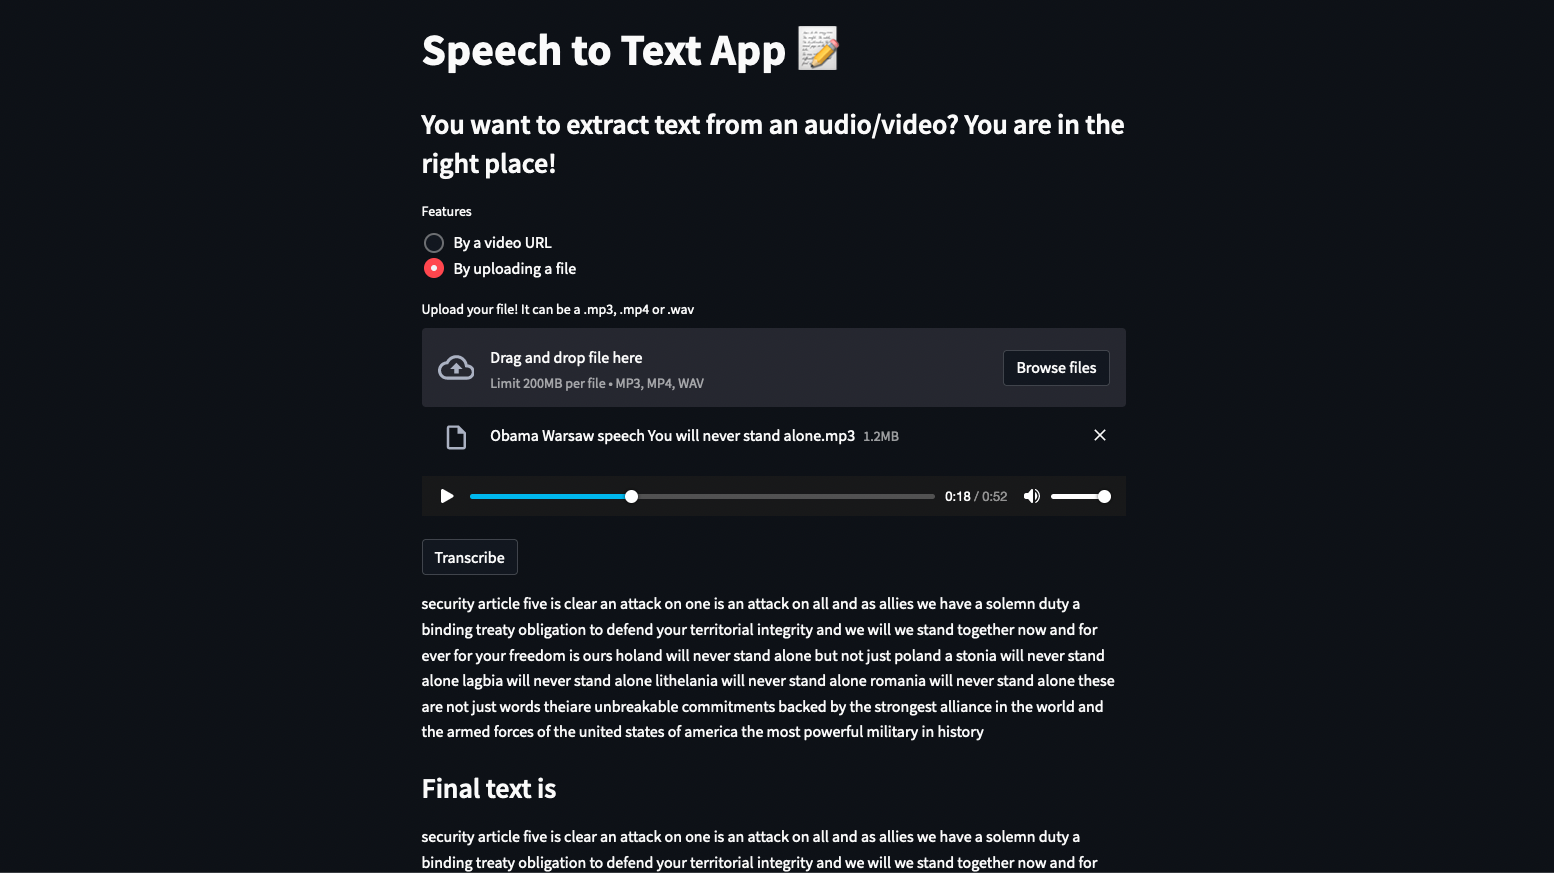
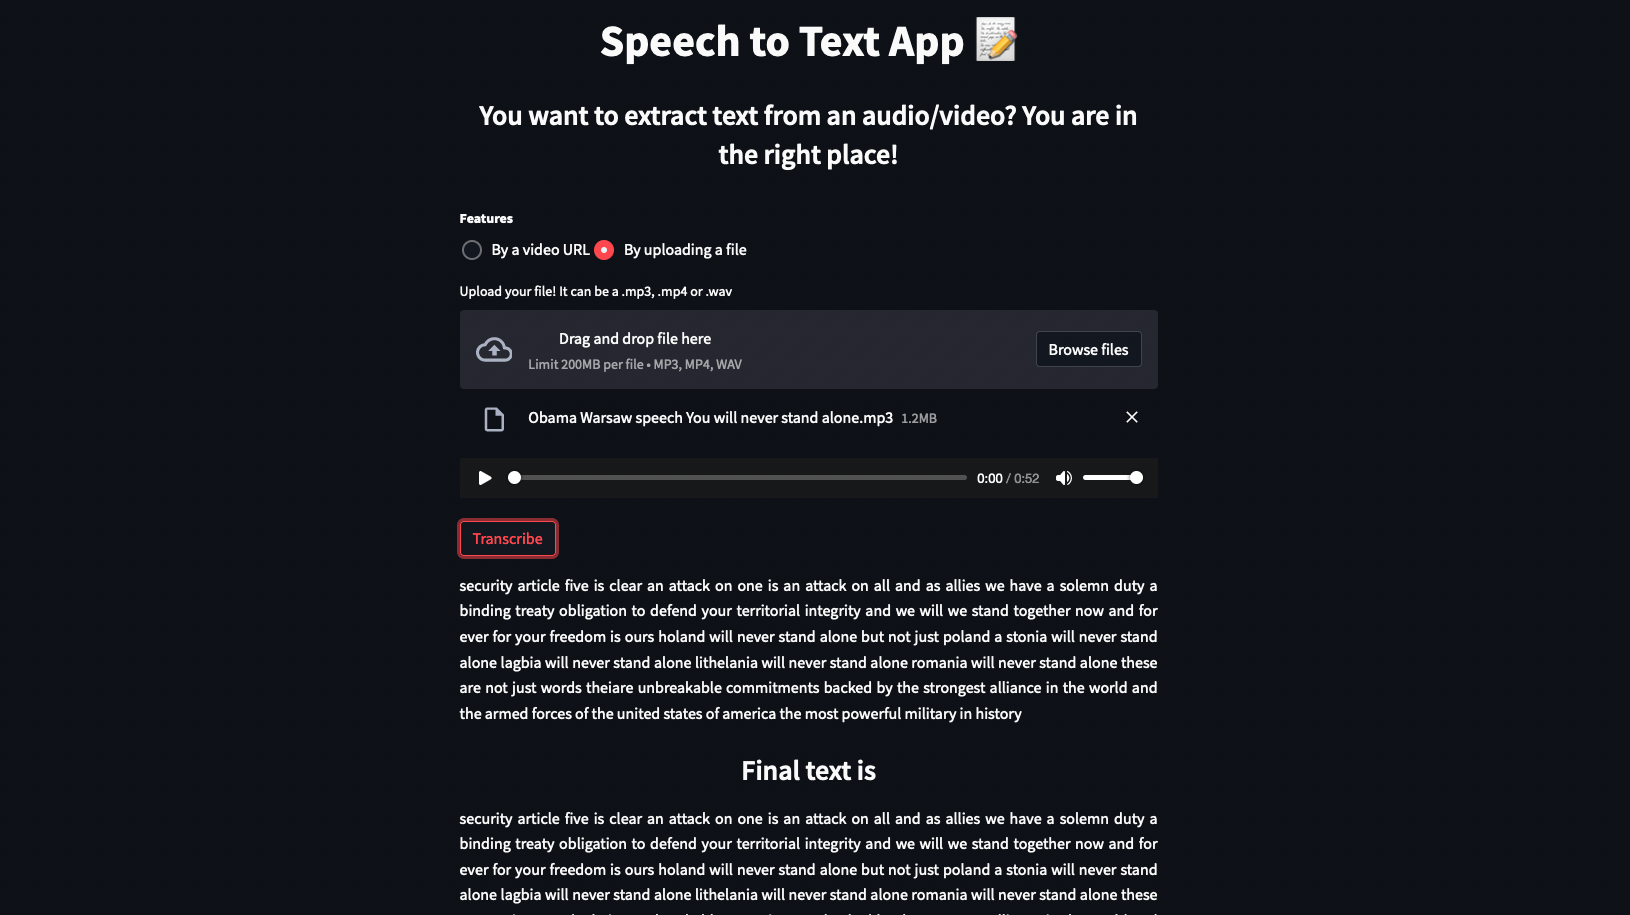
Overview of our final app
Overview of our final Speech-To-Text application
Objective
In the previous article, we have seen how to build a basic Speech-To-Text application with Python and Streamlit. In this tutorial, we will improve this application by changing its appearance, improving its interactivity and preparing features used in the notebooks (transcript a specific audio part, differentiate speakers, generate video subtitles, punctuate and summarize the transcript, …) that we will implement in the last tutorial!
This article is organized as follows:
- Python libraries
- Change appearance with CSS
- Improve the app’s interactivity
- Prepare new functionalities
⚠️ Since this article uses code already explained in the previous notebook tutorials, we will not re-explained its usefulness here. We therefore recommend that you read the notebooks first.
1. Python libraries
To implement our final features (speakers differentiation, summarization, …) to our speech to text app, we need to import the following libraries into our app.py file. We will use them afterwards.
# Models
from pyannote.audio import Pipeline
from transformers import pipeline, HubertForCTC, T5Tokenizer, T5ForConditionalGeneration, Wav2Vec2ForCTC, Wav2Vec2Processor, Wav2Vec2Tokenizer
import pickle

# Others
import pandas as pd
import re
2. Change appearance with CSS
Before adding or modifying anything, let’s improve the appearance of our application!
😕 Indeed, you maybe noticed our transcript is not justified, titles are not centered and there is an unnecessary space at the top of the screen.
➡️ To solve this, let’s use the st.markdown() function to write some CSS code thanks to the “style” attribute!
Just add the following lines to the config() function we have created before, for example after the st.title(“Speech to Text App 📝”) line. This will tell Streamlit how it should display the mentioned elements.
    st.markdown("""
                    <style>
                    .block-container.css-12oz5g7.egzxvld2{
                        padding: 1%;}

                    .stRadio > label:nth-child(1){
                        font-weight: bold;
                        }
                    .stRadio > div{flex-direction:row;}
                    p, span{
                        text-align: justify;
                    }
                    span{
                        text-align: center;
                    }
                    """, unsafe_allow_html=True)
We set the parameter “unsafe_allow_html” to “True” because HTML tags are escaped by default and therefore treated as pure text. Setting this argument to True turns off this behavior.
⬇️ Let’s look at the result:
App without CSS (on the left) and with (on the right)
This is better now, isn’t it?
3. Improve the app’s interactivity
Now we will let the user interact with our application. It will no longer only generate a transcript.
3.1 Download transcript
We want the users to be able to download the generated transcript as a text file. This will save them from having to copy the transcript and paste it into a text file. We can do this easily with a download button widget.
Unfortunately, Streamlit does not help us with this feature. Indeed, each time you interact with a button on the page, the entire Streamlit script will be re-run so it will delete our displayed transcript. To observe this problem, add a download button to the app, just after the st.write(txt_text) in the transcription() function, thanks to the following code:
# Download transcript button - Add it to the transcription() function, after the st.write(txt_text) line
st.download_button("Download as TXT", txt_text, file_name="my_transcription.txt")
Now, if you transcribe an audio file, you should have a download button at the bottom of the transcript and if you click it, you will get the transcript in a .txt format as expected. But you will notice that the whole transcript disappears without any reason which is frustrating for the user, as the video below shows:
Video illustrating the issue with Streamlit button widgets
To solve this, we are going to use Streamlit session state and callback functions. Indeed, session state is a way to share variables between reruns. Since Streamlit reruns the app’s script when we click a button, this is the perfect solution!
➡️ First, let’s initialize four session state variables respectively called audio_file, process, txt_transcript and page_index.
As the session states variables are initialized only one time in the code, we can initialize them all at once as below, in the config() function:
# Initialize session state variables
# Should be added to the config() function
if 'page_index' not in st.session_state:
    st.session_state['audio_file'] = None
    st.session_state["process"] = []
    st.session_state['txt_transcript'] = ""
    st.session_state["page_index"] = 0
The first one allow us to save the audio file of the user. Then, the process variable (which is a list) will contain each generated transcript part with its associated timestamps, while the third variable will only contain the concatenated transcripts, which means the final text.
The last variable, page_index, will determine which page of our application will be displayed according to its value. Indeed, since clicking the download button removes the displayed transcript, we are going to create a second page, named results page, where we will display again the user’s audio file and the obtained transcript thanks to the values saved in our session state variables. We can then redirect the user to this second page as soon as the user clicks the download button. This will allow the user to always be able to see his transcript, even if he downloads it!
➡️ Once we have initialized the session state variables, we need to save the transcript with the associated timestamps and the final text in these variables so we do not lose these information when we click a button.
To do that, we need to define an update_session_state() function which will allow us to update our session state variables, either by replacing their content, or by concatenating it, which will be interesting for the transcripts since they are obtained step by step. Indeed, concatenating each transcript part will allow us to obtain the final transcript. Here is the function:
def update_session_state(var, data, concatenate_token=False):
    """
    A simple function to update a session state variable
    :param var: variable's name
    :param data: new value of the variable
    :param concatenate_token: do we replace or concatenate
    """

    if concatenate_token:
        st.session_state[var] += data
    else:
        st.session_state[var] = data
This is where we will use the variable save_result from the previous article. Actually, save_result is a list which contains the timestamps and the generated transcript. This corresponds to what we want in the process state variable, which will allow us to retrieve the transcripts and associated timestamps and display them on our results page!
### Add this line to the transcription() function, after the transcription_non_diarization() call

# Save results
update_session_state("process", save_result)
Let’s do the same with the audio_file and txt_text variables, so we can also re-display the audio player and the final text on our results page.
### Add this line to the transcription() function, after the st.audio(uploaded_file) line, to save the audio file

# Save Audio so it is not lost when we interact with a button (so we can display it on the results page)
update_session_state("audio_file", uploaded_file)
### Add this line to the transcription() function, after the if txt_text != ""
# Save txt_text
update_session_state("txt_transcript", txt_text)Thanks to the content saved in our session state variables (audio_file, process, txt_transcript), we are ready to create our results page.
3.2 Create the results page and switch to it
First, we have to tell Streamlit that clicking the download button must change the page_index value. Indeed, remember that its value determines which page of our app is displayed.
If this variable is 0, we will see the home page. If we click a download button, the app’s script is restarted and the transcript will disappear from the home page. But since the page_index value will now be set to 1 when a button is clicked, we will display the results page instead of the home page and we will no longer have an empty page.
To do this, we simply add the previous function to our download button thanks to the on_click parameter, so we can indicate to our app that we want to update the page_index session state variable from 0 to 1 (to go from the home page to the results page) when we click this button.
### Modify the code of the download button, in the transcription() function, at the end of the the if txt_text != "" statement

st.download_button("Download as TXT", txt_text, file_name="my_transcription.txt", on_click=update_session_state, args=("page_index", 1,))
Now that the page_index value is updated, we need to check its value to know if the displayed page should be the home page or the results page.
We do this value checking into the main code of our app. You can replace the old main code by the following one:
if __name__ == '__main__':
    config()

    # Default page
    if st.session_state['page_index'] == 0:
        choice = st.radio("Features", ["By a video URL", "By uploading a file"])

        stt_tokenizer, stt_model = load_models()

        if choice == "By a video URL":
            transcript_from_url(stt_tokenizer, stt_model)

        elif choice == "By uploading a file":
            transcript_from_file(stt_tokenizer, stt_model)

    # Results page
    elif st.session_state['page_index'] == 1:
        # Display Results page
        display_results()
Now that we have created this page, all that remains is to display elements on it (titles, buttons, audio file, transcript)!
def display_results():

    st.button("Load an other file", on_click=update_session_state, args=("page_index", 0,))
    st.audio(st.session_state['audio_file'])

    # Display results of transcription by steps
    if st.session_state["process"] != []:
        for elt in (st.session_state['process']):

            # Timestamp
            st.write(elt[0])

            # Transcript for this timestamp
            st.write(elt[1])

    # Display final text
    st.subheader("Final text is")
    st.write(st.session_state["txt_transcript"])


    # Download your transcription.txt
    st.download_button("Download as TXT", st.session_state["txt_transcript"], file_name="my_transcription.txt")
👀 You maybe noticed that at the beginning of the previous function, we have added a “Load an other file” button. If you look at it, you will see it has a callback function that updates the page_index to 0. In other words, this button allows the user to return to the home page so he can transcribe an other file.
Now let’s see what happens when we interact with this download button:
Video illustrating the solved issue with Streamlit button widgets
As you can see, clicking the download button no longer makes the transcript disappear, thanks to our results page! We still have the st.audio() widget, the process as well as the final text and the download button. We have solved our problem!
3.3 Jump audio start to each timestamps
Our Speech-To-Text application would be so much better if the timestamps were displayed as buttons so that the user can click them and listen to the considered audio part thanks to the audio player widget we placed. Now that we know how to manipulate session state variables and callback functions, there is not much left to do 😁!
First, define a new session state variable in the config() function named start_time. It will indicate to our app where the starting point of the st.audio() widget should be. For the moment, it is always at 0s.
### Add this initialization to the config() function, with the other session state variables

st.session_state["start_time"] = 0
Then, we define a new callback function that handles a timestamp button click. Just like before, it needs to redirect us to the results page, as we do not want the transcript to disappear. But it also needs to update the start_time variable to the beginning value of the timestamp button clicked by the user, so the starting point of the audio player can change.
For example, if the timestamp is [10s – 20s], we will set the starting point of the audio player to 10 seconds so that the user can check on the audio player the generated transcript for this part.
Here is the new callback function:
def click_timestamp_btn(sub_start):
    """
    When user clicks a Timestamp button, we go to the display results page and st.audio is set to the sub_start value)
    It allows the user to listen to the considered part of the audio
    :param sub_start: Beginning of the considered transcript (ms)
    """

    update_session_state("page_index", 1)
    update_session_state("start_time", int(sub_start / 1000)) # division to convert ms to s
Now, we need to replace the timestamp text by a timestamp button, so we can click it.
To do this, just replace the st.write(temp_timestamps) of the display_transcription() function by a widget button that calls our new callback function, with sub_start as an argument, which corresponds to the beginning value of the timestamp. In the previous example, sub_start would be 10s.
### Modify the code that displays the temp_timestamps variable, in the display_transcription() function
st.button(temp_timestamps, on_click=click_timestamp_btn, args=(sub_start,))
To make it work, we also need to modify 3 lines of code in the display_results() function, which manages the results page, because it needs to:
- Make the st.audio() widget starts from the start_time session state value
- Display timestamps of the results page as buttons instead of texts
- Call the update_session_state() function when we click one of these buttons to update the start_time value, so it changes the starting point of the audio player
def display_results():
    st.button("Load an other file", on_click=update_session_state, args=("page_index", 0,))
    st.audio(st.session_state['audio_file'], start_time=st.session_state["start_time"])

    # Display results of transcription by steps
    if st.session_state["process"] != []:
        for elt in (st.session_state['process']):
            # Timestamp
            st.button(elt[0], on_click=update_session_state, args=("start_time", elt[2],))

            #Transcript for this timestamp
            st.write(elt[1])

    # Display final text
    st.subheader("Final text is")
    st.write(st.session_state["txt_transcript"])

    # Download your transcription.txt
    st.download_button("Download as TXT", st.session_state["txt_transcript"], file_name="my_transcription.txt")
When you’ve done this, each timestamp button (home page and results page) will be able to change the starting point of the audio player, as you can see on this video:
Video illustrating the timestamp button click
This feature is really useful to easily check each of the obtained transcripts!
4. Preparing new functionalities
Now that the application is taking shape, it is time to add the many features we studied in the notebooks.
Among these options are the possibility to:
- Trim/Cut an audio, if the user wants to transcribe only a specific part of the audio file
- Differentiate speakers (Diarization)
- Punctuate the transcript
- Summarize the transcript
- Generate subtitles for videos
- Change the speech-to-text model to a better one (result will be longer)
- Display or not the timestamps
4.1 Let the user enable these functionalities or not
First of all, we need to provide the user with a way to customize his transcript by choosing the options he wants to activate.
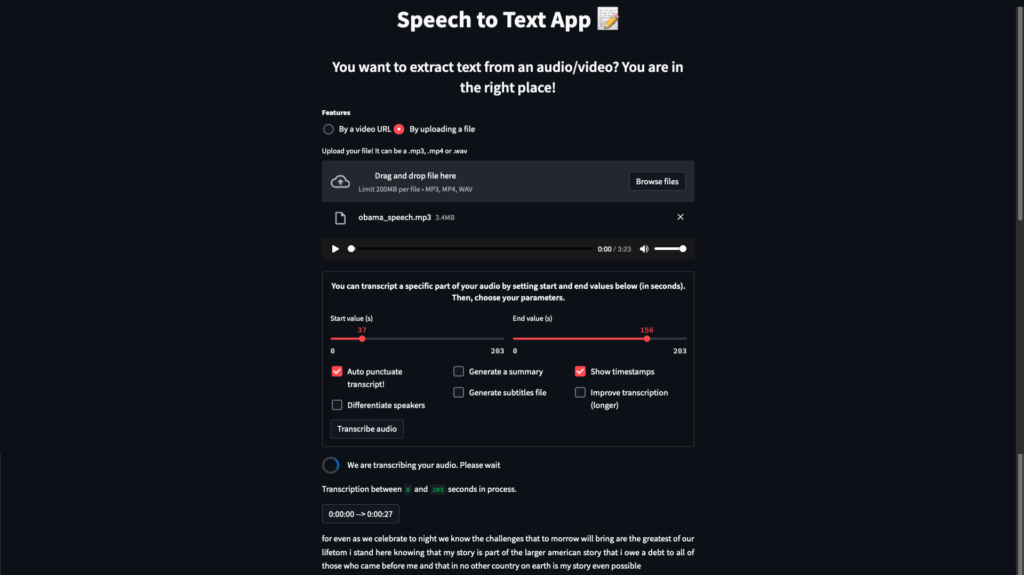
➡️ To do this, we will use sliders & check boxes as it shown on the screenshot below:
Add the following function to your code. It will display all the options on our application.
def load_options(audio_length, dia_pipeline):
    """
    Display options so the user can customize the result (punctuate, summarize the transcript ? trim the audio? ...)
    User can choose his parameters thanks to sliders & checkboxes, both displayed in a st.form so the page doesn't
    reload when interacting with an element (frustrating if it does because user loses fluidity).
    :return: the chosen parameters
    """
    # Create a st.form()
    with st.form("form"):
        st.markdown("""<h6>
            You can transcript a specific part of your audio by setting start and end values below (in seconds). Then,
            choose your parameters.</h6>""", unsafe_allow_html=True)

        # Possibility to trim / cut the audio on a specific part (=> transcribe less seconds will result in saving time)
        # To perform that, user selects his time intervals thanks to sliders, displayed in 2 different columns
        col1, col2 = st.columns(2)
        with col1:
            start = st.slider("Start value (s)", 0, audio_length, value=0)
        with col2:
            end = st.slider("End value (s)", 0, audio_length, value=audio_length)

        # Create 3 new columns to displayed other options
        col1, col2, col3 = st.columns(3)

        # User selects his preferences with checkboxes
        with col1:
            # Get an automatic punctuation
            punctuation_token = st.checkbox("Punctuate my final text", value=True)

            # Differentiate Speakers
            if dia_pipeline == None:
                st.write("Diarization model unvailable")
                diarization_token = False
            else:
                diarization_token = st.checkbox("Differentiate speakers")

        with col2:
            # Summarize the transcript
            summarize_token = st.checkbox("Generate a summary", value=False)

            # Generate a SRT file instead of a TXT file (shorter timestamps)
            srt_token = st.checkbox("Generate subtitles file", value=False)

        with col3:
            # Display the timestamp of each transcribed part
            timestamps_token = st.checkbox("Show timestamps", value=True)

            # Improve transcript with an other model (better transcript but longer to obtain)
            choose_better_model = st.checkbox("Change STT Model")

        # Srt option requires timestamps so it can matches text with time => Need to correct the following case
        if not timestamps_token and srt_token:
            timestamps_token = True
            st.warning("Srt option requires timestamps. We activated it for you.")

        # Validate choices with a button
        transcript_btn = st.form_submit_button("Transcribe audio!")

    return transcript_btn, start, end, diarization_token, punctuation_token, timestamps_token, srt_token, summarize_token, choose_better_model
This function is very simple to understand:
First of all, we display all options in a st.form(), so the page doesn’t reload each time the user interacts with an element (Streamlit’s feature which can be frustrating because in our case it wastes time). If you are curious, you can try to run your app with without the st.form() to observe the problem 😊.
Then, we create some columns. They allow us to display the elements one under the other, aligned, to improve the visual appearance. Here too, you can display the elements one after the other without using columns, but it will look different.
We will call this function in the transcription() function, in the next article 😉. But if you want to test it now, you can call this function after the st.audio() widget. Just keep in mind that this will only display the options, but it won’t change the result since the options are not implemented yet.
4.2 Session states variables
To interact with these features, we need to initialize more session states variables (I swear these are the last ones 🙃):
### Add new initialization to our config() function

st.session_state['srt_token'] = 0  # Is subtitles parameter enabled or not
st.session_state['srt_txt'] = ""  # Save the transcript in a subtitles case to display it on the results page
st.session_state["summary"] = ""  # Save the summary of the transcript so we can display it on the results page
st.session_state["number_of_speakers"] = 0  # Save the number of speakers detected in the conversation (diarization)
st.session_state["chosen_mode"] = 0  # Save the mode chosen by the user (Diarization or not, timestamps or not)
st.session_state["btn_token_list"] = []  # List of tokens that indicates what options are activated to adapt the display on results page
st.session_state["my_HF_token"] = "ACCESS_TOKEN_GOES_HERE"  # User's Token that allows the use of the diarization model
st.session_state["disable"] = True  # Default appearance of the button to change your token
To quickly introduce you to their usefulness:
- srt_token: Indicates if the user has activated or not the subtitles option in the form
- srt_text: Contains the transcript as a subtitles format (.SRT) in order to save it when we click a button
- summary: Contains the short transcript given by the summarization model, for the same reason
- number_of_speakers: Number of speakers detected by the diarization algorithm in the audio recording
- chosen_mode: Indicates what options the user has selected so we know which information should be displayed (timestamps? results of diarization?)
- btn_token_list: Handle which buttons should be displayed. You will understand why it is needed in the next article
- my_HF_token: Save the user’s token that allows the use of the diarization model
- disable: Boolean that allows to make the change user’s token button clickable or not (not clickable if token has not been added)
You will also need to add the following line of code to the init_transcription() function:
# Add this line to the init_transcription() function
update_session_state("summary", "")
This will reset the summary for each new audio file transcribed.
4.3 Import the models
Of course, to interact with these functionalities, we need to load new A.I. models.
⚠️ Reminder: We have used each of them in the previous notebook tutorials. We will not re-explain their usefulness here.
4.3.1 Create a token to access to the diarization model
Since version 2 of pyannote.audio library, an access token has been implemented and is mandatory in order to use the diarization model (which allows speakers differentiation)
To create your access token, you will need to:
- Create an Hugging Face account and verify your email address
- Visit the speaker-diarization page and the segmentation page, and accept user conditions on both pages (only if requested)
- Visit the token page to create an access token (Read Role)
4.3.2 Load the models
Once you have your token, you can modify the code of the load_models() function to add the models:
@st.cache(allow_output_mutation=True)
def load_models():
    """
    Instead of systematically downloading each time the models we use (transcript model, summarizer, speaker differentiation, ...)
    thanks to transformers' pipeline, we first try to directly import them locally to save time when the app is launched.
    This function has a st.cache(), because as the models never change, we want the function to execute only one time
    (also to save time). Otherwise, it would run every time we transcribe a new audio file.
    :return: Loaded models
    """

    # Load facebook-hubert-large-ls960-ft model (English speech to text model)
    with st.spinner("Loading Speech to Text Model"):
        # If models are stored in a folder, we import them. Otherwise, we import the models with their respective library

        try:
            stt_tokenizer = pickle.load(open("models/STT_processor_hubert-large-ls960-ft.sav", 'rb'))
        except FileNotFoundError:
            stt_tokenizer = Wav2Vec2Processor.from_pretrained("facebook/hubert-large-ls960-ft")

        try:
            stt_model = pickle.load(open("models/STT_model_hubert-large-ls960-ft.sav", 'rb'))
        except FileNotFoundError:
            stt_model = HubertForCTC.from_pretrained("facebook/hubert-large-ls960-ft")

    # Load T5 model (Auto punctuation model)
    with st.spinner("Loading Punctuation Model"):
        try:
            t5_tokenizer = torch.load("models/T5_tokenizer.sav")
        except OSError:
            t5_tokenizer = T5Tokenizer.from_pretrained("flexudy/t5-small-wav2vec2-grammar-fixer")

        try:
            t5_model = torch.load("models/T5_model.sav")
        except FileNotFoundError:
            t5_model = T5ForConditionalGeneration.from_pretrained("flexudy/t5-small-wav2vec2-grammar-fixer")

    # Load summarizer model
    with st.spinner("Loading Summarization Model"):
        try:
            summarizer = pickle.load(open("models/summarizer.sav", 'rb'))
        except FileNotFoundError:
            summarizer = pipeline("summarization")

    # Load Diarization model (Differentiate speakers)
    with st.spinner("Loading Diarization Model"):
        try:
            dia_pipeline = pickle.load(open("models/dia_pipeline.sav", 'rb'))
        except FileNotFoundError:
            dia_pipeline = Pipeline.from_pretrained("pyannote/speaker-diarization@2.1", use_auth_token=st.session_state["my_HF_token"])

            #If the token hasn't been modified, dia_pipeline will automatically be set to None. The functionality will then be disabled.

    return stt_tokenizer, stt_model, t5_tokenizer, t5_model, summarizer, dia_pipeline
⚠️ Don’t forget to modify the use_auth_token=”ACCESS TOKEN GOES HERE” by your personal token. Otherwise, the app will be launched without the diarization functionality.
As the load_models() function now returns 6 variables (instead of 2), we need to change the line of code that calls this function to avoid an error. This one is in the main:
# Replace the load_models() code line call in the main code by the following one
stt_tokenizer, stt_model, t5_tokenizer, t5_model, summarizer, dia_pipeline = load_models()
As we discussed in the previous article, having more models makes the initialization of the speech to text app longer. You will notice this if you run the app.
➡️ This is why we now propose two ways to import the models in the previous function.
The first one, that we will use by default, consists in searching the models in a folder, where we will save all the models used by our app. If we find the model in this folder, we will import it, instead of downloading it. This allows not to depend on the download speed of an internet connection and makes the application usable as soon as it is launched!
If we don’t find the model in this folder, we will switch to the second solution which is to reproduce the way we have always used: download models from their libraries. The problem is that it takes several minutes to download all the models and then launch the application, which is quite frustrating.
➡️ We will show you how you can save these models in a folder in the documentation that will help you to deploy your project on AI Deploy.
Conclusion
Well done 🥳 ! Your application is now visually pleasing and offers more interactivity thanks to the download button and those that allow you to play with the audio player. You also managed to create a form that will allow the user to indicate what functionalities he wants use!
➡️ Now it’s time to create these features and add them to our application! You can discover how in the next article 😉.

I am anengineering student who has been working at OVHcloud for a few months. I am familiar with several computer languages, but within my studies, I specialized in artificial intelligence and Python is therefore my main working tool.
It is a growing field that allows me to discover and understand things, to create but also as you see to explain them :)!