
A guide to build a solution for sign language interpretation based on a Computer Vision algorithm: YOLOv7.
Introduction
In the field of Artificial Intelligence, we often talk about Computer Vision and Object Detection, but what role do these AI techniques play in the vast field of healthcare? We’ll see that data plays a key role in AI applications for the medical-social sector.
Have you ever wondered if AI could be the solution to understand sign language?
Through this article, you will see that it is possible to use an AI model to detect signed letters. How? Thanks to the power of Computer Vision and Transfer Learning!
The article is organized as follows:
- Objectives
- American Sign Language Dataset
- Fine-Tune YOLOv7 model for Sign Language detection
- Deploy custom YOLOv7 model for real time detection
All the code for this blogpost is available in our dedicated GitHub repository. You can Fine-Tune YOLOv7 to detect signs with AI Notebooks tool and deploy the custom model for real-time detection with AI Deploy.
Objectives
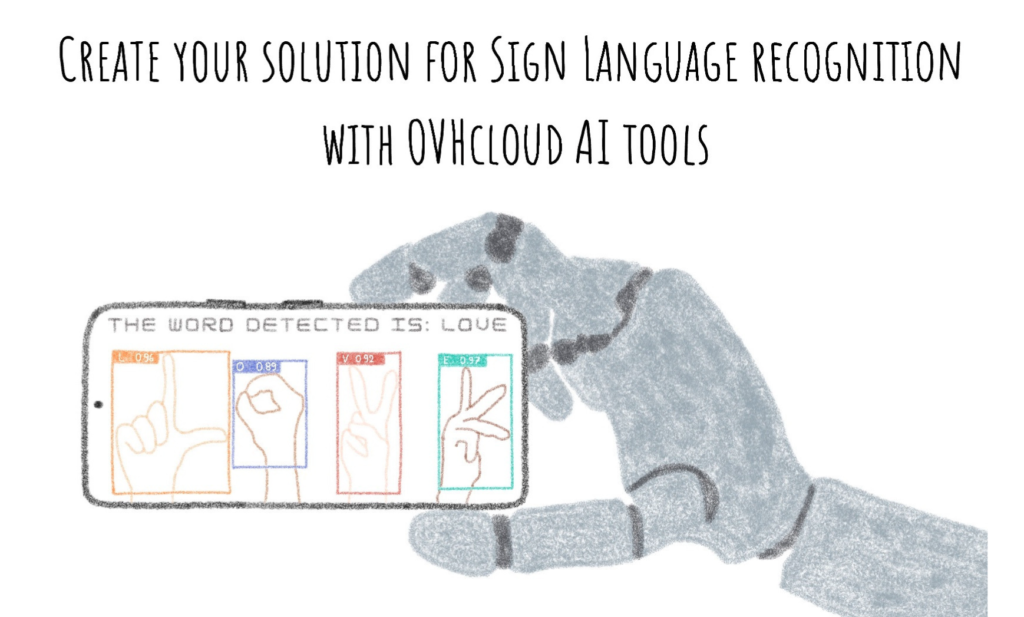
The purpose of this article is to show how it is possible to deploy a solution for Sign Language recognition thanks to AI.
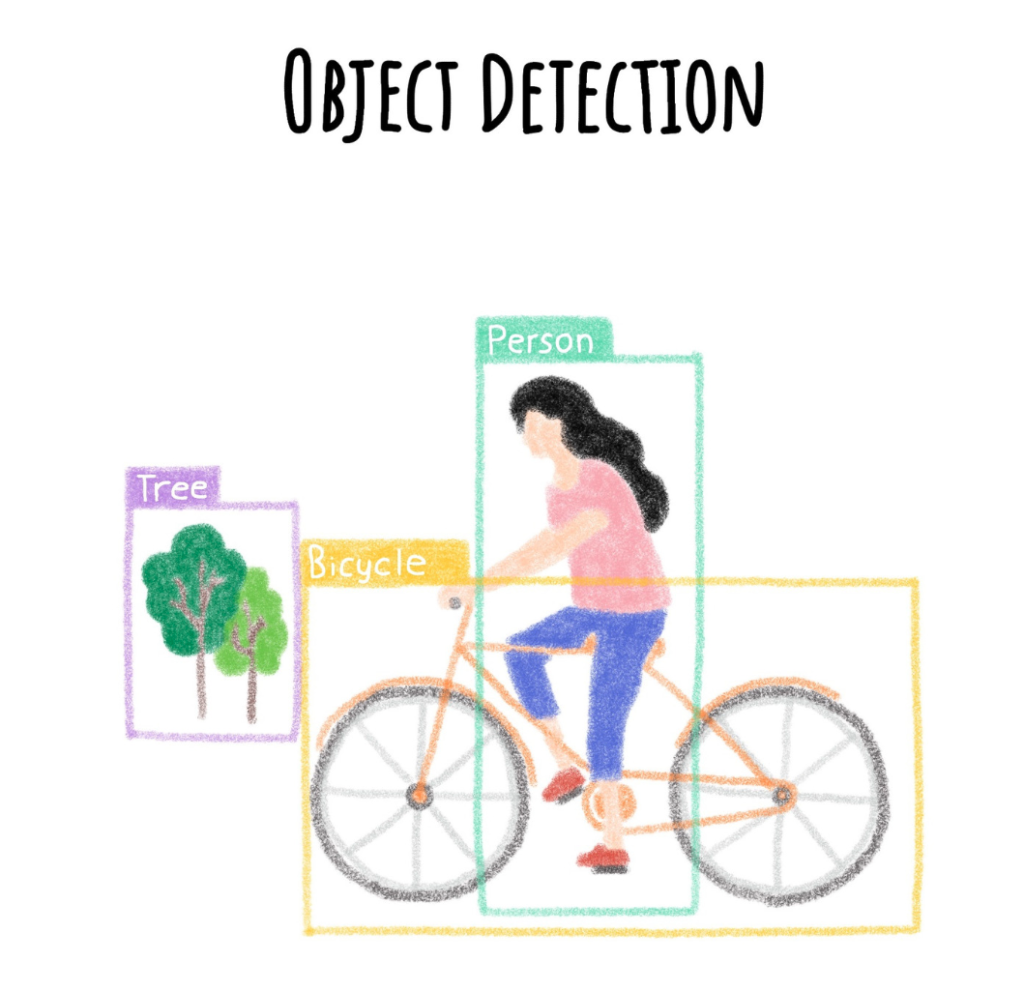
An Object Detection algorithm will be used to detect the various signs and categorize them. Although closely related to image classification, Object Detection performs Image Classification on a more precise scale.
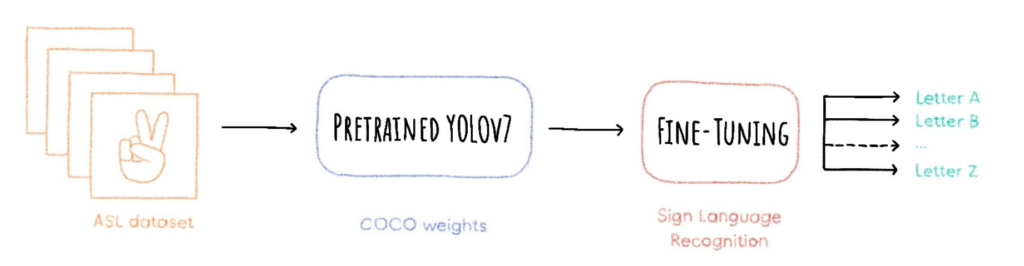
In this article, you will learn how to Fine-Tune YOLOv7 model for Sign Language detection.
Once the model has been trained, what do you think of deploying a web app? Streamlit is the answer to your needs! At the end, AI will enable you to understand Sign Language, with real-time detection and written transcription.
American Sign Language Dataset
First of all, let’s talk data!
American Sign Language Letters Dataset v1 is a public set of alphabet images and their labels created by David Lee.
This dataset is composed of 1728 images and 26 classes with the alphabet letters from A to Z.
This dataset is composed of images and their corresponding labels, which are in txt format and give information about the location of the object thanks to the x, y coordinates as well as the height and width of the bounding box.
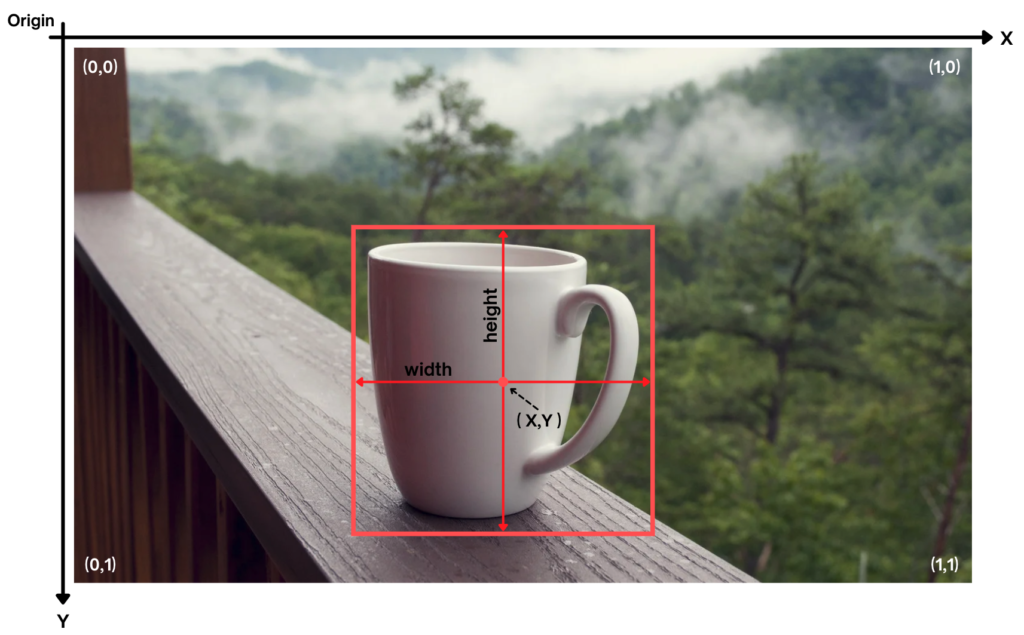
This data format is ideal for training a YOLO type Object Detection model.
Fine-Tune YOLOv7 model for Sign Language recognition
How can the model YOLOv7 be trained to recognize American Sign Language letters?
Object Detection with YOLOv7
YOLOv7 is part of the “YOLO family” algorithms, which actually means “You Only Look Once.” In fact, unlike many detection algorithms, YOLO is a neural network that evaluates the position and class of identified objects from a single end-to-end network that detects classes using a fully connected layer.
Therefore, YOLO models pass only once on each image to detect the objects. This Object Detection model is particularly known for its speed and accuracy and allows real-time recognition.
But how can the model YOLOv7 be trained to recognize American Sign Language letters? Follow the next steps and let the magic work!
The full notebook is available on the following GitHub repository.
Import dependencies
Firstly, import the dependencies you need.
import torch
import os
import yaml
import torchvision
from IPython.display import Image, clear_output
Check GPU availability
Then, check the GPU availability. Indeed, the training of a model like YOLOv7 requires the use of GPU, in this case a Tesla V100S is used.
print('Setup complete. Using torch %s %s' % (torch.__version__, torch.cuda.get_device_properties(0) if torch.cuda.is_available() else 'CPU'))Setup complete. Using torch 1.12.1+cu102 _CudaDeviceProperties(name='Tesla V100S-PCIE-32GB', major=7, minor=0, total_memory=32510MB, multi_processor_count=80)
Extract the dataset information
Next, you can access to the data.yaml file.
This file contains vital information about the dataset, especially the number of classes. Here we got 26 classes with the letters from A to Z.
# go to the directory where the data.yaml file is located to extract the number of classes
%cd /workspace/data
with open("data.yaml", 'r') as stream:
    num_classes = str(yaml.safe_load(stream)['nc'])
Now, it’s time to train YOLOv7 model!
Recover YOLOv7 weights
In this tutorial, you can use the Transfer Learning method by using YOLOv7 weights pre-trained on the COCO dataset.
How to define Transfer Learning?
For both humans and machines, learning something new takes time and practice. However, it is easier to perform out tasks similar to those already learned. As with humans, AI will be able to identify patterns from previous knowledge and apply them to new learning.
If a model is trained on a database, there is no need to re-train the model from scratch to fit a new set of similar data.
Main advantages of Transfer Learning:
- saving resources
- improving efficiency
- model training facilitation
- saving time
At this time, you can download the trained model:
# YOLOv7 path
%cd /workspace/yolov7
!wget https://github.com/WongKinYiu/yolov7/releases/download/v0.1/yolov7_training.pt
Saving to: ‘yolov7_training.pt’
yolov7_training.pt 100%[===================>] 72.12M 12.0MB/s in 5.5s
Run YOLOv7 training on ASL Letters Dataset
You can therefore set the following parameters.
- workers: maximum number of dataloader workers.
- device: cuda device.
- batch-size: refers to the batch size (number of training examples used in one iteration).
- data: refers to the path to the yaml file.
- img: refers to the input images size.
- cfg: define the model configuration.
- weights: initial weights path.
- name: save to project/name.
- hyp: hyperparameters path.
- epochs: refers to the number of training epochs. An epoch corresponds to one cycle through the full training dataset.
# time the performance
%time

# train yolov7 on custom data for 100 epochs
!python /workspace/yolov7/train.py \
          --workers 8 \
          --device 0 \
          --batch-size 8 \
          --data '/workspace/data/data.yaml' \
          --img 416 416 \
          --cfg '/workspace/yolov7/cfg/training/yolov7.yaml' \
          --weights '/workspace/yolov7/yolov7_training.pt' \
          --name yolov7-asl \
          --hyp '/workspace/yolov7/data/hyp.scratch.custom.yaml' \
          --epochs 100
Display results of YOLOv7 training on ASL Letters dataset
Then you can display the results of the training and check the evolution of the metrics.
# display images
Image(filename='/workspace/yolov7/runs/train/yolov7-asl/results.png', width=1000)  # view results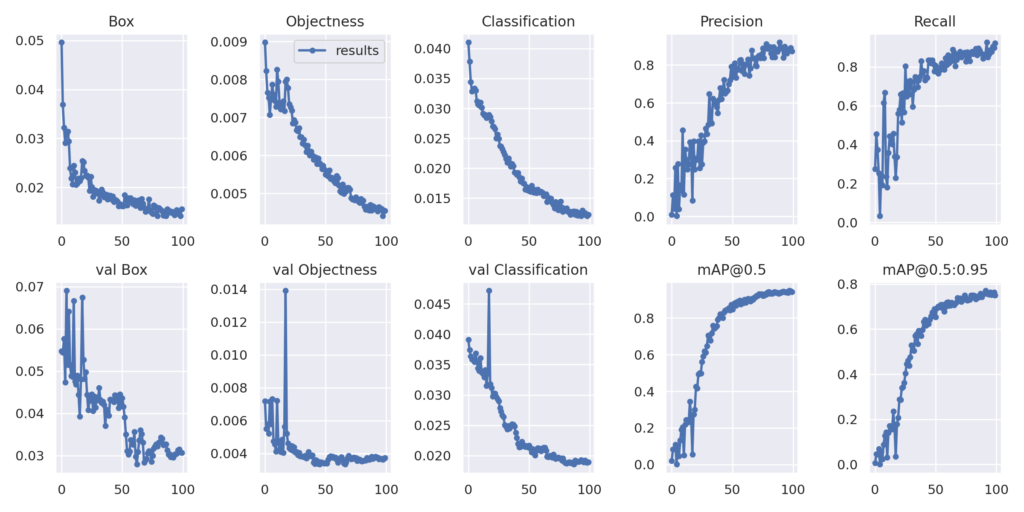
Export new weights for future inference
Finally, you can extract the new weights coming from YOLOv7 training on ASL Alphabet dataset. The goal is to save the model weights in a bucket in the cloud for reuse in a dedicated application.
Firstly, rename the PyTorch model it with the name you want.
%cd /workspace/yolov7/runs/train/yolov7-asl/weights/
os.rename("best.pt","yolov7.pt")
/workspace/yolov7/runs/train/yolov7-asl/weights
Secondly, copy it in a new folder where you can put all the weights generated during your trainings.
%cp /workspace/yolov7/runs/train/yolov7-asl/weights/yolov7.pt /workspace/asl-volov7-model/yolov7.ptYour model is ready? It’s now time to deploy a web app to use the model and benefit from real-time detection 🎉 !
Deploy custom YOLOv7 model for real time detection
Once this YOLOv7 model is trained, it can be used for inference. If you want to quickly build an app to serve your AI model, the Streamlit framework may be right for you.
What is Streamlit?
Now, it’s time to discuss about the framework used to create a Web App: Streamlit!
Streamlit allows you to transform data scripts into quickly shareable web applications using only the Python language. Moreover, this framework does not require front-end skills.
This is a time-saver for the data scientist who wants to deploy an app around the world of data!
To make this app accessible, you need to containerize it using Docker.
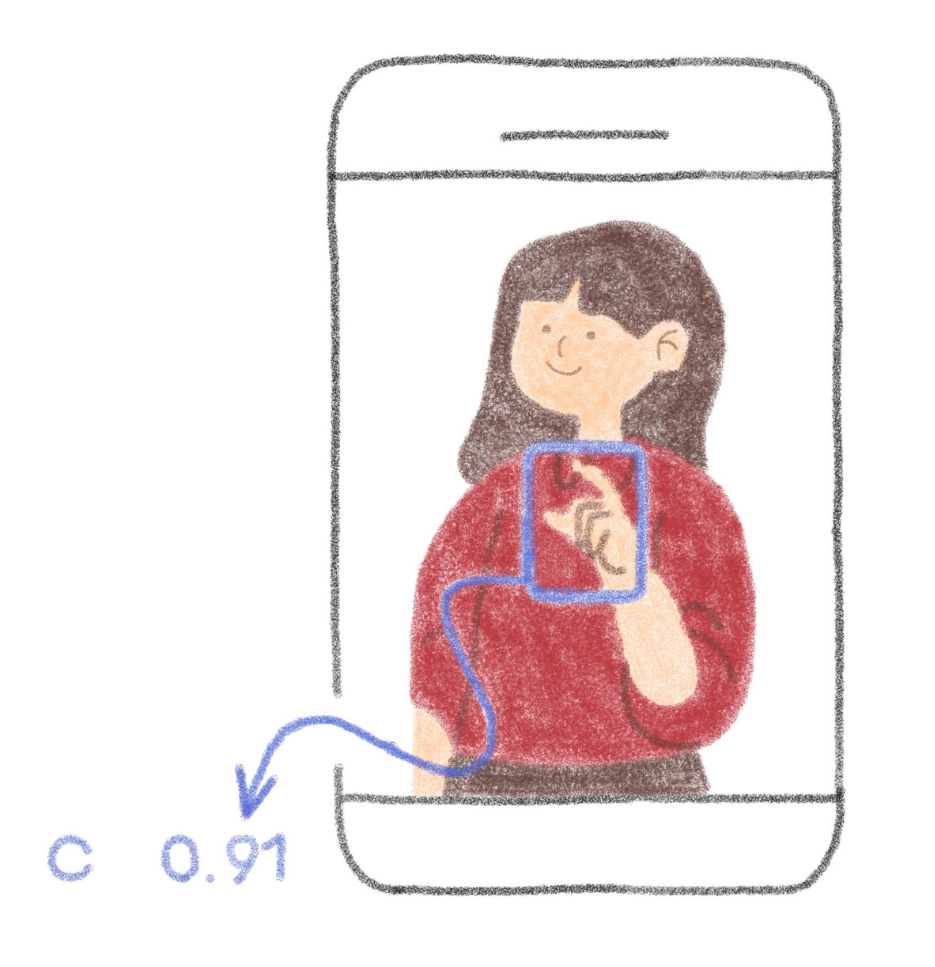
By creating an app, you will enable anyone to understand Sign Language, with Real-Time detection and written transcription.
Let’s go for the implementation!
Create the interface with Streamlit
First of all, we must build the web interface to take a photo and the various functions to analyze the signs present on this image.
load_model: this function should be pushed in “cache” so that you only have to load the model once
@st.cache
def load_model():

    custom_yolov7_model = torch.hub.load("WongKinYiu/yolov7", 'custom', '/workspace/asl-volov7-model/yolov7.pt')

return custom_yolov7_modelget_prediction: the model analyzes the image and returns the result of the prediction
def get_prediction(img_bytes, model):

    img = Image.open(io.BytesIO(img_bytes))
    results = model(img, size=640)

return resultsanalyse_image: the image is processed before and after the model analysis
def analyse_image(image, model):

    if image is not None:

        img = Image.open(image)

        bytes_data = image.getvalue()
        img_bytes = np.asarray(bytearray(bytes_data), dtype=np.uint8)
        result = get_prediction(img_bytes, model)
        result.render()

        for img in result.imgs:
            RGB_img = cv2.cvtColor(img, cv2.COLOR_BGR2RGB)
            im_arr = cv2.imencode('.jpg', RGB_img)[1]
            st.image(im_arr.tobytes())

        result_list = list((result.pandas().xyxy[0])["name"])

    else:
        st.write("no asl letters were detected!")
        result_list = []

return result_listdisplay_letters: the letters are recovered and displayed to form the final word
def display_letters(letters_list):

    word = ''.join(letters_list)
    path_file = "/workspace/word_file.txt"
    with open(path_file, "a") as f:
        f.write(word)

    return path_file
To access the full code of the app, refer to this GitHub repository.
Containerize your app with Docker
Once the app code has been created, it’s time to containerize it!
The containerization is based on the construction of a Docker image, and before this image is usable, several steps must be completed.
What are the containerization steps 🐳 ?
The following steps refer to this documentation where you can find detailed information.
- Write the requirements.txt file
- Create the Dockerfile
- Build the Docker image
- Tag and push the Docker image on a registry
Your docker image is created successfully? You are ready to launch your app 🚀 !
Deploy your app and make it accessible
The following command starts a new AI Deploy app running your Streamlit web interface.
ovhai app run
       --gpu 1 \
       --default-http-port 8501 \
       --volume asl-volov7-model@GRA/:/workspace/asl-volov7-model:RO \
       <shared-registry-address>/yolov7-streamlit-asl-recognition:latest
In this command line, you can set up several parameters:
resources: choose between CPUs or GPUsdefault HTTP port: precise the Streamlit default port – 8501data: link the bucket containing your modeldocker image: add your docker image addess
When your app is up and running, you can access the following page:

Conclusion
Well done 🎉 ! You have learned how to create your own solution for Sign Language recognition with OVHcloud AI tools.
You have been able to Fine-Tune YOLOv7 model thanks to AI Notebooks and deploy a Real-Time recognition app with AI Deploy.
Want to find out more?
Notebook
You want to access the notebook? Refer to the GitHub repository.
To launch this notebook with AI Notebook, please refer to our documentation.
App
You want to access to the full code to create the Streamlit app? Refer to the GitHub repository.
To deploy this app with AI Deploy, please refer to our documentation.
References
- ASL Alphabet Dataset V1
- YOLOv7 GitHub repository
- Object detection: train YOLOv5 on a custom dataset
- YoloV7 Training on Custom Data

Solution Architect @OVHcloud