
Travel through the Data & AI universe of OVHcloud with the MLflow integration.

As Artificial Intelligence (AI) continues to grow in importance, Data Scientists and Machine Learning Engineers need a robust and scalable platform to manage the entire Machine Learning (ML) lifecycle.
MLflow, an open-source platform, provides a comprehensive framework for managing ML experiments, models, and deployments.
Mlflow offers many benefits and provides a complete framework for ML lifecycle management with features such as:
- Experiment tracking and model management
- Reproducibility and collaboration
- Scalability, flexibility, and integration
- Automated ML and model serving capabilities
- Improved model accuracy, faster time-to-market, and reduced costs.
In this reference architecture, you will explore how to leverage remote experience tracking with the MLflow Tracking Server on the OVHcloud Public Cloud infrastructure.
In fact, you will be able to build a scalable and efficient ML platform, streamlining your ML workflow and accelerating model development using OVHcloud AI Notebooks, AI Training, Managed Databases (PostgreSQL), and Object Storage.
The result? A fully remote, production-ready ML experiment tracking pipeline, powered by OVHcloud’s Data & Machine Learning Services (e.g. AI Notebooks and AI Training).
Overview of the MLflow server architecture
Here is how will be configured MLflow:
- Development and training environment: create and train model with AI Notebooks
- Remote Tracking Server: host in an AI Training job (Container as a Service)
- Backend Store: benefit from a managed PostgreSQL database (DBaaS).
- Artifact Store: use OVHcloud Object Storage (S3-compatible).

In the following tutorial, all services are deployed within the OVHcloud Public Cloud.
Prerequisites
Before you begin, ensure you have:
- An OVHcloud Public Cloud account
- An OpenStack user with the following roles:
- Administrator
- AI Training Operator
- Object Storage Operator
🚀 Having all the ingredients for our recipe, it’s time to set up your MLflow remote tracking server!
Architecture guide: MLflow remote tracking server
Let’s go for the set up and deployment of your custom MLflow tracking tool!
⚙️ Also consider that all of the following steps can be automated using OVHcloud APIs!
Step 1 – Install ovhai CLI
Firstly, start by setting up your CLI environment.
curl https://cli.gra.ai.cloud.ovh.net/install.sh | bashSecondly, login using your OpenStack credentials.
ovhai login -u <openstack-username> -p <openstack-password>Now, it’s time to create your bucket inside OVHcloud Object Storage!
Step 2 – Provision Object Storage (Artifact Store)
- Go to Public Cloud > Storage > Object Storage in the OVHcloud Control Panel.
- Create a datastore and a new S3 bucket (e.g.,
mlflow-s3-bucket). - Register the datastore with the
ovhaiCLI:
ovhai datastore add s3 <ALIAS> https://s3.gra.io.cloud.ovh.net/ gra <my-access-key> <my-secret-key> --store-credentials-locallyStep 3 – Create PostgreSQL Managed DB (Backend Store)
1. Navigate to Databases & Analytics > Databases
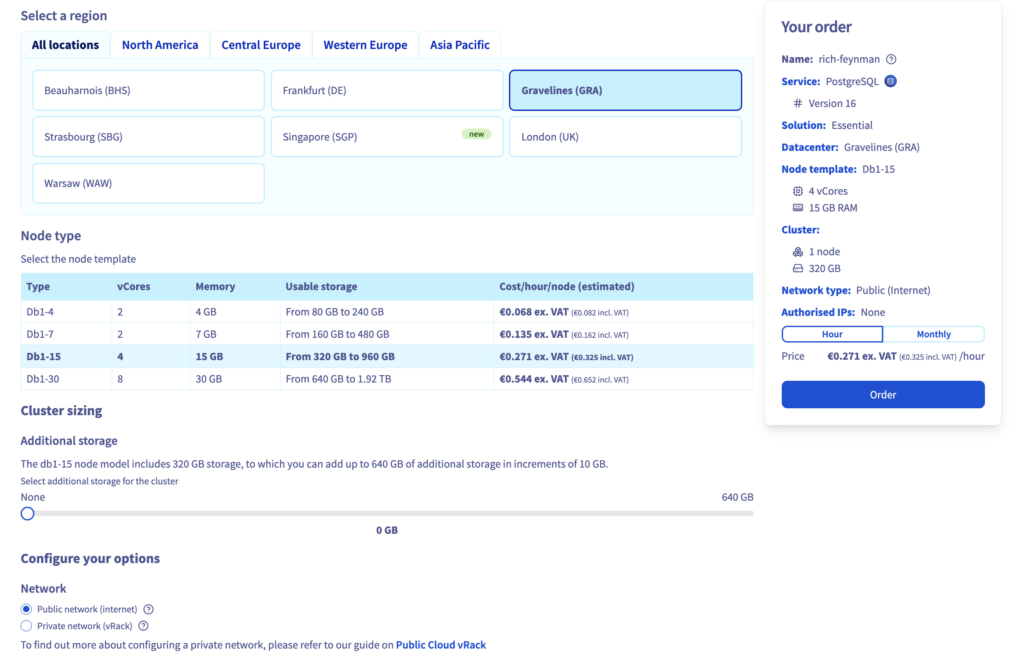
2. Create a new PostgreSQL instance with Essential plan
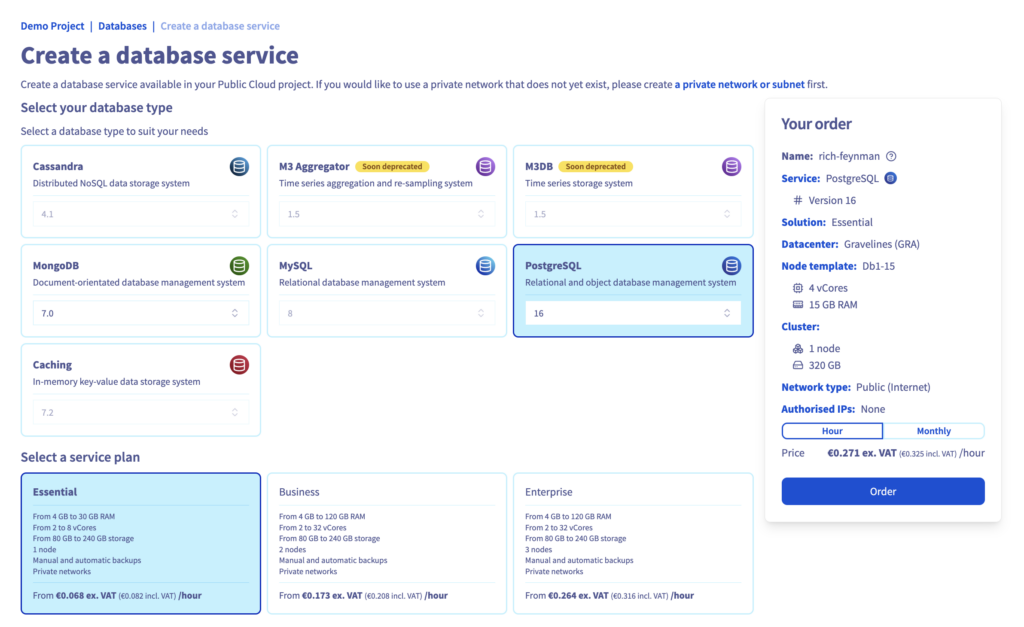
3. Select Location and Node type
4. Reset the user password
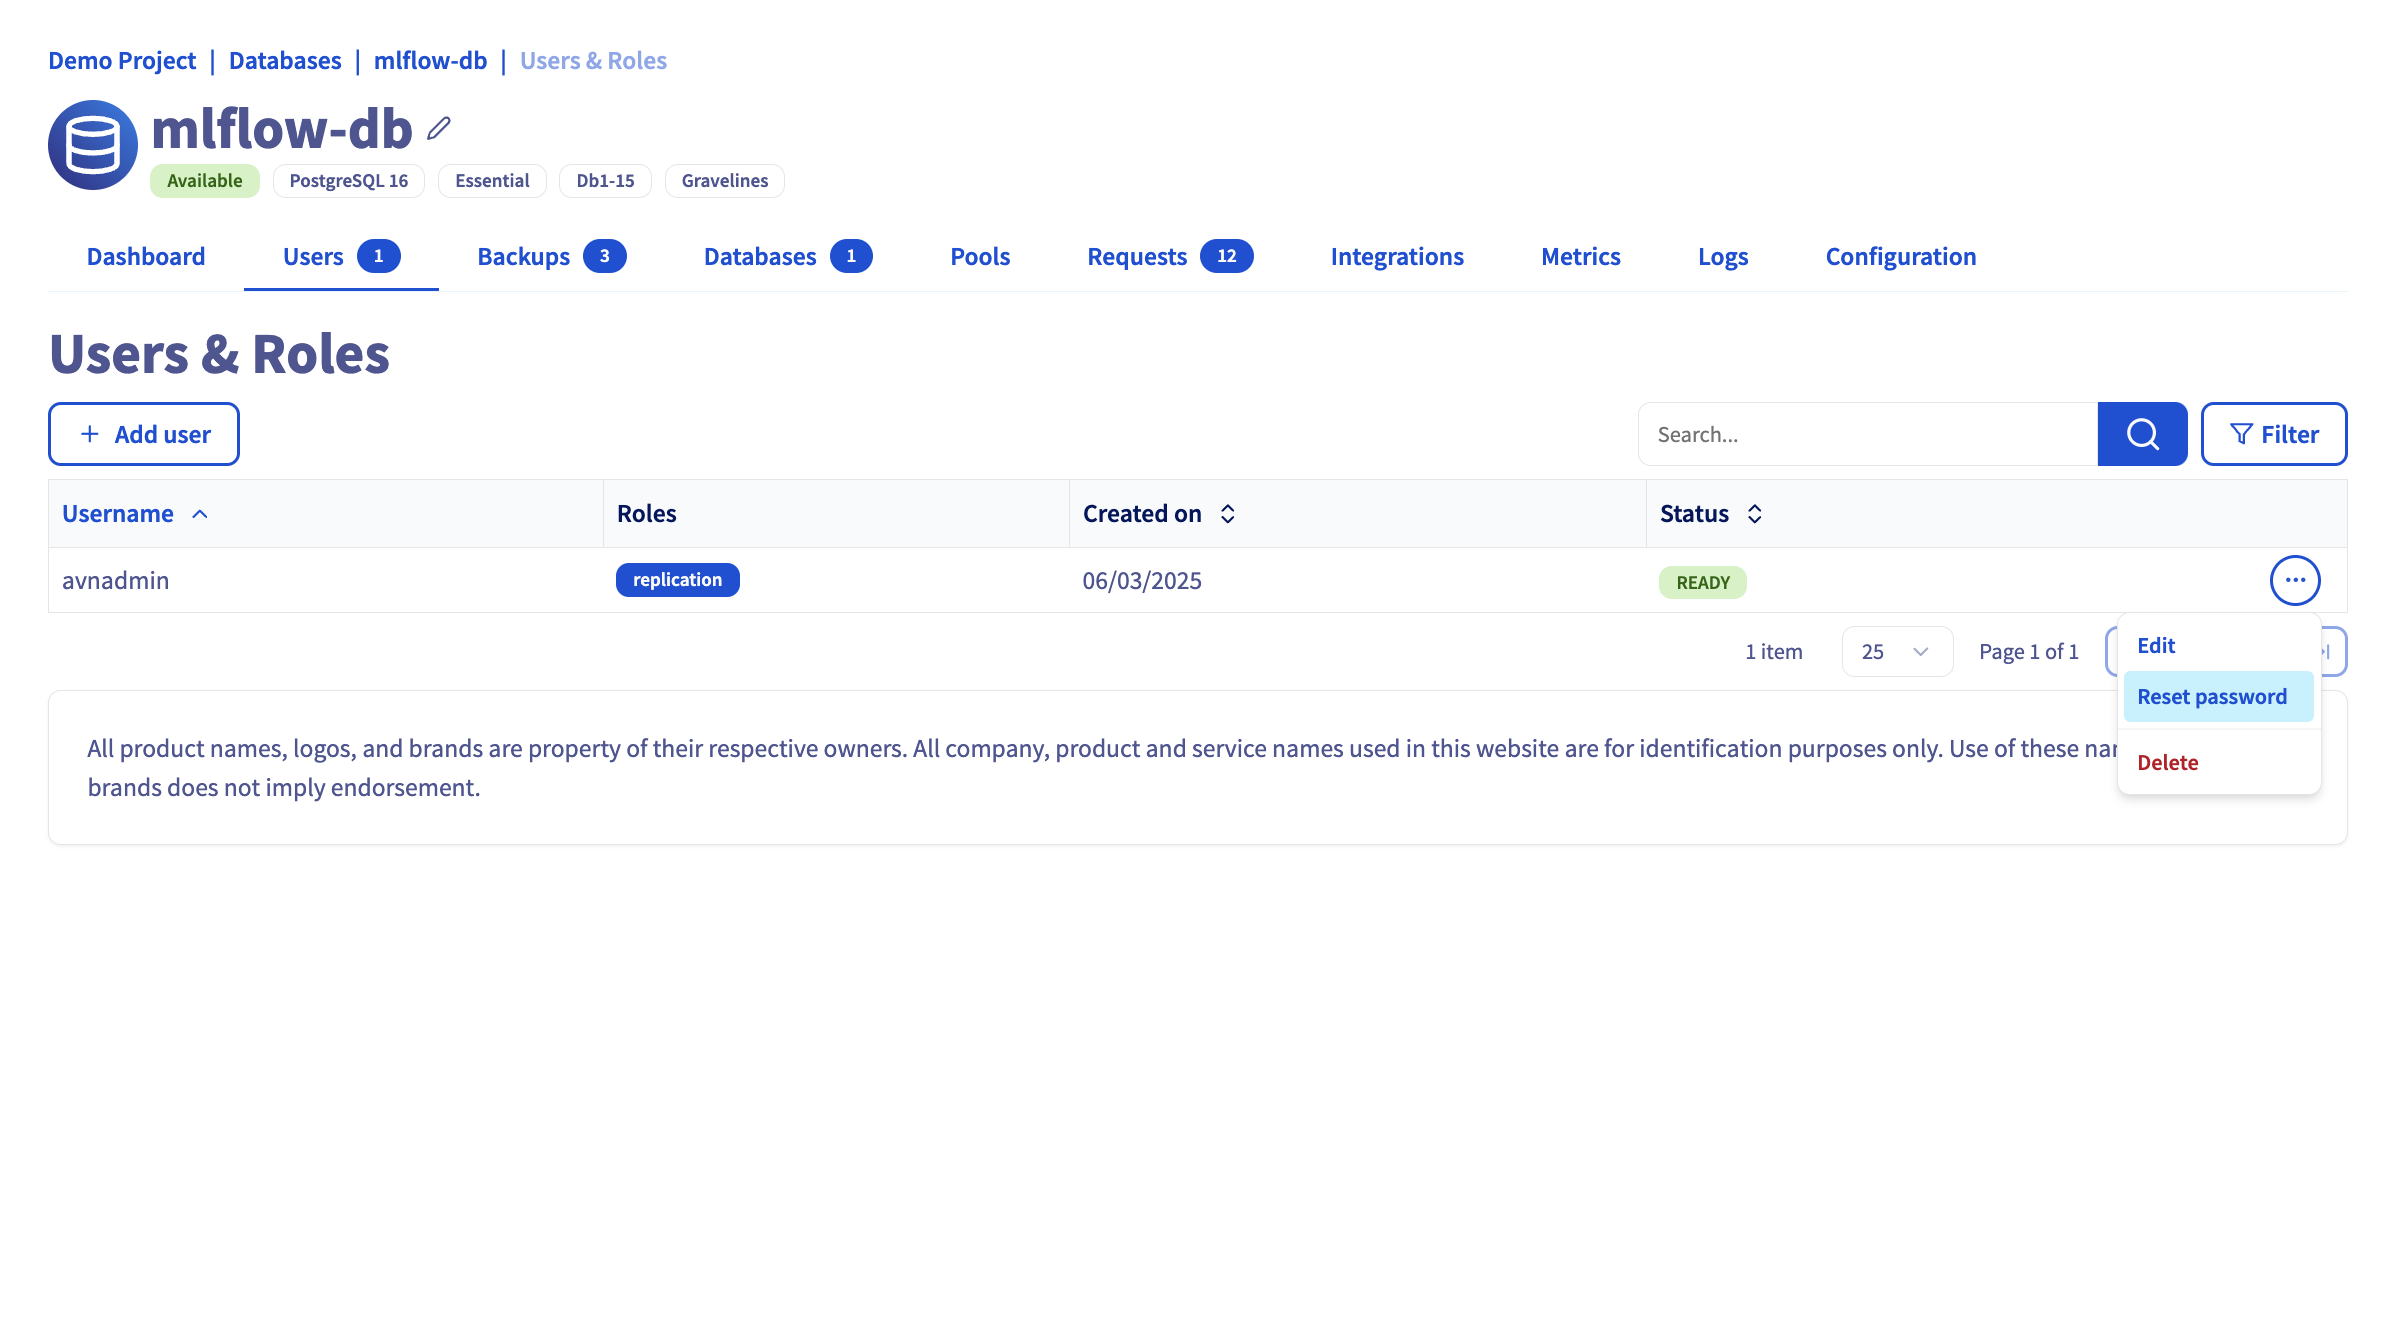
5. Take note of te following parameters
Go to your database dashboard:
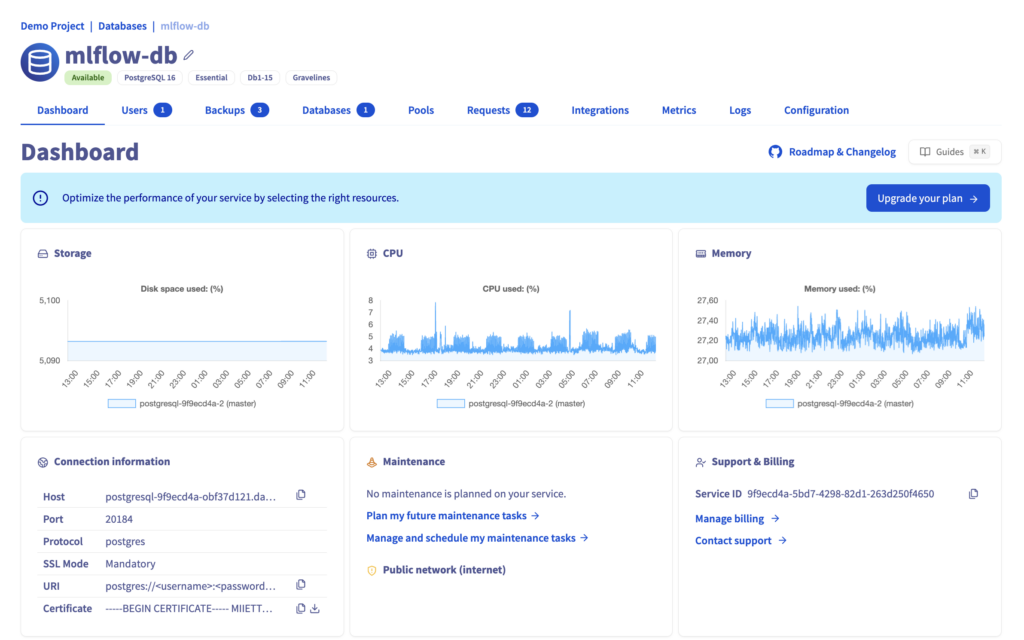
Then, copy the connexion information:
<db_hostname>
<db_username>
<db_password>
<db_name>
<db_port>
<ssl_mode>
Your Backend Store is now ready to use!
Step 4 -Build you custom MLflow Docker image and
1. Develop MLflow launching script
Firstly, you have to write a script in bash to launch the server: mlflow_server.sh
echo "The MLflow server is starting..."

mlflow server \
  --backend-store-uri postgresql://${POSTGRE_USER}:${POSTGRE_PASSWORD}@${PG_HOST}:${PG_PORT}/${PG_DB}?sslmode=${SSL_MODE} \
  --default-artifact-root ${S3_BUCKET_NAME}/ \
  --host 0.0.0.0 \
  --port 5000
2. Create Dockerfile
Install the required Python dependency and give the rights on the /mlruns path to the OVHcloud user.
FROM ghcr.io/mlflow/mlflow:latest

# Install Python dependencies
RUN pip install psycopg2-binary

COPY mlflow_server.sh .

# Change the ownership of `mlruns` directory to the OVHcloud user (42420:42420)
RUN mkdir -p /mlruns
RUN chown -R 42420:42420 /mlruns

# Start MLflow server inside container
CMD ["bash", "mlflow_server.sh"]
3. Build your custom MLflow docker image
Build the docker image using the previous Dockerfile.
docker build . -t mlflow-server-ai-training:latest4. Tag and push the docker image to your registry
Finally, you can push the Docker image to your registry.
docker tag mlflow-server-ai-training:latest <your-registry-address>/mlflow-server-ai-training:latestdocker push <your-registry-address>/mlflow-server-ai-training:latestCongrats! You can now use the Docker image to launch MLflow server.
Step 5 – Start MLflow Tracking Server inside container
You can use AI Training to start MLflow server inside a job.
1. Using ovhai CLI, run the following command inside terminal
ovhai job run --name mlflow-server \
              --default-http-port 5000 \
              --cpu 4 \
              -v mlflow-s3-bucket@DEMO/:/artifacts:RW:cache \
              -e POSTGRE_USER=avnadmin \
              -e POSTGRE_PASSWORD=<db_password> \
              -e S3_ENDPOINT=https://s3.gra.io.cloud.ovh.net/ \
              -e S3_BUCKET_NAME=mlflow-s3-bucket \
              -e PG_HOST=<db_hostname> \
              -e PG_DB=defaultdb \
              -e PG_PORT=20184 \
              -e SSL_MODE=require \
              <your_registry_address>/mlflow-server-ai-training:latest
Full command explained:
ovhai job run
This is the core command to run a job using the OVHcloud AI Training platform.
--name mlflow-server
Sets a custom name for the job. For example, mlflow-server.
--default-http-port 5000
Exposes port 5000 as the default HTTP endpoint. MLflow’s web UI typically runs on port 5000, so this ensures the UI is accessible once the job is running.
--cpu4
Allocates 4 CPUs for the job. You can adjust this based on how heavy your MLflow workload is.
-v mlflow-s3-bucket@DEMO/:/artifacts:RW:cache
This mounts your OVHcloud Object Storage volume into the job’s file system:
– mlflow-s3-bucket@DEMO/: refers to your S3 bucket volume from the OVHcloud Object Storage
– :/artifacts: mounts the volume into the container under /artifacts
– RW: enables Read/Write permissions
– cache: enables volume caching, improving performance for frequent reads/writes
-e POSTGRE_USER=avnadmin-e POSTGRE_PASSWORD=<db_password>-e PG_HOST=<db_hostname>-e PG_DB=defaultdb-e PG_PORT=20184-e SSL_MODE=require
These are environment variables for connecting to the PostgreSQL backend store:
– avnadmin: the default admin user for OVHcloud’s managed PostgreSQL
– POSTGRE_PASSWORD: must be replaced with your actual database password
– PG_HOST: the hostname of your managed PostgreSQL instance
– PG_DB: the name of the database to use (default: defaultdb)
– PG_PORT: the port your PostgreSQL server is listening on
– SSL_MODE: enforce SSL connection to secure DB traffic
-e S3_ENDPOINT=https://s3.gra.io.cloud.ovh.net/
Tells MLflow where the S3-compatible endpoint is hosted. This is specific to OVHcloud’s GRA (Gravelines) region Object Storage.
-e S3_BUCKET_NAME=mlflow-s3-bucket
Sets the name of the S3 bucket where MLflow should store artifacts (models, metrics, etc.).
<your_registry_address>/mlflow-server-ai-training:latest
This is the custom MLflow Docker image you are running inside the job.
2. Check if your AI Training job is RUNNING
Replace the <job_id> by yours.
ovhai job get <job_id>You should obtain:
History:
    DATE                  STATE
    04-04-25 09:58:00     QUEUED
    04-04-25 09:58:01     INITIALIZING
    04-04-25 09:58:07     PENDING
    04-04-25 09:58:10     RUNNING
  Info:
    Message:   Job is running
3. Recover the IP and external IP of your AI Training job
Using, your <job_id>, you can retrieve your AI Training job IP.
ovhai job get <job_id> -o json | jq '.status.ip' -rFor example, you can obtain something like that: 10.42.80.176
You also need the External IP:
ovhai job get <job_id> -o json | jq '.status.externalIp' -rReturning the IP address you will have to whitelist to be able to connect to your database (e.g. 51.210.38.188)
Step 6 – Whitelist AI Training job IP in PostgreSQL DB
From Databases & Analytics > Databases, edit your DB configuration to allow access from the job Extranal IP.

Then, you can see that the job External IP is now white listed.
Well done! Your MLflow server and the backend store are now connected.
Step 7 – Create an AI Notebook
It’s time to train and track your Machine Learning models using MLflow!
To do so, use the OVHcloud ovhai CLI and start a new AI Notebook with GPU.
ovhai notebook run conda jupyterlab \
  --name mlflow-notebook \
  --framework-version conda-py311-cudaDevel11.8 \
  --gpu 1
Full command explained:
ovhai notebookrun
This is the core command to run a notebook using the OVHcloud AI Notebooks platform.
--name mlflow-notebook
Sets a custom name for the notebook. In this case, you can name it mlflow-notebook.
--framework-version conda-py311-cudaDevel11.8
Define the framework and version you want to use in your notebook. Here, you are using Python 3.11 with Conda framework and CUDA compatibility.
--gpu 1
Allocates 1 GPU for the job, by default a Tesla V100S from NVIDIA (ai1-1-gpu). You can select the flavor you want from the OVHcloud GPU range.
Then, check if your AI Notebook is RUNNING.
ovhai notebook get <notebook_id>Once your notebook is in RUNNING status, you should be able to access it using its URL:
State:          RUNNING
Duration:       1411412
Url:            https://<notebook_id>.notebook.gra.ai.cloud.ovh.net
Grpc Address:   <notebook_id>.nb-grpc.gra.ai.cloud.ovh.net:443
Info Url:       https://ui.gra.ai.cloud.ovh.net/notebook/<notebook_id>
You can start your AI model development inside notebook.
Step 8 – Model training inside Jupyter notebook
To begin with, set up your notebook environment.
1. Create the requirements.txt file
numpy==2.2.3
scipy==1.15.2
mlflow==2.20.3
sklearn==1.6.1
2. Install dependencies
From a notebook cell, launch the following command.
!pip3 install -r requirements.txtPerfect! You can start coding…
3. Import Python librairies
Here, you have to import os, mlflow and scikit-learn.
# import dependencies
import os
import mlflow
import sklearn
from sklearn.model_selection import train_test_split
from sklearn.datasets import load_diabetes
from sklearn.ensemble import RandomForestRegressor
In another notebook cell, set the MLflow tracking URI. Note that you have to replace 10.42.80.176 by your own job IP.
mlflow.set_tracking_uri("http://10.42.80.176:5000")Then start training your model!
mlflow.autolog()

db = load_diabetes()
X_train, X_test, y_train, y_test = train_test_split(db.data, db.target)

# Create and train models.
rf = RandomForestRegressor(n_estimators=100, max_depth=6, max_features=3)
rf.fit(X_train, y_train)

# Use the model to make predictions on the test dataset.
predictions = rf.predict(X_test)
Output:
🏃 View run dashing-foal-850 at: http://10.42.80.176:5000/#/experiments/0/runs/e7dad7c073634ec28675c0defce2b9ec 🧪 View experiment at: http://10.42.80.176:5000/#/experiments/0
Congrats! You can now track your model training from MLflow remote server…
Step 9 – Track and compare models from MLflow remote server
Finally, access to MLflow dashboard using the job URL: https://<job_id>.job.gra.ai.cloud.ovh.net

Then, you can check your model trainings and evaluations:
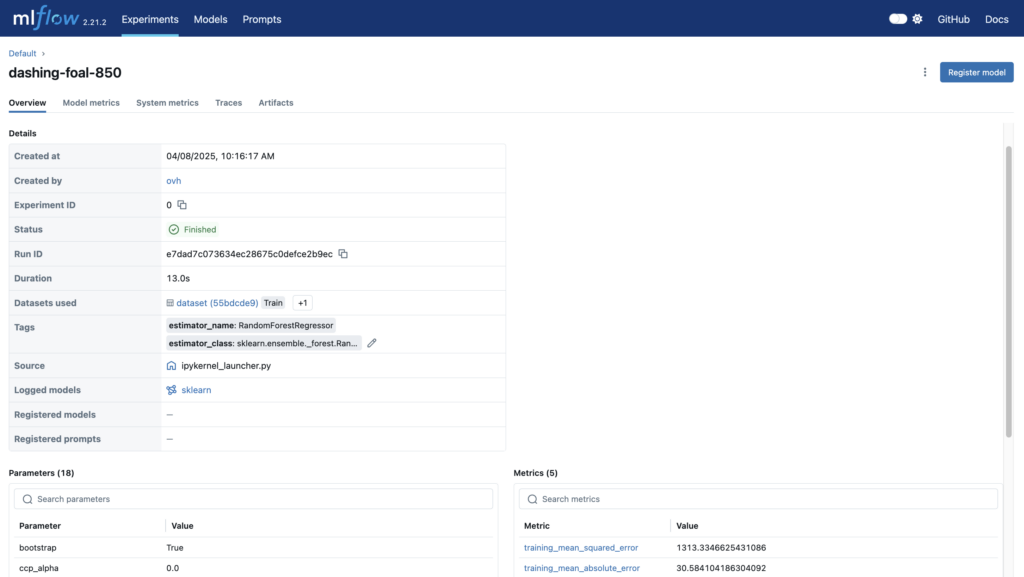
What a success! You can finally use your MLflow to evaluate, compare and archive your various trainings.
Step 10 – Monitor everything remotely
You now have a complete Machine Learning pipeline with remote experiment tracking. Access:
- Metrics, Parameters, and Tags → PostgreSQL
- Artifacts (Models, Files) → S3 bucket
This setup is reusable, automatable, and production-ready!
What’s next?
- Automate deployment with OVHcloud APIs
- Run different training sessions in parallel and compare them with your remote MLflow tracking server
- Use AI Deploy to serve your trained models

Solution Architect @OVHcloud