OVHcloud File Storage y Manila CSI (RWX): almacenamiento compartido en clústeres de Kubernetes (MKS)
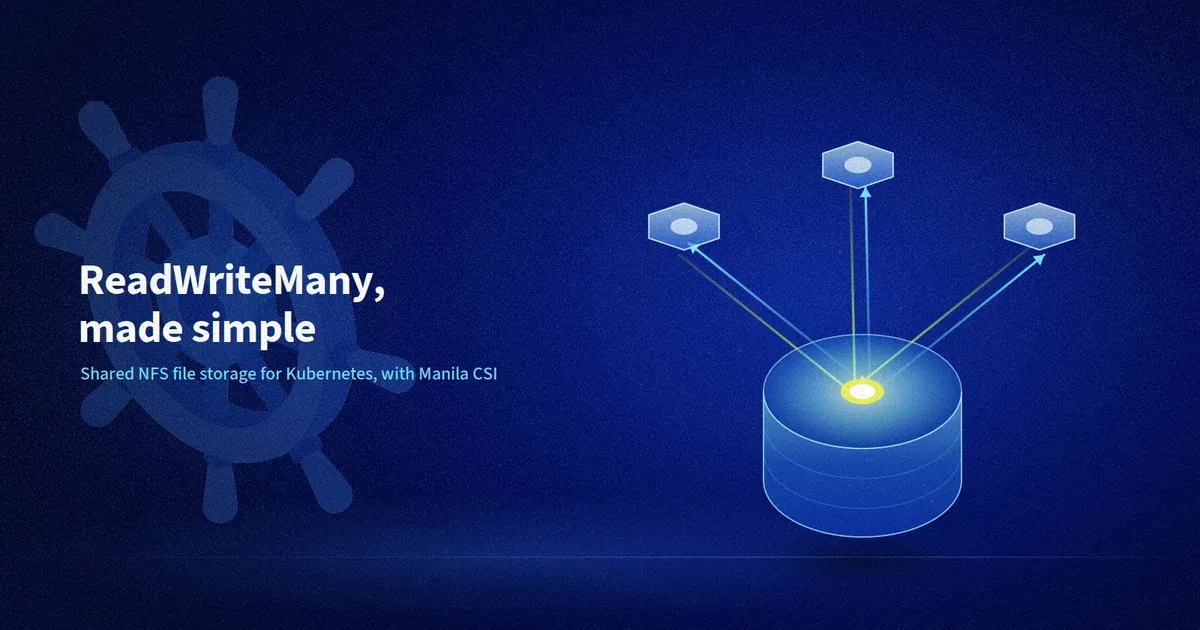
Cuando se ejecutan aplicaciones con estado en Kubernetes, uno de los retos habituales es proporcionar almacenamiento persistente compartido al que puedan acceder varias cargas de trabajo.
Aunque los volúmenes persistentes de Kubernetes suelen depender del almacenamiento en bloque con acceso ReadWriteOnce, algunas aplicaciones requieren acceso al sistema de archivos compartido con capacidades ReadWriteMany (RWX).
OVHcloud File Storage ofrece recursos compartidos NFS gestionados que las cargas de trabajo de Kubernetes pueden consumir de forma dinámica a través del driver Manila CSI.
En este artículo veremos cómo integrar OVHcloud File Storage con OVHcloud Managed Kubernetes Service (MKS) utilizando Manila CSI, con las capacidades de almacenamiento RWX.
OVHcloud File Storage

OVHcloud Public Cloud File Storage es un servicio de almacenamiento de archivos compartido totalmente gestionado, diseñado para cargas de trabajo nativas en la nube que se ejecutan en instancias de Public Cloud y clústeres Kubernetes.
Basado en OpenStack Manila, ofrece volúmenes NFSv3 compartidos que varios clientes pueden montar simultáneamente, lo que lo convierte en una solución ideal para aplicaciones que requieren acceso ReadWriteMany (RWX) . Los volúmenes se pueden aprovisionar desde 150 GiB hasta 10 TiB, con un rendimiento predecible y lineal que se escala con la capacidad asignada.
Al tratarse de un servicio totalmente gestionado, no tienes que desplegar ni mantener tu propio servidor NFS. File Storage se integra con la plataforma de OVHcloud a través del área de cliente, la API, la CLI y el proveedor de Terraform, y con Kubernetes mediante el driver Manila CSI, lo que permite aprovisionar volúmenes compartidos de forma dinámica directamente desde el clúster.
¿Por qué utilizar Manila CSI?
La interfaz de almacenamiento de contenedores (Container Storage Interface, CSI) de Kubernetes proporciona un mecanismo estándar para exponer sistemas de almacenamiento externos a Kubernetes.
En lugar de crear manualmente montajes NFS y PersistentVolumes, el driver Manila CSI permite a Kubernetes crear y gestionar recursos compartidos de forma dinámica mediante objetos propios de Kubernetes, como StorageClasses (SC), PersistentVolumeClaims (PVC) y PersistentVolumes (PV).
Requisitos
Antes de empezar, necesitas:
- un proyecto de OVHcloud Public Cloud;
- un clúster Managed Kubernetes Service (MKS) de OVHcloud conectado a una red privada;
- Terraform CLI instalado;
- kubectl CLI instalado.
Cómo desplegar Manila CSI paso a paso: ¡vamos allá!
Ya tenemos un clúster MKS en la región EU-WEST-PAR, desplegado en una red privada y una subred. En esta entrada del blog vamos a:
- crear un usuario Public Cloud para el driver Manila CSI;
- instalar el driver CSI NFS;
- instalar el driver de Manila CSI;
- desplegar un Secret para Manila CSI que permita al driver autenticarse en OpenStack y gestionar los recursos de Manila en tu clúster;
- crear una red compartida de archivos;
- desplegar un ConfigMap para configurar el driver Manila CSI;
- desplegar la StorageClass csi-manila-nfs para que el driver Manila CSI pueda crear recursos compartidos de Manila de forma dinámica y usarlos como volúmenes de Kubernetes.
Utilizaremos Terraform para desplegar esta arquitectura fácilmente.
Crea un archivo provider.tf y añade la siguiente información:
terraform {
  required_providers {
    helm = {
      source = "hashicorp/helm"
    }

    kubectl = {
      source = "alekc/kubectl"
      version = "2.1.6"
    }

    ovh = {
      source = "ovh/ovh"
    }
  }
}

provider "helm" {
  kubernetes = {
    host                   = data.ovh_cloud_project_kube.mks_cluster.kubeconfig_attributes[0].host
    client_certificate     = base64decode(data.ovh_cloud_project_kube.mks_cluster.kubeconfig_attributes[0].client_certificate)
    client_key             = base64decode(data.ovh_cloud_project_kube.mks_cluster.kubeconfig_attributes[0].client_key)
    cluster_ca_certificate = base64decode(data.ovh_cloud_project_kube.mks_cluster.kubeconfig_attributes[0].cluster_ca_certificate)
  }
}

provider "kubectl" {
  host                   = data.ovh_cloud_project_kube.mks_cluster.kubeconfig_attributes[0].host
  client_certificate     = base64decode(data.ovh_cloud_project_kube.mks_cluster.kubeconfig_attributes[0].client_certificate)
  client_key             = base64decode(data.ovh_cloud_project_kube.mks_cluster.kubeconfig_attributes[0].client_key)
  cluster_ca_certificate = base64decode(data.ovh_cloud_project_kube.mks_cluster.kubeconfig_attributes[0].cluster_ca_certificate)
  load_config_file       = false
}
Configura las variables de entorno, para el OVHcloud Terraform provider, con tus credenciales:
# OVHcloud provider needed keys
export OVH_ENDPOINT="ovh-eu"
export OVH_APPLICATION_KEY="xxx"
export OVH_APPLICATION_SECRET="xxx"
export OVH_CONSUMER_KEY="xxx"
export OVH_CLOUD_PROJECT_SERVICE="xxx"
Crea un archivo variables.tf.template y añade la siguiente información:
variable "service_name" {
  default = "$OVH_CLOUD_PROJECT_SERVICE"
}

variable "mks_cluster_id" {
  default = "<your_mks_cluster_id>"
}
⚠️ En el archivo, sustituye el ID de MKS con la información de tu ID de clúster de MKS existente.
Reemplaza el valor de la variable del entorno OVH_CLOUD_PROJECT_SERVICE en el archivo variables.tf:
envsubst < variables.tf.template > variables.tfCrea un archivo nfs_share.tf y añade la siguiente información:
data "ovh_cloud_project_kube" "mks_cluster" {
  service_name = var.service_name
  kube_id      = var.mks_cluster_id
}

data "ovh_cloud_network_private_vrack_subnet" "mks_cluster_subnet" {
  service_name = var.service_name
  network_id   = data.ovh_cloud_project_kube.mks_cluster.private_network_id
  id           = data.ovh_cloud_project_kube.mks_cluster.nodes_subnet_id
}

# CSI Manila

module "csi_manila" {
  source = "git::https://github.com/ovh/public-cloud-examples.git//containers-orchestration/managed-kubernetes/install-csi-manila/modules/ovhcloud/csi_manila?ref=v1.5.0"

  service_name       = var.service_name
  region             = data.ovh_cloud_project_kube.mks_cluster.region
  share_network_name = "${data.ovh_cloud_project_kube.mks_cluster.name}-share-network"
  network_id         = data.ovh_cloud_project_kube.mks_cluster.private_network_id
  subnet_id          = data.ovh_cloud_project_kube.mks_cluster.nodes_subnet_id
  subnet_cidr        = data.ovh_cloud_network_private_vrack_subnet.mks_cluster_subnet.cidr
}

output "manila-user" {
  value = module.csi_manila.manila-user
}
💡En este archivo Terraform estamos utilizando un módulo Terraform csi_manila existente alojado en el repositorio OVHcloud Public Cloud Examples GitHub.
La configuración de Terraform ya está lista. Ahora podemos iniciar el entorno de trabajo:
terraform initEl output debería ser:
$ terraform init

Initializing the backend...
Initializing modules...
Downloading git::https://github.com/ovh/public-cloud-examples.git?ref=v1.5.0 for csi_manila...
- csi_manila in .terraform/modules/csi_manila/containers-orchestration/managed-kubernetes/install-csi-manila/modules/ovhcloud/csi_manila
Initializing provider plugins...
- Reusing previous version of hashicorp/helm from the dependency lock file
- Reusing previous version of alekc/kubectl from the dependency lock file
- Reusing previous version of ovh/ovh from the dependency lock file
- Installing hashicorp/helm v3.2.0...
- Installed hashicorp/helm v3.2.0 (signed by HashiCorp)
- Installing alekc/kubectl v2.1.6...
- Installed alekc/kubectl v2.1.6 (self-signed, key ID 772FB27A86DAFCE7)
- Installing ovh/ovh v2.16.1...
- Installed ovh/ovh v2.16.1 (signed by a HashiCorp partner, key ID F56D1A6CBDAAADA5)
Partner and community providers are signed by their developers.
If you'd like to know more about provider signing, you can read about it here:
https://developer.hashicorp.com/terraform/cli/plugins/signing

Terraform has been successfully initialized!

You may now begin working with Terraform. Try running "terraform plan" to see
any changes that are required for your infrastructure. All Terraform commands
should now work.

If you ever set or change modules or backend configuration for Terraform,
rerun this command to reinitialize your working directory. If you forget, other
commands will detect it and remind you to do so if necessary.
Aplícalo:
terraform applyEl output debería ser:
$ terraform apply

data.ovh_cloud_project_kube.mks_cluster: Reading...
data.ovh_cloud_project_kube.mks_cluster: Read complete after 1s [id=xxxxxxxx-xxxx-xxxx-xxxx-xxxxxxxxxx]
data.ovh_cloud_network_private_vrack_subnet.mks_cluster_subnet: Reading...
data.ovh_cloud_network_private_vrack_subnet.mks_cluster_subnet: Read complete after 1s [id=xxxxxxxx-xxxx-xxxx-xxxx-xxxxxxxxxx]

Terraform used the selected providers to generate the following execution plan. Resource actions are indicated with the following symbols:
  + create

Terraform will perform the following actions:

  # module.csi_manila.helm_release.csi-driver-nfs will be created
  + resource "helm_release" "csi-driver-nfs" {
      + atomic                     = false
      + chart                      = "csi-driver-nfs"
      + cleanup_on_fail            = false
      + create_namespace           = false
      + dependency_update          = false
      + disable_crd_hooks          = false
      + disable_openapi_validation = false
      + disable_webhooks           = false
      + force_update               = false
      + id                         = (known after apply)
      + lint                       = false
      + max_history                = 0
      + metadata                   = (known after apply)
      + name                       = "csi-driver-nfs"
      + namespace                  = "kube-system"
      + pass_credentials           = false
      + recreate_pods              = false
      + render_subchart_notes      = true
      + replace                    = false
      + repository                 = "https://raw.githubusercontent.com/kubernetes-csi/csi-driver-nfs/master/charts"
      + reset_values               = false
      + reuse_values               = false
      + set_wo                     = (write-only attribute)
      + skip_crds                  = false
      + status                     = "deployed"
      + take_ownership             = false
      + timeout                    = 300
      + upgrade_install            = false
      + verify                     = false
      + version                    = "4.13.4"
      + wait                       = true
      + wait_for_jobs              = false
    }

  # module.csi_manila.helm_release.openstack-manila-csi will be created
  + resource "helm_release" "openstack-manila-csi" {
      + atomic                     = false
      + chart                      = "openstack-manila-csi"
      + cleanup_on_fail            = false
      + create_namespace           = false
      + dependency_update          = false
      + disable_crd_hooks          = false
      + disable_openapi_validation = false
      + disable_webhooks           = false
      + force_update               = false
      + id                         = (known after apply)
      + lint                       = false
      + max_history                = 0
      + metadata                   = (known after apply)
      + name                       = "openstack-manila-csi"
      + namespace                  = "kube-system"
      + pass_credentials           = false
      + recreate_pods              = false
      + render_subchart_notes      = true
      + replace                    = false
      + repository                 = "https://kubernetes.github.io/cloud-provider-openstack"
      + reset_values               = false
      + reuse_values               = false
      + set_wo                     = (write-only attribute)
      + skip_crds                  = false
      + status                     = "deployed"
      + take_ownership             = false
      + timeout                    = 300
      + upgrade_install            = false
      + verify                     = false
      + version                    = "2.36.0"
      + wait                       = true
      + wait_for_jobs              = false
    }

  # module.csi_manila.kubectl_manifest.csi-manila-secrets will be created
  + resource "kubectl_manifest" "csi-manila-secrets" {
      + api_version             = (known after apply)
      + apply_only              = false
      + field_manager           = "kubectl"
      + force_conflicts         = false
      + force_new               = false
      + id                      = (known after apply)
      + kind                    = (known after apply)
      + live_manifest_incluster = (sensitive value)
      + live_uid                = (known after apply)
      + name                    = (known after apply)
      + namespace               = (known after apply)
      + server_side_apply       = false
      + uid                     = (known after apply)
      + validate_schema         = true
      + wait_for_rollout        = true
      + yaml_body               = (sensitive value)
      + yaml_body_parsed        = (known after apply)
      + yaml_incluster          = (sensitive value)
    }

  # module.csi_manila.kubectl_manifest.manila-runtime-configmap will be created
  + resource "kubectl_manifest" "manila-runtime-configmap" {
      + api_version             = "v1"
      + apply_only              = false
      + field_manager           = "kubectl"
      + force_conflicts         = false
      + force_new               = false
      + id                      = (known after apply)
      + kind                    = "ConfigMap"
      + live_manifest_incluster = (sensitive value)
      + live_uid                = (known after apply)
      + name                    = "manila-csi-runtimeconf-cm"
      + namespace               = "default"
      + server_side_apply       = false
      + uid                     = (known after apply)
      + validate_schema         = true
      + wait_for_rollout        = true
      + yaml_body               = (sensitive value)
      + yaml_body_parsed        = <<-EOT
            apiVersion: v1
            data:
              runtimeconfig.json: |
                {
                  "nfs": {
                    "matchExportLocationAddress": "10.1.0.0/16"
                  }
                }
            kind: ConfigMap
            metadata:
              annotations:
                meta.helm.sh/release-name: manila-csi
                meta.helm.sh/release-namespace: default
              labels:
                app.kubernetes.io/managed-by: Helm
              name: manila-csi-runtimeconf-cm
              namespace: default
        EOT
      + yaml_incluster          = (sensitive value)
    }

  # module.csi_manila.kubectl_manifest.storage-class will be created
  + resource "kubectl_manifest" "storage-class" {
      + api_version             = (known after apply)
      + apply_only              = false
      + field_manager           = "kubectl"
      + force_conflicts         = false
      + force_new               = false
      + id                      = (known after apply)
      + kind                    = (known after apply)
      + live_manifest_incluster = (sensitive value)
      + live_uid                = (known after apply)
      + name                    = (known after apply)
      + namespace               = (known after apply)
      + server_side_apply       = false
      + uid                     = (known after apply)
      + validate_schema         = true
      + wait_for_rollout        = true
      + yaml_body               = (sensitive value)
      + yaml_body_parsed        = (known after apply)
      + yaml_incluster          = (sensitive value)
    }

  # module.csi_manila.ovh_cloud_project_user.manila-user will be created
  + resource "ovh_cloud_project_user" "manila-user" {
      + creation_date = (known after apply)
      + description   = "User for the Manila CSI driver"
      + id            = (known after apply)
      + openstack_rc  = (known after apply)
      + password      = (sensitive value)
      + role_name     = "share_operator"
      + roles         = (known after apply)
      + service_name  = "xxxxxxxxxxxxxxxxxxxxx"
      + status        = (known after apply)
      + username      = (known after apply)
    }

  # module.csi_manila.ovh_cloud_storage_file_share_network.sharenetwork will be created
  + resource "ovh_cloud_storage_file_share_network" "sharenetwork" {
      + checksum        = (known after apply)
      + created_at      = (known after apply)
      + current_state   = (known after apply)
      + description     = (known after apply)
      + id              = (known after apply)
      + name            = "mks_standard_3az-share-network"
      + network_id      = "xxxxxxxx-xxxx-xxxx-xxxx-xxxxxxxxxx"
      + region          = "EU-WEST-PAR"
      + resource_status = (known after apply)
      + service_name    = "xxxxxxxxxxxxxxxxxxxxx"
      + subnet_id       = "xxxxxxxx-xxxx-xxxx-xxxx-xxxxxxxxxx"
      + updated_at      = (known after apply)
    }

Plan: 7 to add, 0 to change, 0 to destroy.

Changes to Outputs:
  + manila-user = (known after apply)

Do you want to perform these actions?
  Terraform will perform the actions described above.
  Only 'yes' will be accepted to approve.

  Enter a value: yes

module.csi_manila.ovh_cloud_storage_file_share_network.sharenetwork: Creating...
module.csi_manila.ovh_cloud_project_user.manila-user: Creating...
module.csi_manila.kubectl_manifest.manila-runtime-configmap: Creating...
module.csi_manila.kubectl_manifest.manila-runtime-configmap: Creation complete after 0s [id=/api/v1/namespaces/default/configmaps/manila-csi-runtimeconf-cm]
module.csi_manila.helm_release.csi-driver-nfs: Creating...
module.csi_manila.ovh_cloud_storage_file_share_network.sharenetwork: Still creating... [00m10s elapsed]
module.csi_manila.ovh_cloud_project_user.manila-user: Still creating... [00m10s elapsed]
module.csi_manila.ovh_cloud_storage_file_share_network.sharenetwork: Creation complete after 12s [id=xxxxxxxx-xxxx-xxxx-xxxx-xxxxxxxxxx]
module.csi_manila.kubectl_manifest.storage-class: Creating...
module.csi_manila.ovh_cloud_project_user.manila-user: Creation complete after 13s [id=718526]
module.csi_manila.kubectl_manifest.csi-manila-secrets: Creating...
module.csi_manila.kubectl_manifest.csi-manila-secrets: Creation complete after 1s [id=/api/v1/namespaces/default/secrets/csi-manila-secrets]
...
Creación dinámica de File Storage en Kubernetes
Ahora, en tu clúster de Kubernetes, crea un archivo pvc.yaml con el siguiente contenido:
apiVersion: v1
kind: PersistentVolumeClaim
metadata:
  name: nfs-share-fs-pvc
spec:
  accessModes:
    - ReadWriteMany
  resources:
    requests:
      storage: 150Gi
  storageClassName: csi-manila-nfs
Aplica este PersistentVolumeClaim (PVC), que permite a los usuarios de Kubernetes solicitar almacenamiento compartido:
kubectl apply -f pvc.yamlComprobar el estado del PVC:
kubectl get pvc nfs-share-fs-pvcEspera hasta que el estado del PVC cambie a Bound.
El resultado debería ser similar al siguiente:
$ kubectl get pvc nfs-share-fs-pvc

NAME               STATUS   VOLUME                                     CAPACITY   ACCESS MODES   STORAGECLASS     VOLUMEATTRIBUTESCLASS   AGE
nfs-share-fs-pvc   Bound    pvc-af1349b7-eb51-43ac-b0f0-94d0e8139c57   150Gi      RWX            csi-manila-nfs   <unset>                 3h48m
Crea un archivo deploy.yaml y añade este contenido:
apiVersion: apps/v1
kind: Deployment
metadata:
  name: nginx-deployment
  labels:
    app: nginx
spec:
  replicas: 1
  selector:
    matchLabels:
      app: nginx
  template:
    metadata:
      labels:
        app: nginx
    spec:
      volumes:
      - name: nfs-share-fs-pvc
        persistentVolumeClaim:
          claimName: nfs-share-fs-pvc
      containers:
      - name: nginx
        image: nginx
        ports:
          - containerPort: 80
            name: "http-server"
        volumeMounts:
          - mountPath: "/usr/share/nginx/html"
            name: nfs-share-fs-pvc
Aplica este despliegue que crea un pod con un volumen asociado al PVC nfs-share-fs-pvc:
kubectl apply -f deploy.yamlComprueba que el pod está en ejecución:
kubectl get podEl resultado debería ser similar al siguiente:
$ kubectl get pod
NAME                                READY   STATUS    RESTARTS   AGE
nginx-deployment-6cbf9b898c-svpzf   1/1     Running   0          6m
Comprueba que puede escalar el despliegue (volumen multi-attach):
kubectl scale deploy/nginx-deployment --replicas=2Comprueba si hay otro pod en ejecución:
kubectl get podEl resultado debería ser similar al siguiente:
$ kubectl get pod

NAME                                READY   STATUS    RESTARTS   AGE
nginx-deployment-6cbf9b898c-867bq   1/1     Running   0          3m
nginx-deployment-6cbf9b898c-svpzf   1/1     Running   0          9m
Para verificar la funcionalidad de RWX, conéctate a un pod y crea un archivo en el directorio montado (por ejemplo, /usr/share/nginx/html).
MY_POD=$(kubectl get po -o name | sed -n '1p')
echo $MY_POD

#Create a file in the pod number 1
kubectl exec $MY_POD -it -- touch /usr/share/nginx/html/index.html
A continuación, conéctate al segundo pod y confirma que el archivo es visible:
MY_POD_2=$(kubectl get po -o name | sed -n '2p')
echo $MY_POD_2

#Display it in the pod number two
kubectl exec $MY_POD_2 -it -- ls -alrt /usr/share/nginx/html/
El resultado debería ser similar al siguiente:
$ kubectl exec $MY_POD_2 -it -- ls -alrt /usr/share/nginx/html/

total 24
drwxr-xr-x 3 root root  4096 Jul 14 01:22 ..
drwx------ 2 root root 16384 Jul 15 09:18 lost+found
drwxrwxrwx 3 root root  4096 Jul 15 09:32 .
-rw-r--r-- 1 root root     0 Jul 15 13:09 index.html
¡Enhorabuena! Ya tienes tu recurso compartido de Manila funcionando a través de NFS. 🎉
Conclusiones
Como hemos visto en este artículo, combinar Manila CSI con OVHcloud File Storage permite proporcionar a las aplicaciones de Kubernetes almacenamiento compartido con aprovisionamiento dinámico.
Te recomendamos que eches un vistazo a nuestro Cloud Roadmap & Changelog para conocer todas las próximas novedades de las soluciones Public Cloud de OVHcloud.