

Introduction
Ethereum is quickly becoming known as one of the most efficient and flexible blockchain networks in the world, enabling financial organisations and individuals alike to create smart contracts that can power the likes of decentralised finance (DeFi) applications and NFT ecosystems. Ethereum is one of the foundations of Web3, providing a decentralised, scalable and secure network where builders can create the digital economy of the future.
But how do you get started? In this tutorial, we provide a guide to deploying and operating an Ethereum node on an OVHcloud public server. By the end of this guide, you will have a fully functional Ethereum node running on OVHcloud, following best practices for reliability and maintainability.
The security hardening and operational best practices required to fully protect an Ethereum node are beyond the scope of this tutorial. Users are strongly advised to implement additional security measures — such as firewall configuration, key management, and monitoring — according to their organizational requirements and industry best practices.
All set? Let’s get started.
Launching an instance
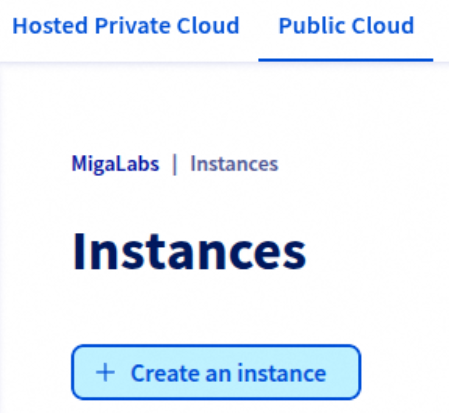
Navigate to the OVHcloud Control Panel, and under the Public Cloud section, select Instances. From there, click on Create an Instance to begin the provisioning process.
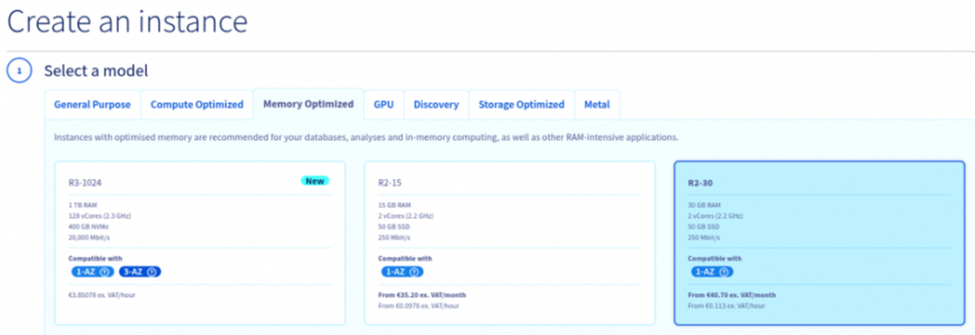
To run an Ethereum node reliably, the hardware specifications must meet the client software’s minimum requirements. According to the Ethereum Foundation documentation, an Ethereum node requires at least:
● Execution client: 2 CPU cores, 16 GB of RAM, and 1 TB of fast SSD storage.
● Consensus client: 2 CPU cores, 8 GB of RAM, and access to the same storage.
For production environments and long-term stability, higher specifications are strongly recommended. In this tutorial, we will provision an instance with 2 vCores and 30 GB of RAM, which satisfies the minimum combined requirements for running both the execution and consensus clients on a single machine.
Within the Memory Optimized category, locate the instance type named R2-30 and select it for deployment.
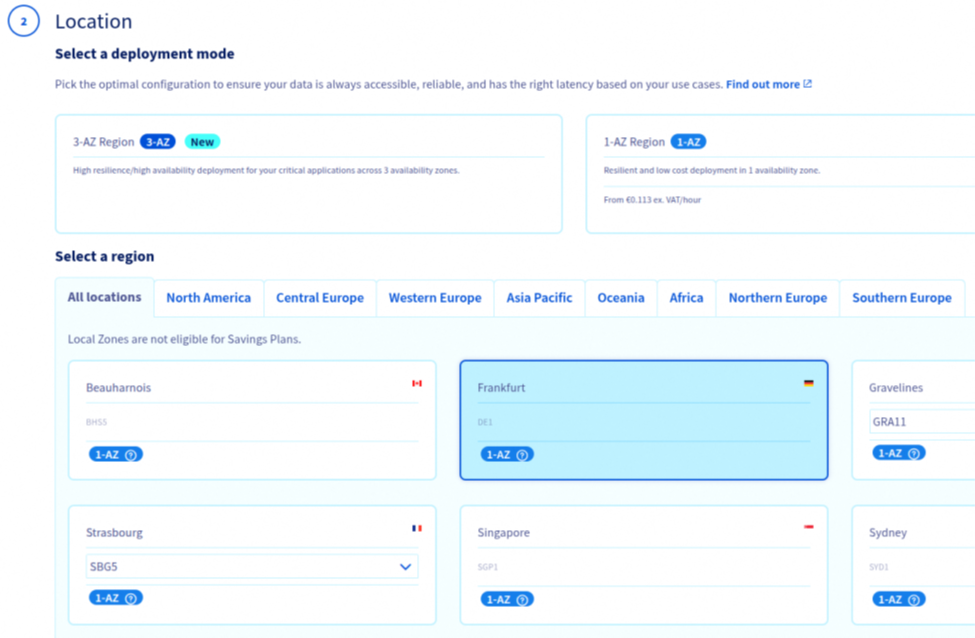
Next, select the geographic location for your instance. The choice of region may affect latency, network performance, and regulatory considerations. For the purposes of this tutorial, we will deploy the node in the Frankfurt data center, which provides low-latency connectivity within Europe and is well-suited for Ethereum node operations.
It is worth noting that maintaining nodes in different geographic regions contributes to the overall resilience and decentralization of the Ethereum network. Geographical diversity helps reduce the risk of localized outages and improves redundancy across the infrastructure.
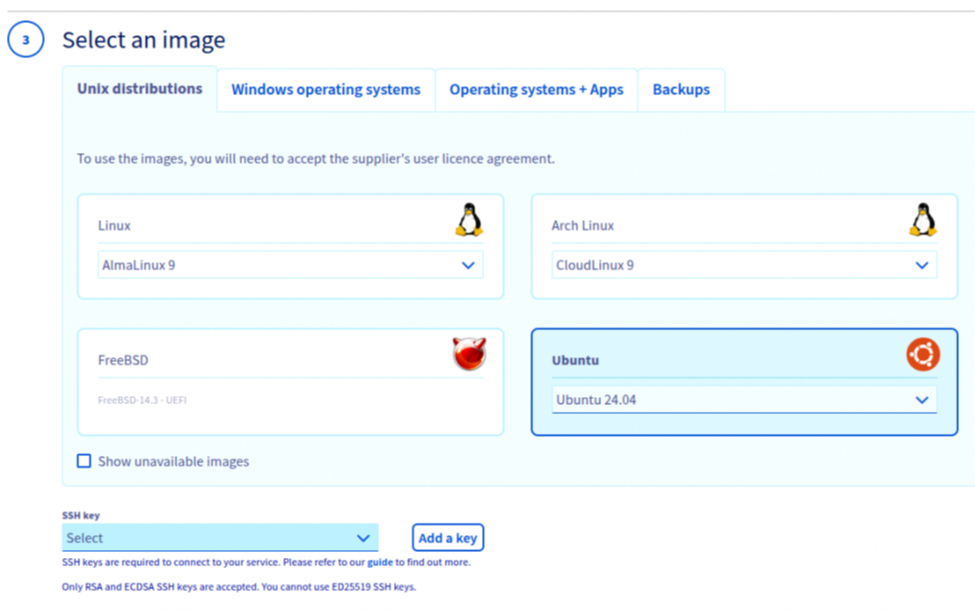
Now, select the operating system image for your instance. For this tutorial, we will use Ubuntu 24.04 LTS.
Next, select the public SSH key that will be associated with your instance. This key will be installed on the server during provisioning and will serve as the primary authentication method for secure remote access. After the instance is launched, you will be able to connect to it via SSH using the corresponding private key. This approach eliminates the need for password-based logins and significantly enhances security by enforcing key-based authentication.
Assign a descriptive name to your instance (e.g., eth-node-fra-01) following your organization’s naming convention. If your workflow uses tags or labels, add ones that identify the role (execution/consensus), environment (prod/stage), and region (FRA). OVHcloud also allows attaching a post-installation script (cloud-init user data) to automate provisioning; however, this tutorial proceeds step-by-step, so leave that field empty.
For the purposes of this tutorial, we will simply assign the instance the name OVHnode.
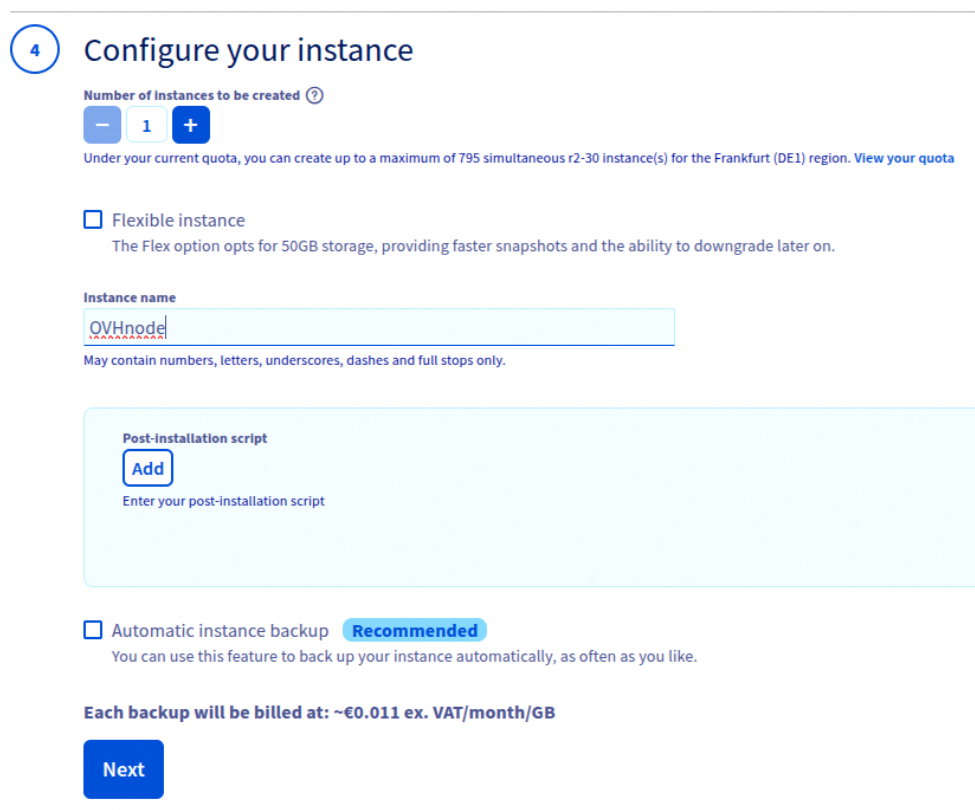
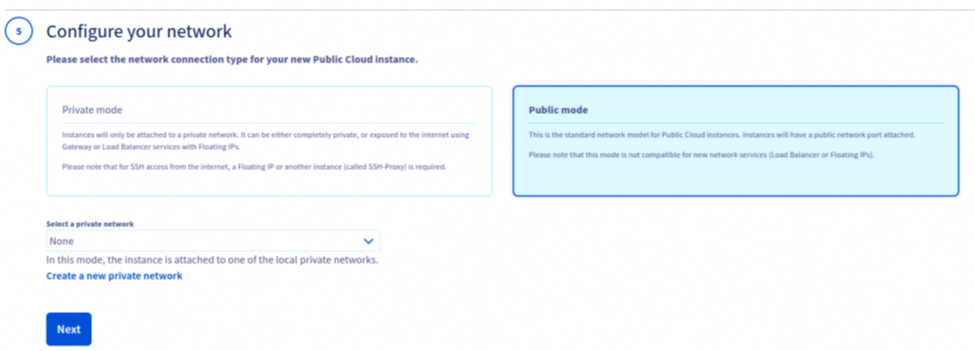
Configure the network access by selecting Public mode, which will assign the instance a public IP address and enable external connectivity. This setting is required for the node to participate in the Ethereum network. Next, choose your preferred billing method.
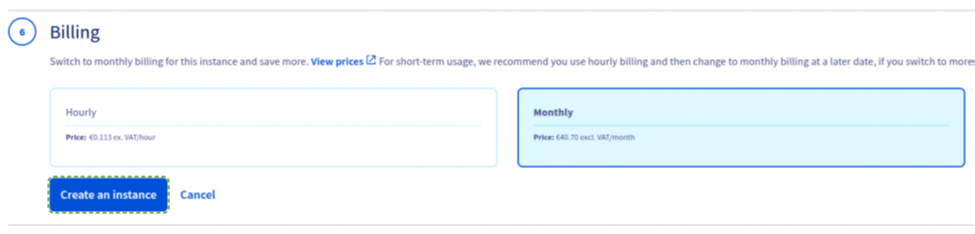
Finally, click on Create an Instance to launch the deployment process. OVHcloud will provision the server with the selected configuration, and within a few minutes, the instance will be available and running. At this point, your Ethereum node host environment is ready for initial access and further configuration.

Adding Storage
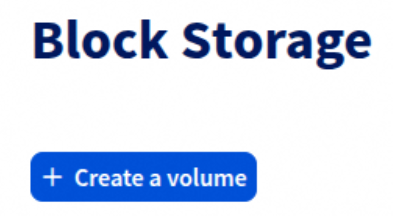
The next step is to provision persistent storage for the Ethereum blockchain data. In the OVHcloud Control Panel, navigate to the Block Storage section from the side menu, and click on Create a Volume. This volume will serve as the primary data store for the Ethereum chain, ensuring durability and scalability independent of the compute instance.
When creating the storage volume, ensure that you select the same region as your compute instance. This is essential to guarantee low-latency access and to allow the volume to be attached directly to your node without cross-region performance penalties.

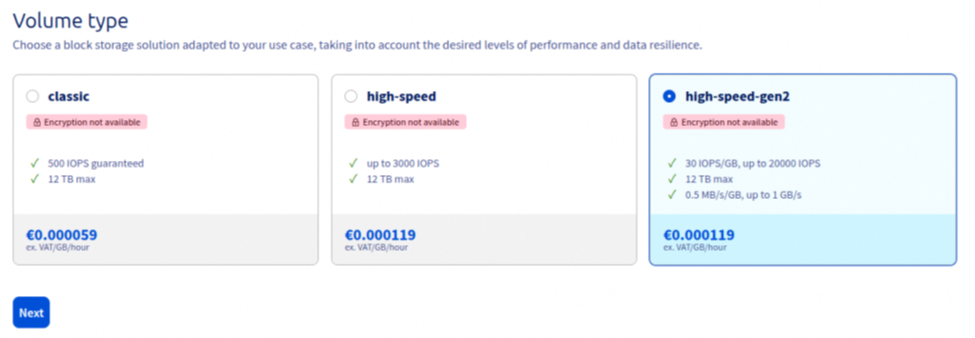
OVHcloud provides three categories of block storage volumes:
- Classic HDD – 500 IOPS guaranteed.
- High-Speed SSD – up to 3,000 IOPS.
- High-Speed Gen2 – up to 20,000 IOPS.
Running an Ethereum node requires high-performance storage due to the constant read and write operations needed to synchronize the blockchain and access block and state data. For this reason, we strongly recommend selecting a High-Speed Gen2 volume, which delivers the necessary throughput and input/output operations per second (IOPS) to ensure stable node performance.
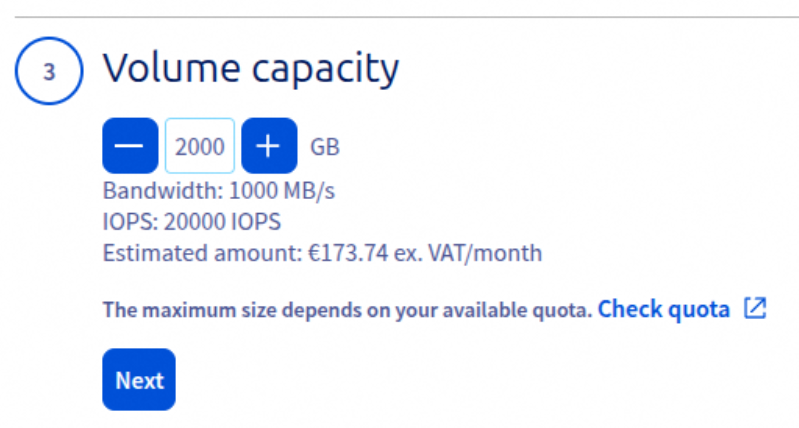
Both the Ethereum Execution Layer (EL) client and the Consensus Layer (CL) client require significant disk capacity to store blockchain data, state, and historical records. A minimum of 2 TB of storage is recommended to operate a full mainnet node reliably. When creating the block storage volume in OVHcloud, set the capacity to 2 TB and select the High-Speed Gen2 option to ensure sufficient performance for synchronization and long-term operation.
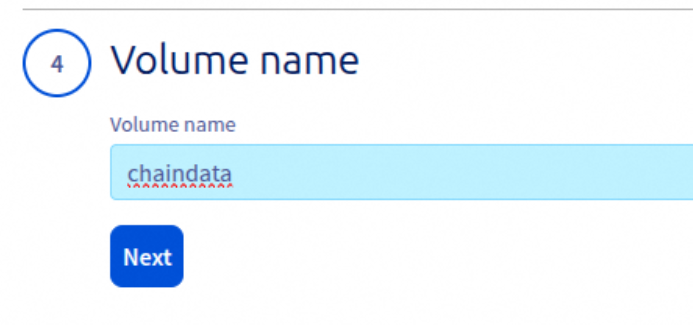
Assign a descriptive name to the storage volume to simplify management and identification. For example, you may name it chaindata to clearly indicate its role as the primary data store for the node.
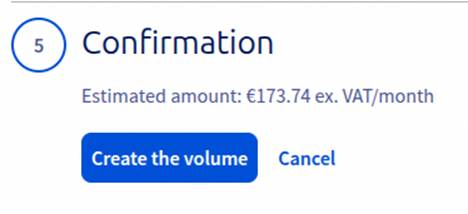
Once all parameters have been configured — including the region, storage type, capacity, and name — click on Create Volume. OVHcloud will provision the block storage resource, which will then be available to attach to your Ethereum node instance.

Mounting the Volume
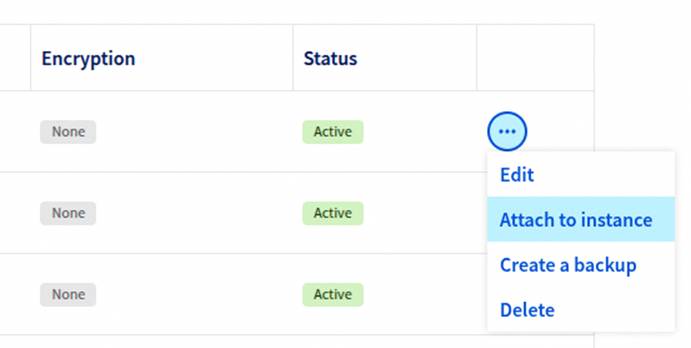
After the new volume appears as available in the OVHcloud Control Panel, attach it to your Ethereum node instance. To do this, open the ⋮ (more options) menu next to the volume entry and select Attach to an Instance. From the list of instances, choose the node you previously created. The volume will then be linked to that instance and accessible as an additional block device.

Now, establish a secure connection to your server via SSH. Use the following command from your local terminal, replacing IPaddress with the public IP assigned to your instance:
ssh ubuntu@IPaddressBy default, OVHcloud instances provisioned with the Ubuntu image create a user named ubuntu, which you should use for the initial connection. Authentication will be handled through the SSH key you configured during instance creation.
Once connected to the instance, run the following command to list all available block devices:
lsblk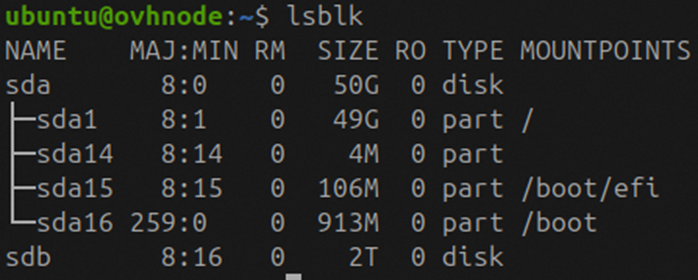
This will display a tree view of the system’s storage devices, including the root disk and the newly attached block storage volume. Identify the additional device (e.g., /dev/sdb) that corresponds to the 2 TB volume you created in OVHcloud. This device will later be formatted and mounted to store the Ethereum blockchain data.
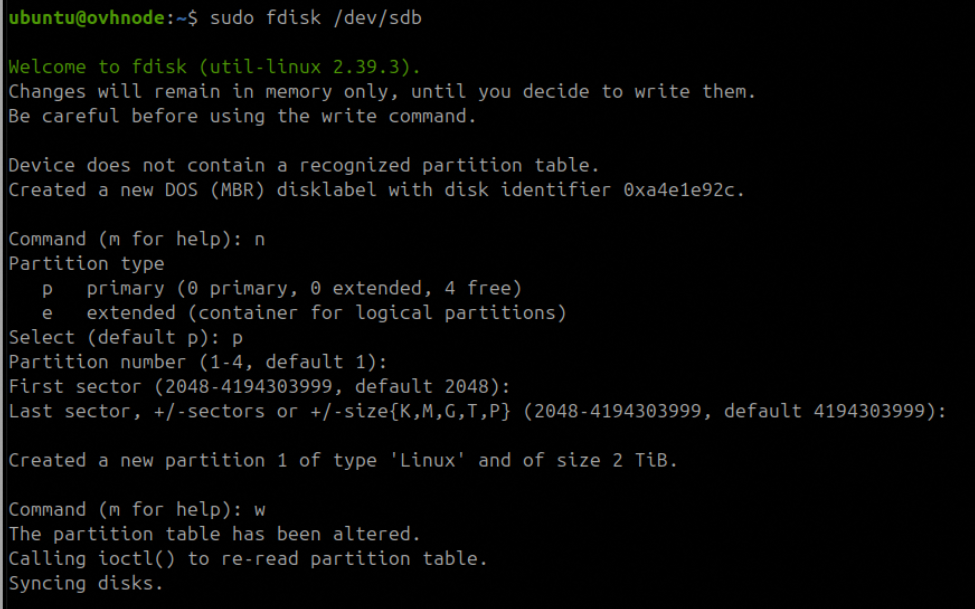
Next, create a partition on the newly attached volume. Replace /dev/sdb with the device name identified in the previous step if it differs. Execute:
sudo fdisk /dev/sdbThis command will open the partitioning utility for the selected block device. From there, you can create a new primary partition that spans the entire disk. Once complete, the partition will typically be available as /dev/sdb1.
Once the partition has been created (e.g., /dev/sdb1), format it with the ext4 filesystem so it can be mounted and used by the operating system. Run the following command:
sudo mkfs.ext4 /dev/sdb1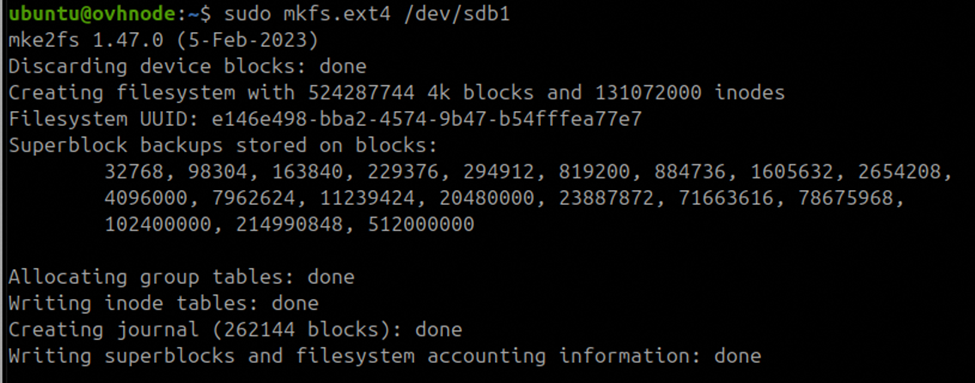
This will initialize the partition with an ext4 filesystem, which is a stable and widely supported choice for storing Ethereum chain data.
Now, create a dedicated directory to serve as the mount point for the formatted volume, then mount it and verify that it has been successfully attached to the filesystem. Execute the following commands:
sudo mkdir -p /mnt/chaindatasudo mount /dev/sdb1 /mnt/chaindatadf -h- mkdir -p /mnt/chaindata creates the mount directory (using -p ensures no error if intermediate directories are missing).
- mount /dev/sdb1 /mnt/chaindata mounts the formatted partition to the directory.
- df -h displays all mounted filesystems in a human-readable format, allowing you to confirm that /dev/sdb1 is correctly mounted at /mnt/chaindata with the expected capacity (approximately 2 TB).

At this point, your disk is mounted and ready for use. However, the configuration is not persistent: if the server restarts, the volume will need to be mounted manually. To ensure the volume is mounted automatically at boot, we must configure it in the /etc/fstab file.
First, retrieve the UUID (Universally Unique Identifier) of your volume by running:
sudo blkidThis command lists all block devices and their associated attributes. Identify the entry corresponding to your new partition (e.g., /dev/sdb1) and copy the value of its UUID field, which will be used in the fstab configuration.

Next, edit the /etc/fstab file to configure the automatic mount. Open the file with your preferred text editor, for example:
sudo nano /etc/fstabThen add the following line at the end of the file, replacing the UUID with the one obtained from the previous blkid command:
UUID=e146e498-bba2-4574-9b47-b54fffea77e7 /mnt/chaindata ext4 nofail 0 0This entry ensures that the partition will be mounted at /mnt/chaindata automatically on every system boot. The nofail option allows the system to continue booting even if the device is unavailable.
Your storage volume is now fully configured and ready to be used for storing Ethereum blockchain data. With the automatic mount entry in place, the system will make the volume available at /mnt/chaindata on every reboot, ensuring a stable and persistent data directory for your node.
Create a dedicated user
Next, create a dedicated user account to manage all Ethereum node operations. This practice improves security by separating node processes from the default system user. Run the following commands:
sudo useradd -s /bin/bash -d /home/node_admin/ -m -G sudo node_adminecho 'node_admin:MySuperPassword123' | sudo chpasswdsudo mkdir -p /home/node_admin/.ssh- useradd creates a new user named node_admin, with a home directory, bash shell, and membership in the sudo group.
- chpasswd sets an initial password for the new user (replace with a strong secret or configure key-based login).
- mkdir -p creates the .ssh directory for SSH configuration in the user’s home directory.
Now, configure SSH key-based authentication for the new user by adding your public SSH key to the authorized_keys file. Replace the placeholder with your actual public key:
sudo sh -c "echo 'My-public-SSH-key' > /home/node_admin/.ssh/authorized_keys"This command creates the authorized_keys file under /home/node_admin/.ssh/ and writes your public key into it, allowing secure, passwordless login as the node_admin user.
Ethereum Preliminaries
Operating a fully functional Ethereum node requires the coordinated operation of two key software components:
1. Execution Client (EL) – responsible for processing transactions and maintaining the Ethereum state.
2. Consensus Client (CL) – responsible for reaching consensus with the rest of the network through the Ethereum proof-of-stake protocol.
These two components must run in tandem and communicate securely to maintain synchronization with the Ethereum mainnet.
The Ethereum ecosystem supports multiple client implementations, each developed independently but compliant with the Ethereum specification. The most widely used options include:
Execution Clients (EL):
- Geth
- Nethermind
- Reth
- Besu
- Erigon
Consensus Clients (CL):
- Lighthouse
- Prysm
- Teku
- Nimbus
- Lodestar
For this guide, we will use the following combination:
● Execution Client: Nethermind
● Consensus Client: Lighthouse
Installing Nethermind (Execution Client)
Step 1: Add the Nethermind APT Repository
To install Nethermind via APT, begin by adding the official repository:
sudo add-apt-repository ppa:nethermindeth/nethermindIf the above command is not found, install the required tools first:
sudo apt-get install software-properties-common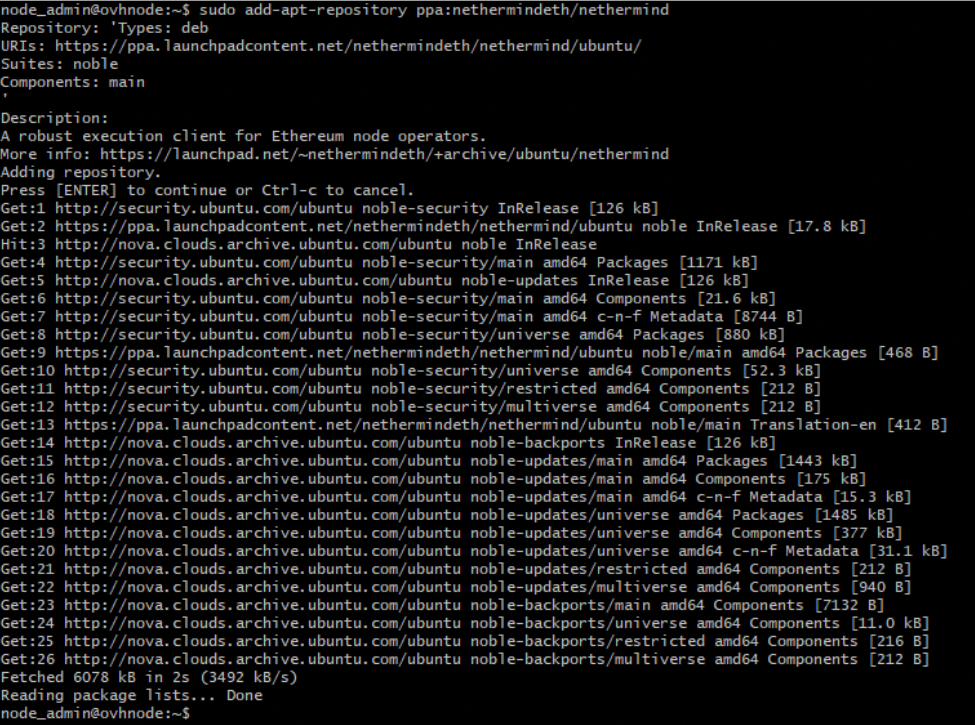
Step 2: Update the Package Index
Refresh your package list to include packages from the newly added repository:
sudo apt-get update
⚠️This may take a few minutes depending on your system and network speed.
Step 3: Install Nethermind
Now install the Nethermind binary:
sudo apt-get install nethermind -y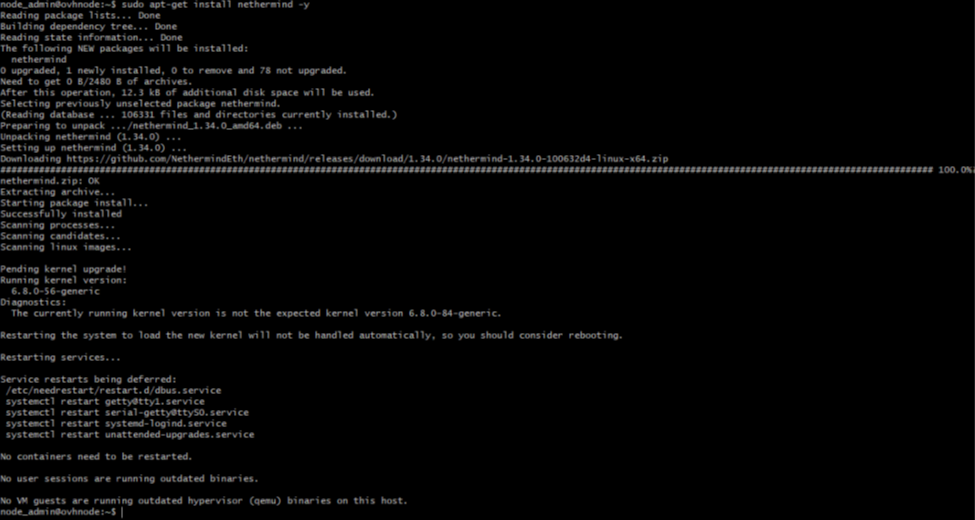
Installing Lighthouse (Consensus Client)
Step 1: Download the Latest Stable Release
Navigate to the Lighthouse GitHub Releases page and locate the latest stable release.
As of September 29, 2025, version 8.0.0 is marked as a Pre-release, so we will use the stable version 7.1.0.
Use the following curl command to download the Lighthouse client binary archive:
curl -LO https://github.com/sigp/lighthouse/releases/download/v7.1.0/lighthouse-v7.1.0-x86_64-unknown-linux-gnu.tar.gz
Step 2: Extract the Archive
Once downloaded, extract the archive:
tar -xvf lighthouse-v7.1.0-x86_64-unknown-linux-gnu.tar.gz
This will place the lighthouse binary in your current directory.
Step 3: Verify and Move the Binary
Test the binary to ensure it is working:
./lighthouse –version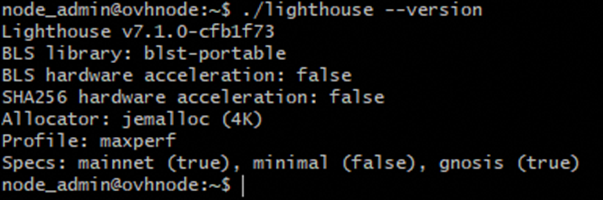
Move it to a directory included in your system’s $PATH for global access:
sudo cp lighthouse /usr/binCreate the JWT Secret File
A shared JWT secret is required for secure authenticated communication between the execution and consensus clients.
Step 1: Create a Secrets Directory
sudo mkdir -p /secretsStep 2: Generate the JWT Token
openssl rand -hex 32 | tr -d "\n" | sudo tee /secrets/jwt.hex > /dev/nullYou should now have the file /secrets/jwt.hex containing a 32-byte hexadecimal secret.

Using screen for Session Persistence
When running on a remote server (such as an OVH cloud instance), any disconnection from your SSH session will terminate running processes unless they are managed through tools like screen.
Check if screen is installed:
screen –version
If not installed:
sudo apt-get install screenSetting Ownership for /mnt/chaindata
When running Ethereum clients (Nethermind and Lighthouse), it’s essential that the user executing the commands has the necessary access to the data directory. To avoid permission issues and maintain security, you should assign ownership of the previously mounted directory to your current user.
sudo chown $USER:$USER /mnt/chaindataThis command sets the user and group ownership of /mnt/chaindata to the currently logged-in user. It ensures that you (and your Ethereum clients, if run under your user account) have full access to read, write, and modify files in this directory.
Now we are ready to launch both the execution and consensus clients in separate screen sessions for persistent background operation.
Launching Nethermind (Execution Client)
Step 1: Create a Screen Session
screen -S nethermindStep 2: Run Nethermind
nethermind -c mainnet \
--data-dir /mnt/chaindata/nethermind \
--JsonRpc.Enabled true \
--HealthChecks.Enabled true \
--HealthChecks.UIEnabled true \
--JsonRpc.EngineHost=127.0.0.1 \
--JsonRpc.EnginePort=8551 \
--JsonRpc.JwtSecretFile=/secrets/jwt.hex
You should see logs indicating the client is running. Eventually, the message:
Waiting for Forkchoice message from Consensus Layerwill appear, indicating the execution client is waiting to pair with the consensus client.

Step 3: Detach the Session
Press: Ctrl-a then d to detach from the session and return to the main shell.
Step 4: List Active Sessions (Optional)
screen -ls
To reattach later:
screen -r nethermindLaunching Lighthouse (Consensus Client)
Step 1: Create a New Screen Session
screen -S lighthouseStep 2: Run Lighthouse Beacon Node
lighthouse bn \
--network mainnet \
--execution-endpoint http://127.0.0.1:8551 \
--execution-jwt /secrets/jwt.hex \
--checkpoint-sync-url https://mainnet.checkpoint.sigp.io \
--http \
--datadir /mnt/chaindata/lighthouse
After some initial setup, Lighthouse should begin syncing with the network.

Step 3: Detach the Session
Use the same key combination: Ctrl-a then d.
Verifying Synchronization Between EL and CL
At this stage, both the execution client (Nethermind) and the consensus client (Lighthouse) should be running in separate screen sessions. To confirm that they are properly connected and synchronization is underway, reattach to the Nethermind session and inspect the logs.
Step 1: Reattach to the Nethermind Session
screen -r nethermindThis command brings you back into the Nethermind screen session, where you can observe real-time logs.
Step 2: Check for Communication Messages
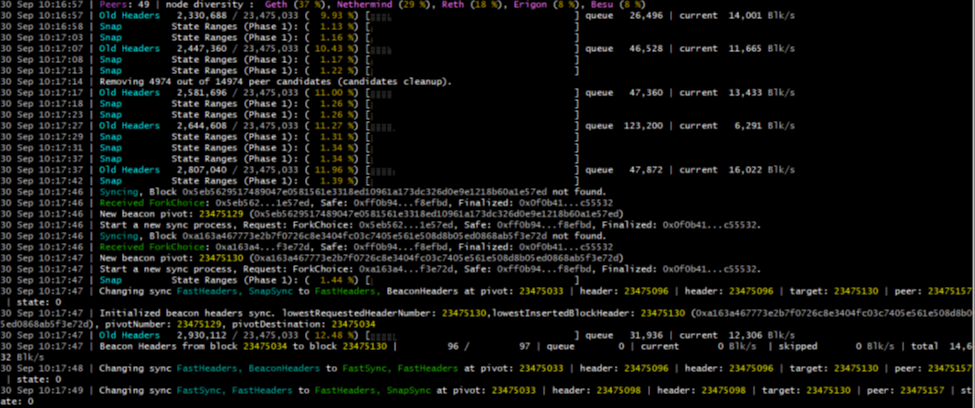
If Lighthouse is running and connected correctly, Nethermind’s logs should no longer display:
Waiting for Forkchoice message from Consensus LayerInstead, you should see logs indicating that the Engine API communication has been established and blocks are being processed. Look for messages like:
Received ForkChoice: ...
Syncing...
These logs confirm that Nethermind is receiving block proposals and fork choice updates from Lighthouse and that the node is syncing correctly with the Ethereum mainnet.
Conclusion
And you’re done! You have deployed a fully functional Ethereum node on OVHcloud.
While this guide focused on the technical deployment, it is important to complement the setup with proper security hardening, monitoring, and maintenance practices to ensure long-term stability. With the foundation now in place, you can extend the node’s functionality, integrate it into larger infrastructures, or use it as a base for research, development, and staking operations.
This is the first guide in our mini-series and will shortly be followed by a tutorial on how to deploy an Ethereum node on a bare metal server and monitor it in real-time. Stay tuned for more.

Lautaro BAUTISTA
Lautaro Bautista (MigaLabs)
DevOps Engineer with 10+ years of experience in digital systems integration and technical operations within international environments. Currently specialized in blockchain infrastructure, focusing on the deployment, monitoring, and performance optimization of Ethereum nodes. Strong background in systems architecture, digital transformation, project management, and cross-functional team leadership. Holds a Master’s degree in Computer Science from Sorbonne University.