

When working on Infrastructure as Code projects, with Terraform or OpenTofu, Terraform States files are created and modified locally in a terraform.tfstate file. It’s a common usage and practice but not convenient when working as a team.
Do you know that you can configure Terraform to store data remotely on OVHcloud S3-compatible Object Storage?
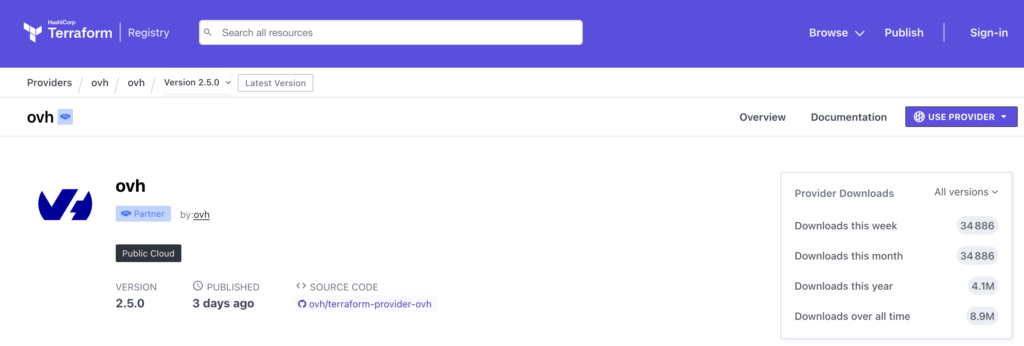
OVHcloud Terraform/OpenTofu provider
To easily provision your infrastructures, OVHcloud provides a Terraform provider which is available in the official Terraform registry.
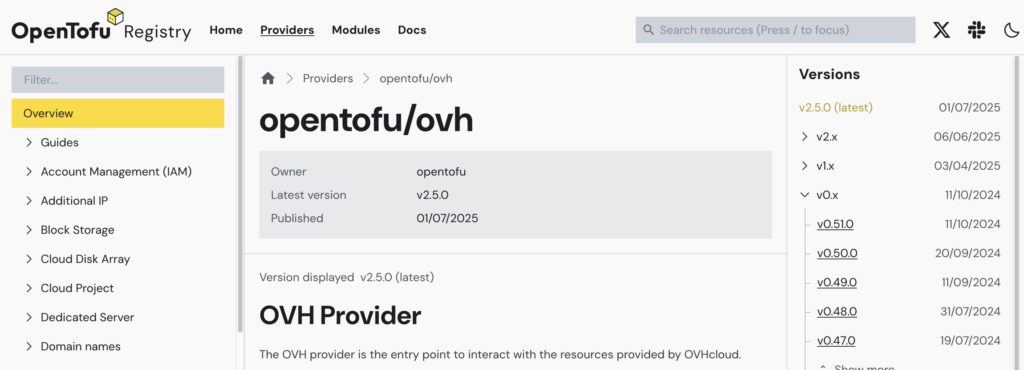
The provider is synchronized in the OpenTofu registry also:
Read the Infrastructure as Code (IaC) on OVHcloud – part 1: Terraform / OpenTofu blog post to have more information about the provider and IaC on OVHcloud.
Note that in the rest of the blog post we will be using terraform CLI and talking about Terraform, but you can also follow the blog post if you are using OpenTofu and tofu CLI instead 😉.
How to
In this blog post we will handle two projects:
object-storage-tf: creation of an OVHcloud S3-compatible Object Sorage and an user and necessary policiesmy-app: usage of abackend.tffile that store and get TF states in your newly created S3-compatible bucket
Note that all the following source code are available on the OVHcloud Public Cloud examples GitHub repository.
Prerequisites:
- Install the Terraform CLI
- For non Linux users, install gettext (that included `envsubst` command)
$ brew install gettext

$ brew link --force gettext- Get the credentials from the OVHCloud Public Cloud project
Let’s create an Object Storage with Terraform
Create a new folder, named object-storage-tf, for example and go into it.
Create a provider.tf file:
terraform {
  required_providers {
    ovh = {
      source  = "ovh/ovh"
    }

    random = {
      source  = "hashicorp/random"
      version = "3.6.3"
    }
  }
}

provider "ovh" {
}
The OVHcloud Terraform provider need the endpoint, the secret keys and the Public Cloud ID that needs to be retrieved from your environment variables:
OVH_ENDPOINTOVH_APPLICATION_KEYOVH_APPLICATION_SECRETOVH_CONSUMER_KEYOVH_CLOUD_PROJECT_SERVICE
Then, create a variables.tf.template file with the following content:
variable "service_name" {
  default = "$OVH_CLOUD_PROJECT_SERVICE"
}


variable bucket_name {
  type        = string
}

variable bucket_region {
  type        = string
  default     = "GRA"
}
Replace the value of your OVH_CLOUD_PROJECT_SERVICE environment variable in the variables.tf file (in the service_name variable):
$ envsubst < variables.tf.template > variables.tfDefine the resources you want to create in a new file called s3.tf:
resource "random_string" "bucket_name_suffix" {
  length  = 16
  special = false
  lower   = true
  upper   = false
}

resource "ovh_cloud_project_storage" "s3_bucket" {
  service_name = var.service_name
  region_name = var.bucket_region
  name = "${var.bucket_name}-${random_string.bucket_name_suffix.result}" # the name must be unique within OVHcloud
}

resource "ovh_cloud_project_user" "s3_user" {
  description	= "${var.bucket_name}-${random_string.bucket_name_suffix.result}"
  role_name	= "objectstore_operator"
}

resource "ovh_cloud_project_user_s3_credential" "s3_user_cred" {
  user_id	= ovh_cloud_project_user.s3_user.id
}

resource "ovh_cloud_project_user_s3_policy" "s3_user_policy" {
  service_name = var.service_name
  user_id      = ovh_cloud_project_user.s3_user.id
  policy = jsonencode({
    "Statement": [{
      "Action": ["s3:*"],
      "Effect": "Allow",
      "Resource": ["arn:aws:s3:::${ovh_cloud_project_storage.s3_bucket.name}","arn:aws:s3:::${ovh_cloud_project_storage.s3_bucket.name}/*"],
      "Sid": "AdminContainer"
    }]
  })
}
In this file we defined that we want to create a S3-compatible Object Storage bucket and an user (with its credentials) that will have the rights (policies) to do actions on this bucket.
Define the information that you want to get after the creation of the resources, in an output.tf file:
output "s3_bucket" {
  value = "${ovh_cloud_project_storage.s3_bucket.name}"
}

output "access_key_id" {
    value = ovh_cloud_project_user_s3_credential.s3_user_cred.access_key_id
}

output "secret_access_key" {
    value = ovh_cloud_project_user_s3_credential.s3_user_cred.secret_access_key
    sensitive = true
}
Now we need to initialise Terraform:
$ terraform init

Initializing the backend...

Initializing provider plugins...
- Finding hashicorp/random versions matching "3.6.3"...
- Reusing previous version of ovh/ovh from the dependency lock file
- Installing hashicorp/random v3.6.3...
- Installed hashicorp/random v3.6.3 (signed by HashiCorp)
- Using previously-installed ovh/ovh v2.5.0

Terraform has made some changes to the provider dependency selections recorded
in the .terraform.lock.hcl file. Review those changes and commit them to your
version control system if they represent changes you intended to make.

Terraform has been successfully initialized!

You may now begin working with Terraform. Try running "terraform plan" to see
any changes that are required for your infrastructure. All Terraform commands
should now work.

If you ever set or change modules or backend configuration for Terraform,
rerun this command to reinitialize your working directory. If you forget, other
commands will detect it and remind you to do so if necessary.
Generate the plan and apply it:
$ terraform apply -var bucket_name=my-bucket

Terraform used the selected providers to generate the following execution plan. Resource actions are indicated with the
following symbols:
  + create

Terraform will perform the following actions:

  # ovh_cloud_project_storage.s3_bucket will be created
  + resource "ovh_cloud_project_storage" "s3_bucket" {
      + created_at    = (known after apply)
      + encryption    = (known after apply)
      + limit         = (known after apply)
      + marker        = (known after apply)
      + name          = (known after apply)
      + objects       = (known after apply)
      + objects_count = (known after apply)
      + objects_size  = (known after apply)
      + owner_id      = (known after apply)
      + prefix        = (known after apply)
      + region        = (known after apply)
      + region_name   = "GRA"
      + replication   = (known after apply)
      + service_name  = "xxxxxxxxxxx"
      + versioning    = (known after apply)
      + virtual_host  = (known after apply)
    }

  # ovh_cloud_project_user.s3_user will be created
  + resource "ovh_cloud_project_user" "s3_user" {
      + creation_date = (known after apply)
      + description   = (known after apply)
      + id            = (known after apply)
      + openstack_rc  = (known after apply)
      + password      = (sensitive value)
      + role_name     = "objectstore_operator"
      + roles         = (known after apply)
      + service_name  = "xxxxxxxxxxx"
      + status        = (known after apply)
      + username      = (known after apply)
    }

  # ovh_cloud_project_user_s3_credential.s3_user_cred will be created
  + resource "ovh_cloud_project_user_s3_credential" "s3_user_cred" {
      + access_key_id     = (known after apply)
      + id                = (known after apply)
      + internal_user_id  = (known after apply)
      + secret_access_key = (sensitive value)
      + service_name      = "xxxxxxxxx"
      + user_id           = (known after apply)
    }

  # ovh_cloud_project_user_s3_policy.s3_user_policy will be created
  + resource "ovh_cloud_project_user_s3_policy" "s3_user_policy" {
      + id           = (known after apply)
      + policy       = (known after apply)
      + service_name = "xxxxxxxx"
      + user_id      = (known after apply)
    }

  # random_string.bucket_name_suffix will be created
  + resource "random_string" "bucket_name_suffix" {
      + id          = (known after apply)
      + length      = 16
      + lower       = true
      + min_lower   = 0
      + min_numeric = 0
      + min_special = 0
      + min_upper   = 0
      + number      = true
      + numeric     = true
      + result      = (known after apply)
      + special     = false
      + upper       = false
    }

Plan: 5 to add, 0 to change, 0 to destroy.

Changes to Outputs:
  + access_key_id     = (known after apply)
  + s3_bucket         = (known after apply)
  + secret_access_key = (sensitive value)

Do you want to perform these actions?
  Terraform will perform the actions described above.
  Only 'yes' will be accepted to approve.

  Enter a value: yes

random_string.bucket_name_suffix: Creating...
random_string.bucket_name_suffix: Creation complete after 0s [id=4qiyj7ywrt2sspfe]
ovh_cloud_project_user.s3_user: Creating...
ovh_cloud_project_storage.s3_bucket: Creating...
ovh_cloud_project_storage.s3_bucket: Creation complete after 1s [name=my-bucket-4qiyj7ywrt2sspfe]
ovh_cloud_project_user.s3_user: Still creating... [10s elapsed]
ovh_cloud_project_user.s3_user: Creation complete after 20s [id=535967]
ovh_cloud_project_user_s3_credential.s3_user_cred: Creating...
ovh_cloud_project_user_s3_policy.s3_user_policy: Creating...
ovh_cloud_project_user_s3_credential.s3_user_cred: Creation complete after 0s [id=5ab69860beb34575acb42c7ba8553884]
ovh_cloud_project_user_s3_policy.s3_user_policy: Creation complete after 0s [id=xxxxxxxxxxx/535967]

Apply complete! Resources: 5 added, 0 changed, 0 destroyed.

Outputs:

access_key_id = "5ab69860beb34575acb42c7ba8553884"
s3_bucket = "my-bucket-4qiyj7ywrt2sspfe"
secret_access_key = <sensitive>
🎉
Save the s3 user credentials in environment variables (mandatory for the following section):
$ export AWS_ACCESS_KEY_ID=$(terraform output -raw access_key_id)
$ export AWS_SECRET_ACCESS_KEY=$(terraform output -raw secret_access_key)
Let’s configure an OVHcloud S3-compatible Object Storage as Terraform Backend
Create a new folder, named my-app, and go into it.
Create a backend.tf file with the following content:
⚠️ If you have a terraform version before 1.6.0:
terraform {
    backend "s3" {
      bucket = "<my-bucket>"
      key    = "my-app.tfstate"
      region = "gra"
      endpoint = "s3.gra.io.cloud.ovh.net"
      skip_credentials_validation = true
      skip_region_validation      = true
    }
}
⚠️ Since Terraform version 1.6.0:
terraform {
    backend "s3" {
      bucket = "<my-bucket>"
      key    = "my-app.tfstate"
      region = "gra"
      endpoints = {
        s3 = "https://s3.gra.io.cloud.ovh.net/"
      }
      skip_credentials_validation = true
      skip_region_validation      = true
      skip_requesting_account_id  = true
      skip_s3_checksum            = true
    }
}
You can replace <my-bucket> with the newly created bucket or with an existing bucket you created.
Initialise Terraform:
$ terraform init

Initializing the backend...

Successfully configured the backend "s3"! Terraform will automatically
use this backend unless the backend configuration changes.

Initializing provider plugins...
- Finding latest version of ovh/ovh...
- Installing ovh/ovh v2.5.0...
- Installed ovh/ovh v2.5.0 (signed by a HashiCorp partner, key ID F56D1A6CBDAAADA5)

...
As you can see, now, terraform is using “s3” backend! 💪
Want to go further?
In this blog post, we created an S3-compatible Object Storage with basic configuration but be aware that you can configure a S3-compatible bucket with encryption, versioning and more:
💡 Terraform States are not encrypted at rest when stored by Terraform so we recommend to enable the encryption the OVHcloud S3-compatible Object Storage bucket 🙂.
Developer Advocate at OVHcloud, specialized in Cloud Native, Infrastructure as Code (IaC) & Developer eXperience (DX).
She is recognized as a Docker Captain, CNCF ambassador, GDE & Women techmakers Ambassador.
She has been working as a Developer and Ops for over 20 years. Cloud enthusiast and advocates DevOps/Cloud/Golang best practices.
Technical writer, a sketchnoter and a speaker at international conferences.
Book author, she created a new visual way for people to learn and understand Cloud technologies: "Understanding Kubernetes / Docker / Istio in a visual way" in sketchnotes, books and videos.