
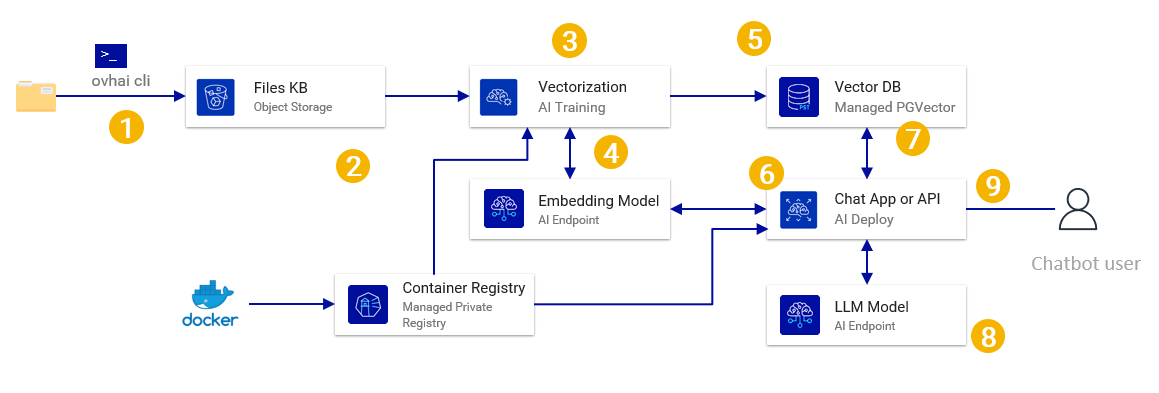
This document presents a reference architecture for a simple Retrieval Augmented Generation solution based on a vector Db using OVHcloud managed services. In this use case we have a large number of pdf/markdown documents that are ingested as a single batch to create a knowledge base and a simple text chat interface for a user to ask questions.
- Reference Architecture
- Architecture Guide
- Deployment Tutorial
Workflow Overview
- First the documents/files to include in the knowledge base have to be uploaded into Object Storage. You can use the ovhai cli or any S3* compatible tool (or even upload via the manager if only a few files).
- AI Training is used to run a job to read the files, chunk them by reading a container from a container registry.
- The AI Training calls an embedding model from AI Endpoints to generate the vector for each of those chunks.
- The AI Training job adds the vector, text and metadata in a Managed PostgreSQL with the PGVector extension.
- AI Deploy is used to deploy a container (from the registry) with a Gradio chat front end.
- For each user message, the AI deploy code sends the message to the AI Endpoint embedding model, gets the vector, sends it to PostgreSQL to recover the most relevant content (using vector similarity).
- The user message, as well as the recovered relevant content, is sent to the AI Endpoint LLM model.
- Answer from the LLM is displayed in the gradio chatbot interface for the user.
Limitations & Warnings
- Choice of embedding model & LLM model has to be adapted to your use case.
- This setup does not allow IP filtering for the database : AI Training generates a new IP every time the job is executed so it’s not possible to know it in advance and therefore add it the IP filtering list from the database.
- In this example AI Training is not used to train an AI but as a « batch job » solution so you do not need any GPU.
- In this example AI endpoint is not used to deploy an inference server but as a « Container as a service » to run the chat & backend logic (no GPU needed)
- While PGVector scales better than other basic vectorDB solutions, it’s not adapted for very large deployments. You still need to be careful with performances and created indexes for example.
OVHCloud products used
- AI Endpoints – AI Models Inference via a managed API service proposing open source models with a per call pricing.
- AI Training – A container based batch job service including GPUs and Object Storage Integration where you only pay for the processing time.
- Managed PostgreSQL – A managed PostgreSQL database including backups and PGVector extension for embeddings & similarity search support.
- Object Storage S3 Compatible – An S3 compatible object storage adapted for AI & Analytics workloads.
Architecture Guide : Retrieval Augmented Generation
There will be 2 main processes, managed by 2 different python scripts :
- Ingesting the documents to create the knowledge base
- Querying the knowledge base via a llm powered chatbot
1 – Building the knowledge base

In practice for this example we will be ingesting 2 types of content :
- The “Terms & Conditions” of OVHcloud servers, as PDF files, which will be uploaded into a Object Storage Bucket.
- The public documentation of OVHcloud products, which are hosted in github as markdown files.
For the pdfs, text will be extracted from the PDF using the PyPDF2 library and we will use a simplistic chunking strategy : 1 chunk = 1 pdf page. For the markdowns, the chunking will be by section (“#”). The calculation of the embedding vector is managed by an AI Endpoint embedding model API. The database to store the embedding vectors is a postgresql managed database with the PGVector extension.
2 – Querying the knowledge base
The second process is what is used in the backend when a user sends a message to the chat.

For each message sent to the chat, this process will convert the text to an embedding, search the closest texts in the knowledge base, build a prompt for the LLM with the recovered texts, ask the LLM for an answer and display the answer in the chat app.
Detailed Architecture Explanations
Document Storage Choice
In this architecture, we need to store an unknown number of documents that will need to be accessible programmatically and kept for a long period (we won’t delete the documents as we want to be able to reconstruct the knowledge base at any time to add improvements).
The obvious choice is to use Object Storage S3 Compatible :
- It’s scalable (you don’t need to know before-hand the size of the documents)
- It’s cost effective (multiple times cheaper than file storage or block storage)
- It’s redundant by design.
- It’s easily and securely accessible programmatically (ex : Boto3) but also has a large support for upload solutions (Ex : CyberDuck)
- It allows for parallel processing (if you ever need to adapt this architecture for larger volumes)
In this use case, we can use the standard class as we will not be doing many IOPS operations (only reading each document once each time we reconstruct the knowledge base).
Note that currently OVH Object Storage S3 Compatible is not compatible with private networks : it’s API will always be accessible via a public IP.
Compute Choice
In this architecture several computations will be needed :
- Computations for the AI model inferences (LLM and embedding model).
The 2 most adapted options available at OVHcloud are :
- AI Endpoints : Several models are proposed out-of-the-box via a managed API. You only need to choose the model and get a token. No need to deploy an inference server. Cost is per call and depends on the model.
- AI Deploy : Allows you to deploy a managed container, with choice of GPU(s) and autoscaling (starting a 1). You must bring the container and the model files. You pay for minute of compute.
If the model you want is available via Endpoint and that you do not need constant inference then AI Endpoints is the best option for simplicity and cost. AI Deploy becomes the best option if the model you want is not available in AI Endpoints or that you have a constant / high number of inferences needs (in which case it’s cheaper to use a GPU full time than pay per call)
Other options include running an inference server on virtual instance, Kubernetes cluster or a bare metal server but those solutions are less managed.
| Product | Advantage | Inconvenient |
|---|---|---|
| AI Endpoints | – Fastest setup time (just create a token) – Fully managed API – Cost per call (cheaper for small uses) – High availability by design | – Model choice from curated list – Multi-tenant – Throughput may vary (shared infrastructure) – No private network. |
| AI Deploy | – Deploy any model. – CPU/RAM based autoscaling (with integrated load balancing) – Controllable by API or CLI – Embedded Grafana for monitoring – High availability by design (Kubernetes based) – No Kubernetes skills needed. | – No private network – IP changes at each new start/stop – Scaling starts at 1 pod (no scaling down to 0 resources) – Need to provide your own container & model – Need AI engineering skills to setup inference server |
| Other less managed options : Managed Kubernetes Service Instances Dedicated Servers | – Private networking (vRack) – Dedicated hardware (Dedicated Servers) – Specific compliance (SNC…) | – Time to setup – Skills needed (Kubernetes, infra operations, AI engineering) – High availability & scaling to set up |
- Compute for the database (see chapter on Vector DB choice)
- Compute for the knowledge base creation (Batch)
Compute is needed for knowledge base creation step. In this step, a script (ex : Python) is used to read the documents stored in the object storage and for each document apply a conversion, chunk the document and feed it to the embedding model. The result is finally inserted into the vector database.
Let’s consider that this process would be executed as a batch (meaning that it would be run once in a while for all documents at once) using a python script. In that we have several options :
- AI Training : While mainly aimed at AI Training workloads, it can be used without GPUs as a “batch as a job” container service. You can use pre-build containers and simply provide the requirements (python libraries to install) and job to execute (in an object storage bucket or git repo). It can be scheduled or executed by a simple API or CLI command and you only pay for the processing time.
- For testing, or 1 shot : [AI Notebook] (https://www.ovhcloud.com/en/public-cloud/data-processing/) : It’s an interesting option for testing as it allows a step by step execution of each step in an interactive jupyter notebook but it’s not a production option as AI Notebooks cannot be scheduled or executed remotely.
- If parallel processing is needed, [Data Processing][https://www.ovhcloud.com/en/public-cloud/data-processing/) (ovhcloud spark-job as a service) would also become an option. It gives the ability to launch py-spark jobs (you choose the number and size of the workers) while only paying for the processing time.
- Instances : a linux instance where you can install python, setup the environment and run the job. You can start / stop the instance (via the interface but also API / CLI) so you only pay for the time it was up.
- Managed Kubernetes Service : if you have the skills and need for a cluster, it’s also an option but setup is needed.
Dedicated Servers are not adapted for this task as we only need the processing for a short period of time.
- Compute for the chat API / Web App
For the chat api or web application, unlike the knowledge base creation compute, you will need something that stays online, has high availability, that provides scaling in case of workload pikes.
A good option is to use AI Deploy
Other options are to use general compute products but which will be less managed. You will need to set setup the autoscalling and high availability yourself.
- Instances
- Managed Kubernetes Service
- Dedicated Server
Embedding Model Choice
The embedding model is the mathematical function that will transform your text into a numerical vector that can then be used to calculate semantic similarities. It’s therefore important to choose the right model as changing it will mean you would have to re-populate completely the knowledge base.
First step is therefore to correctly choose your model. Second step is to choose the type of inference service.
Key considerations for the choice of embedding model :
- Languages supported : Embedding models are trained on text and some are trained only on specific languages and therefore will only work for those languages.
- Type of embedding : is it word-level or sentence-level embedding ? Is it for text only or also multimodal (ex : manages images like CLIP) This will depend on the use case.
- Dimensionality : The number of dimensions in the vector. The size of the vectors produced by the embedding model affects both the computational efficiency and the model’s ability to capture nuanced meanings. Higher dimensions may capture more information but also increase computational cost and the risk of over fitting
- Max Tokens : This one is critical as it sets the maximum size of the text that you can use in a single embedding. If you plan on embedding entire pages, then you will need a larger number than for sentences.
- License : Each model has a specific license and some do not allow commercial use or add restriction. Check carefully to stay compliant.
As an example the “multilingual-e5-base” model, which is available in the OVHcloud AI Endpoints :
- Language Supported : ~ 100 top languages (better performance with most common languages)
- Type of Embeddings : Sentences
- Dimensionality : 768 (smallish)
- Max tokens : 512 (~ a long paragraph)
- License : MIT (Can be used commercially)
You can check the following leader board to see the top current models : https://huggingface.co/spaces/mteb/leaderboard
Vector Database Choice
For the vector database you need to choose what software you will be using but also how to deploy it.
For the software there is a large choice of Vector Databases (See https://db-engines.com/en/ranking/vector+dbms). A few options to highlight :
- Managed PostgreSQL with PGVector Extension The best option at OVHcloud if you are looking for a scalable, highly supported, ready to use & fully managed vector database. While PostreSQL does not support vectors storage and vector similarity search by default, it can be added with the “PGVector” extension.
- Qdrant : High scalability solution with multiple deployment options. Closed source.
- ChromaDB Chroma is a an open-source basic vectorDB that has the advantage of very light (can even run in memory) and includes native embedding functions (ie you don’t need an embedding model and chroma will generate the vector itself using it’s integrated models) It’s very commonly used for proof of concepts & experimentation as it’s the default db for Langchain but it’s not recommended for production & scaling. In particular it doesn’t have any access management and is not adapted for SQL querying (you can add metadata for your embeddings and filter on those but that’s it)
For the hosting, you basically need to decide between a managed database service or self-deployment on a generic compute option (On a Managed Kubernetes Service, an Instance or a Dedicated Server)
Large Language Model Choice
When choosing an LLM for a RAG use case, you need to check a few key characteristics :
- The context length : It’s the maximum size of text you can provide to the model when querying it, including all the prompts (system & user prompts) in number of tokens. Note that all models are not using the same tokenizer, which is the algorithm used to transform the text into tokens so a given text can be slightly different number of tokens for different models. You can use online token count tools to get an estimate. As a rule of thumb largest context requires largest computation & costs.
- The language supported : Check that the languages that you needed are correctly supported by the LLM. Some LLMs are only trained on english or a few languages or may have better performances on specific languages.
- The model size : Usually given in Millions, or Billions of parameters, it gives an idea of performance of the model but also the hardware needed. As a rule of thumb, larger models will provide better results (better understanding, better reasoning) but largest models will need more memory (vram) and computation (flops) for each inference.
- Multi-modal or text only : Most models only accept text as input and output but some allow media (images, video, sound). In RAG this may be important if you want to provide images in the context that the model has to understand.
- The model task / domain : Some models are specialized in specific tasks (ex : coding, instruction, chat…) or on specific domains (ex : medical, role playing)
- The license : Most models come with a license, which can allow or not specific uses cases (ex : commercial or research), or include requirements (ex : mention the model used). It’s important to check that your intended use is accepted by the license.
The choice of model therefore depends on the adequacy of these parameters versus your specific use case :
- What type & length are the documents you want to include in the context ? This will define if you need a multi-modal model or a small/large context model.
- What is your budget ? Larger / better models usually cost more per inference.
- What is the difficulty of the task and quality of the answer expected ? You may want to use a small model which will be much cheaper.
- What is the intended use case ? This will define the license you can use and if you need a specialized model or not.
Concerning the performance, you can check the various leader boards. Example : https://huggingface.co/spaces/open-llm-leaderboard/open_llm_leaderboard The model languages, context length, modality, license and specifics are usually mentioned in the model documentation.
In the case of AI Endpoints, OVHcloud proposes a list of curated open source models with the documentation directly available on the AI Endpoints webpage.
Chat Interface
Deployment Tutorial – Retrieval Augmented Generation
Use Case
For this tutorial we will be creating a simple chatbot that answers questions based on 2 sources :
- The OVHcloud english standard terms of services which can be downloaded here : https://www.ovhcloud.com/fr/terms-and-conditions/contracts/
- The OVHcloud english documentation which is accessible here but also exist in markdown files in github : https://github.com/ovh/docs
Architecture Overview
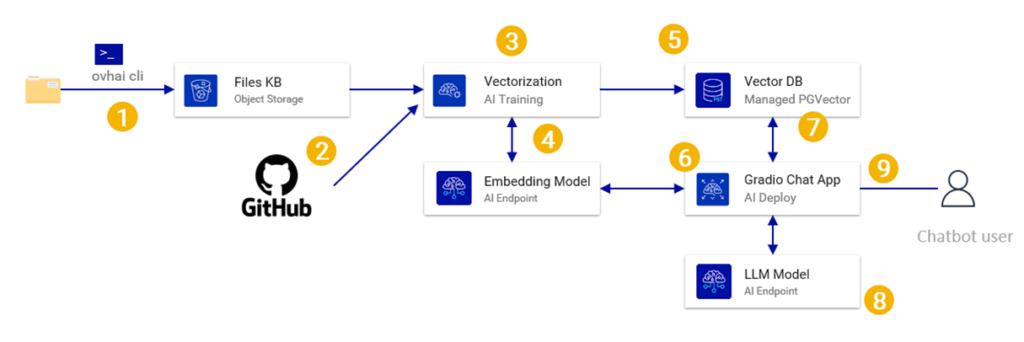
The tutorial architecture is adapted for the use case but also for simplification.
- Part of the documents will be stored/read from a bucket but the rest will come from a github repository (no need to duplicate into the bucket)
- For the vectorization step we will use a pre-build container from the OVHcloud public registry instead of a custom container.
- We will deploy a basic chat interface in AI deploy using Gradio (instead of deploying an API server)
Requirements
- An OVHcloud account and a Public Cloud Project already created.
- Docker installed on a server/computer (to build the containers).
Limitations & Warnings
- The documents ingested are only PDF and Markdown in this guide but it can be adapted to any kind of documents, including web pages.
- Documents ingested are only in english so the chatbot will have to be in english.
- This tutorial does not use any AI workflow library (ex Langchain) but simple code to allow better understanding.
- This tutorial uses a very basic document chunking method (1 page = 1 embedding or 1 section = 1 embedding) – You need to update it based on your exact use case.
- No user authentication or access management is included in this example.
- We are not managing the number of tokens by chunk : the using multilingual-e5-base model has a limit of 512 tokens and will ignore the rest of the text.
Steps Overview
- Create the open stack users.
- Create the object storage bucket.
- Get your AI Endpoints API Token.
- Create the PostgreSQL database and activate PGVector.
- Create the Managed Private Registry.
- Install & configure the ovhai CLI.
- Create the knowledge database python script.
- Create the chatbot logic & interface python script.
- Write the Requirements files.
- Upload the files to the bucket.
- Optional : Test the scripts via a jupyter AI Notebook.
- Run the Generate Knowledge Base job with AI Training.
- Build & upload the chatbot web app container.
- Deploy the chatbot app via AI Deploy.
- Chat with your documents !
1. Create the open stack users
We will be creating 2 openstack users :
- Rag_reader : this will be used in the code read the data from the object storage
- Ops_user : this will be used in the CLI to launch the AI training jobs and launch AI deploy.
Step 1.1 – Go to the OVHCloud Manager https://www.ovh.com/manager/
Step 1.2 – Go to Public Cloud Click on the Public Cloud entry on the top menu

Step 1.3 – Go to Users & Role, under Project Management in the left menu
Step 1.4 – Click on “Add user”

Step 1.5 – Lets call it “rag_reader”

Step 1.6 – Give it “ObjectStore operator” role
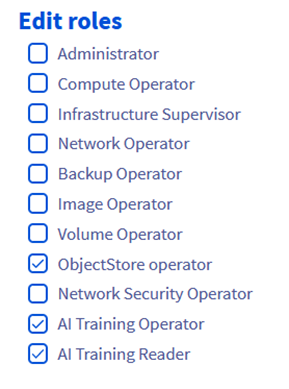
- Rag_reader should have ObjectStore Operator role.
- Ops_reader should have AI Training Operator and AI Training Reader roles.
Step 1.7 – Check that the user was created and note the user ID (user-…). It should take a few seconds

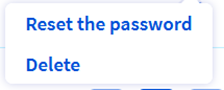
Step 1.8 – Generate a password by clicking on the “…” and selecting “Generate a password”.
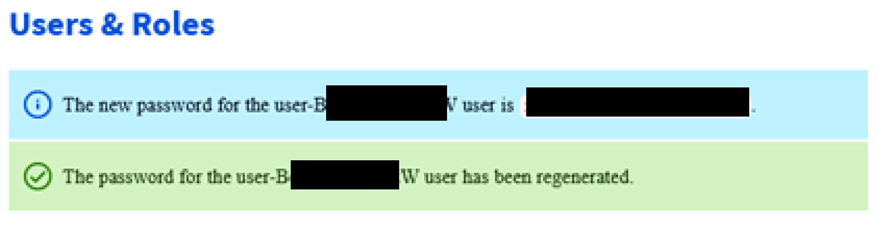
Important : SAVE the password somewhere as it cannot be displayed again (you have to generate a new one).
Step 1.9 – Repeat the exercise to create user “Ops_user”, with AI Training Operator and AI Training Reader rights.
2. Create the Object Storage buckets
We need to create 2 different buckets :
- “rag-knowledge-files” will be used to upload / store all the files used to generate the knowledge base.
- “rag-scripts” will be used to upload the python scripts containing all the logic and app.
Step 2.1 – To go the OVHcloud Manager https://www.ovh.com/manager/
Step 2.2 – Go to Public Cloud Click on the Public Cloud entry on the top menu

Step 2.3 – Click on Object Storage on the left menu
Step 2.4 – Click on Create an object container

Step 2.5 – Select Standard Object Storage – S3 Compatible API
Step 2.6 – Select a region (based on your requirements)
Step 2.7 – Link it to the user previously created (rag_reader)

Step 2.8 – Click on View Credentials

Step 2.9 – Copy somewhere the access key and user name.

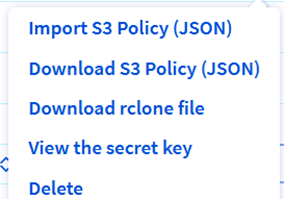
If you missed this, you can reset the credentials by selecting “users” in the Object Storage page (this shows the access keys), selecting a user and going to “View the secret key”.
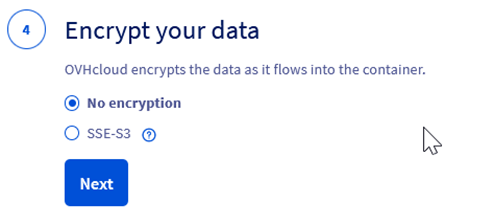
Step 2.10 – Select an encryption method (Depends on the sensitivity of your data)
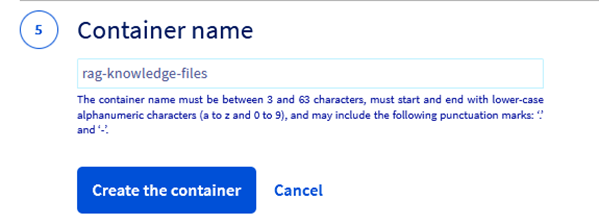
Step 2.11 – Give a meaningful name to the object storage container. In this example lets call it “rag-knowledge-files”
Step 2.12 – Create the rag-scripts bucket using the same process.
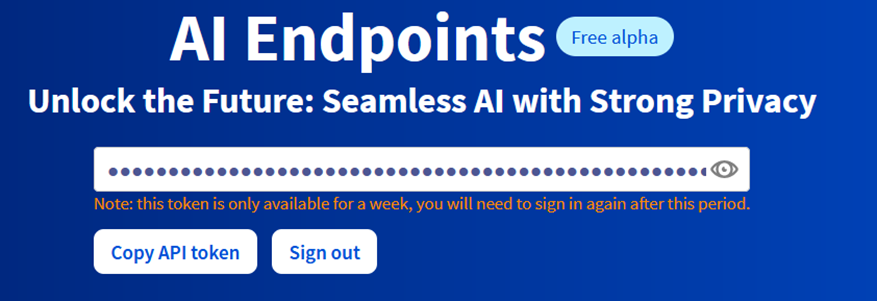
3. Get your OVHcloud AI Endpoints API token
Step 3.1 – Go to to the endpoints page https://endpoints.ai.cloud.ovh.net/
Step 3.2 – Log in using your ovhcloud account Step 3.3 – Generate and save the API token for later
4. Create the PostgreSQL database and activate PGVector
Step 4.1 – Go to OVHcloud Manager and select Databases on the left menu.
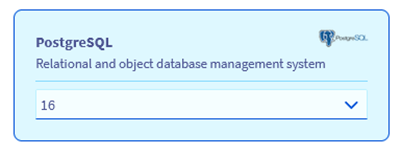
Step 4.2 – Select PostgreSQL (latest version) and the range based on your requirements (essential is enough for an evaluation).

Step 4.3 – Select a region

Step 4.4 – Select a node type. The smallest one is enough for an evaluation.

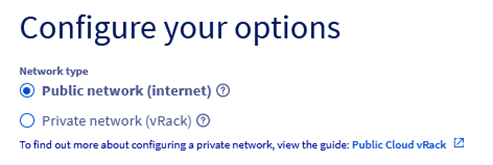
Step 4.5 – Select Public Network
Wait for the database to be spawned.
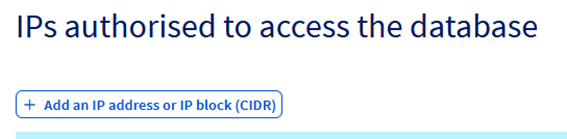
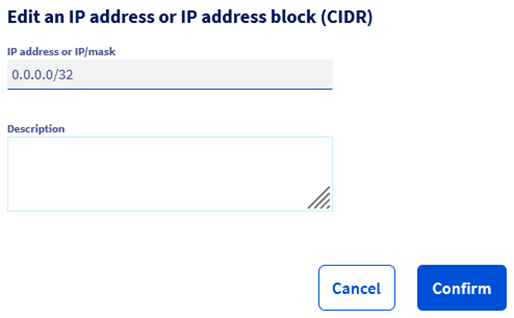
Step 4.6 – Configure authorized IP addresses Once database is up, we need to add authorized IP addresses so that we can write / read in it.
For this specific architecture we must allow all IP (adding mask 0.0.0.0/0) since we will be using AI Deploy & AI Training, for which the Ips are generated at each run (it’s therefore not possible to know the IP beforehand). Note that if you have a security concert with this, you can replace AI Deploy & AI Training by an Instance (in which case you will know the exact IP).
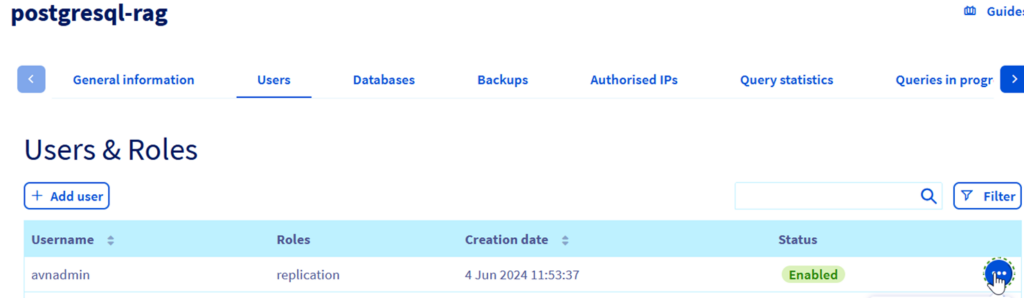
Step 4.7 – Obtain the PostgreSQL user and password. For simplicity you can reset the default user (avadmin) password and save it. You can also save the instance name.

5. Create the Managed Private Registry
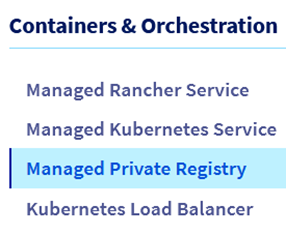
This will be used to store your docker images. This step is not mandatory if you already have a registry (ex : dockerhub). Step 5.1 – In the OVHCloud Manager go to “Managed Private Registry” on the left menu
Step 5.2 – Select create and name your registry.

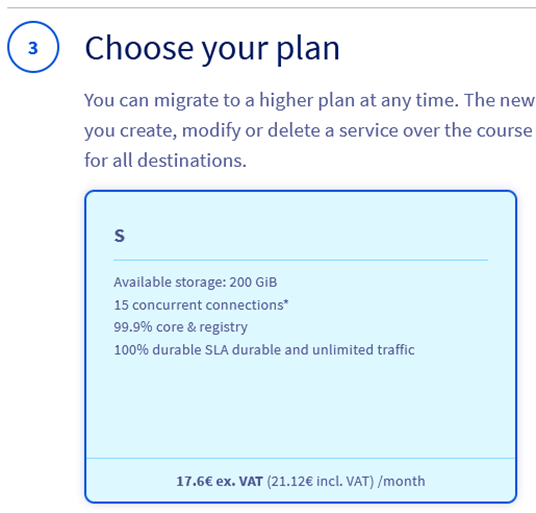
Step 5.3 – Select your plan (Small is enough for this evaluation).
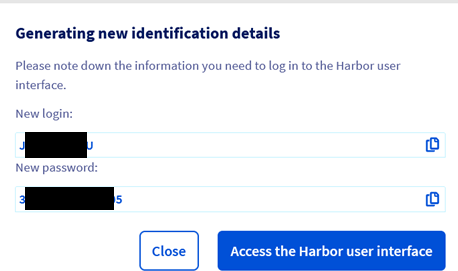
Step 5.4 – Note the login & password for your registry
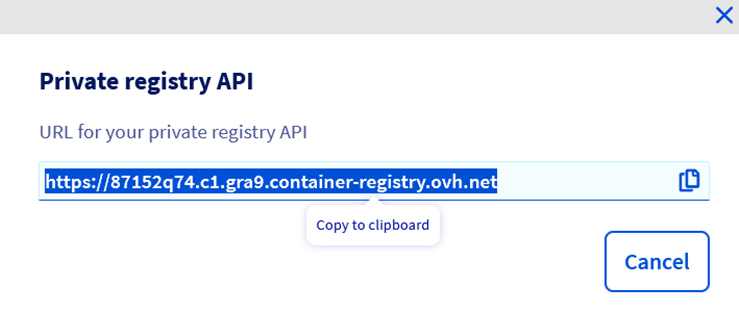
Step 5.5 – Get the registry API URL
Click on … and “Harbor API”.
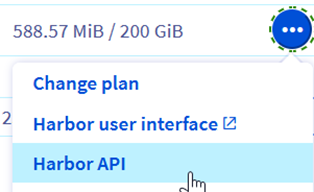
Copy the registry API url (to use later)
At this point, you have created all the resources that we need. You should have :
- 2 OpenStack Users (Rag_reader and Rag_ops) with an ID and password
- 2 object storage buckets
- A PostgreSQL database, with user and password
- A container registry, with user and password
6.Install & Configure the ovhai CLI
The OVHAI cli is the easiest way to managed the AI products and it’s integration with object storage & the container registries.
Step 6.1 – Go to https://cli.bhs.ai.cloud.ovh.net/
Follow install instructions (depends on OS).
Step 6.2 – Launch CLI and log in
Launch a command line (depends on OS), navigate to the folder containing the CLI and run the login command :
ovhai loginSelect Terminal and provide the ID and password for the Rag_ops openstack user created before. If it worked correctly you should be able to run ovhai me and get a result with the user id :
Ovhai meStep 6.3 – Add the S3 compatible object storage as Datastore
This is only needed if you created an Object Storage bucket, not if you chose a swift object storage. This steps registers the bucket with the AI tools so that it can use it later on. Run the ovhai datastore add command, using the access and secret key from the bucket you created initially.
ovhai datastore add s3 <alias> <bucket endpoint> <bucket region> <my-access-key> <my-secret-key> --store-credentials-locallyExample :
ovhai datastore add s3 S3GRA https://s3.gra.io.cloud.ovh.net/ gra 9e4306e46eb44f97C110916ac456eac7 7211fc326d8546ecbCfa22576hj47b26 --store-credentials-locallyCheck that it was correctly added with (it should display the new datastore) :
ovhai datastore listStep 7 – Create Knowledge Base python script
Now that we have setup all the resources and configurations, we need to create the “generate_knowledge_base.py“ python code to generate the knowledge base.
In essence this script will :
- Get the parameters (from the code and from environment variables that will be passed from the CLI)
- Connect to the PostgreSQL database using Psycopg2
- Connect and list all pdf files stored in the object storage using Boto3 library.
- For each page of each pdf document :
- Extract the text from the page using PyPDF2.
- Send it to the AI Endpoints Embeddings API to calculate the text embedding (using multilingual-e5-base model).
- Write the embedding (as a vector), pdf document name, page number and page text in the PostgreSQL database.
- Find all documents with name “guide.en-ie.md” in the ovhcloud doc github and for each document :
- Split the document by sections using “startwith(#)”.
- Send each section to AI Endpoints Embedding API to calculate the text embedding (using multilingual-e5-base model)
- Write the embedding (as a vector), the md document name, section number and text in the PostgreSQL database.
- Close the connection the PostgreSQL database.
Script in python below for “generate_knowledge_base.py”
import boto3
from PyPDF2 import PdfReader
import requests
import psycopg2
from psycopg2.extras import execute_values
import os
from markdownify import markdownify as md # to open and split the markwdown files
import time # for the wait function

# Variables that wont change much and are not sensitive.
# Change the values for your use case
S3_endpoint = "https://s3.gra.io.cloud.ovh.net/"
S3_container_name = "rag-knowledge-files"
ovhcloud_embedding_endpoint_url = 'https://multilingual-e5-base.endpoints.kepler.ai.cloud.ovh.net/api/text2vec'
postgre_host = 'postgresql-5e40dd63-oa5f936d2.database.cloud.ovh.net'
postgre_db = 'defaultdb'
postgre_port = '20184'
sslmode = "require"

# variables that could change and are sensitive which will be provided via environment variables
S3_secret_key = os.getenv('S3_SECRET_KEY')
S3_access_key = os.getenv('S3_ACCESS_KEY')
ovhcloud_ai_endpoint_api_key = os.getenv('OVHCLOUD_AI_ENDPOINT_API_KEY')
postgre_password = os.getenv("POSTGRE_PASSWORD")
postgre_user = os.getenv("POSTGRE_USER")

# Connect to PostgreSQL
conn = psycopg2.connect(
        dbname="defaultdb",
        user=postgre_user,
        password=postgre_password,
        host=postgre_host,
        port=postgre_port,
        sslmode=sslmode
)
cur = conn.cursor()

# check if the pgvector extension exists, if not activate it. Without this Postgre will now accept vectors and you won’t be able to do vector similarity search
cur.execute("CREATE EXTENSION IF NOT EXISTS vector")
conn.commit()

# check if the embeddings table exists, if not create it
# embeddings table stores the embeddings but also the document name, the page number and the text itself
cur.execute("CREATE TABLE IF NOT EXISTS embeddings (id SERIAL PRIMARY KEY, document_name TEXT, page_number INT, text TEXT, embedding VECTOR)")
conn.commit()
# we make sure the table is empty. This means every time we launch this job it will regenerate the full tabled based on all the documents in the object storage.
cur.execute("TRUNCATE TABLE embeddings;")
conn.commit()

# Connect to object storage and print the list of files
s3 = boto3.client('s3',
                  endpoint_url=S3_endpoint,
                  aws_access_key_id=S3_access_key,
                  aws_secret_access_key=S3_secret_key)
bucket = s3.list_objects(Bucket=S3_container_name)

# only select the pdf files and then for each count the number of pages and display the nb
for obj in bucket['Contents']:
    if obj['Key'].endswith('.pdf'):
        # Download the PDF file
        s3.download_file(S3_container_name, obj['Key'], 'temp.pdf')

        # Read the PDF file
        with open('temp.pdf', 'rb') as file:
            reader = PdfReader(file)
            print(f"Number of pages in {obj['Key']}:", len(reader.pages))
            # for each page, extract the text and send it to the embedding endpoint
            for page_num in range(len(reader.pages)):
                page = reader.pages[page_num]
                text = page.extract_text()
                # Generate embeddings
                response = requests.post(ovhcloud_embedding_endpoint_url, json={"text": text}, headers={'Authorization': f'Bearer {ovhcloud_ai_endpoint_api_key}'})
                embeddings = response.json()
                # Insert embeddings into PostgreSQL
                execute_values(cur, "INSERT INTO embeddings (document_name, page_number, text, embedding) VALUES %s", [(obj['Key'], page_num, text, embeddings)])
                conn.commit()

            # close the file and then delete the temp file
            file.close()
        # delete the temp file temp.pdf
        os.remove('temp.pdf')
# check how many rows are in the embeddings table and print it
cur.execute("SELECT COUNT(*) FROM embeddings")
print("DB now has", cur.fetchone()[0], " embeddings")

# Function to get all 'guide.en-ie.md' files in a directory and its subdirectories
def get_guide_md_files(directory):
    guide_files = []
    for root, _, files in os.walk(directory):
        for file in files:
            if file == 'guide.en-ie.md':
                guide_files.append(os.path.join(root, file))
    return guide_files

# Function to extract sections from markdown text
def extract_md_sections(md_text):
    sections = []
    current_section = []
    lines = md_text.split('\n')

    for line in lines:
        if line.startswith('#'):
            if current_section:
                sections.append('\n'.join(current_section))
                current_section = []
        current_section.append(line)

    if current_section:
        sections.append('\n'.join(current_section))

    return sections

# Local directory containing markdown files
local_directory = 'docs/pages/'

# Process 'guide.en-ie.md' files in the local directory
guide_files = get_guide_md_files(local_directory)

for guide_file in guide_files:
    with open(guide_file, 'r', encoding='utf-8') as file:
        md_text = file.read()

    sections = extract_md_sections(md_text)

    for section_num, section_text in enumerate(sections):
        # Add folder structure at the beginning of the text
        folder_structure = os.path.relpath(guide_file, local_directory)
        text_with_structure = f"{folder_structure}\n\n{section_text}"

        # Generate embeddings
        response = requests.post(ovhcloud_embedding_endpoint_url, json={"text": text_with_structure}, headers={'Authorization': f'Bearer {ovhcloud_ai_endpoint_api_key}'})
        embeddings = response.json()

        data = [(folder_structure, section_num, text_with_structure, embeddings)]
        # Insert embeddings into PostgreSQL
        try:
            execute_values(
                cur,
                "INSERT INTO embeddings (document_name, page_number, text, embedding) VALUES %s",
                data
            )
            conn.commit()
        except Exception as e:
            print(f"Error inserting data for {guide_file} section {section_num}: {e}")
            conn.rollback()

        # 3-second wait to avoid reaching API rate limits
        time.sleep(3)

# Check the number of rows in the embeddings table
cur.execute("SELECT COUNT(*) FROM embeddings")
print("DB now has", cur.fetchone()[0], " embeddings")

# Close the connection
cur.close()
conn.cl
Step 8 – Chatbot logic & Interface python script
Second python script needed is the chatbot interface and the logic behind the chatbot answers. We will call it “query_knowledge_base.py”.
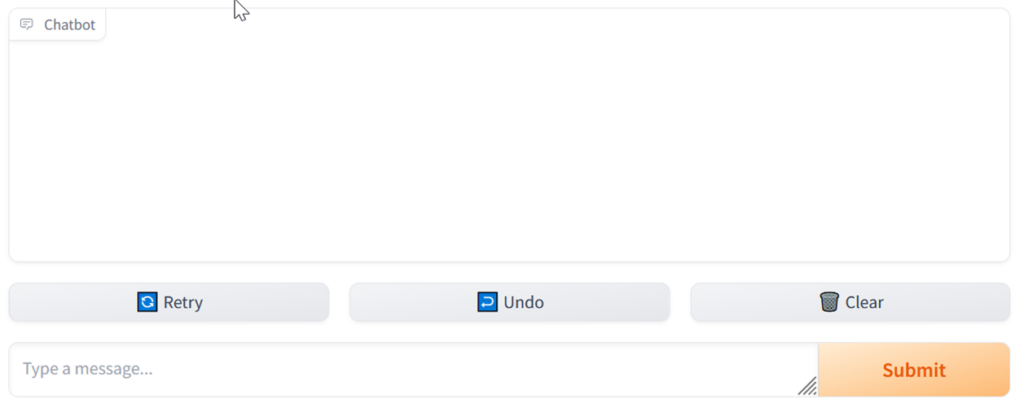
For the chatbot we will be using the basic chat interface built in Gradio : gr.ChatInterface(rag_response).launch()
You can check Gradio guides here.
“Rag_response” is the function that will be handling the overall process : • It reads the user message and the history of chat • It sends the user message to the embedding model AI Endpoint API to convert the query into an embedding vector. • It queries the vector database with the resulting embedding vector to find the top 5 most semantically close chunks (in our case pdf pages) • It builds a context with : The user query + chat history + system prompt + context (build from results of the vector DB) • It sends the prompt to the AI Endpoint LLM model API. • It displays the result into the chat interface.
Script in python below for “query_knowledge_base.py
def rag_response(message, history):
print(history)
# Get the embeddings of the query text
response = requests.post(ovhcloud_embedding_endpoint_url, json={"text": message}, headers={'Authorization': f'Bearer {ovhcloud_ai_endpoint_api_key}'})
    query_embedding = response.json()

# Connect to the PostgreSQL db and run a similarity query on this embedding to get the top 5 most similar texts

with psycopg2.connect(dbname=postgre_db, user=postgre_user, password=postgre_password, host=postgre_host, port=postgre_port, sslmode=sslmode) as conn:
   with conn.cursor() as cur:
      cur.execute("SELECT document_name, page_number, embedding <-> %s::vector as distance, text FROM embeddings ORDER BY distance LIMIT 5", (query_embedding,))
      results = cur.fetchall()

    # Build the context string for the LLM model by concatenating the top 5 most relevant texts
system_prompt = "You are a nice chatbot and you have to answer the user question based on the context provided below and no prior knowledge. If the answer was found in a context document, provide the document name and page number. \n <context>"
system_prompt += ''.join(f"\n Document: {result[0]}, Page: {result[1]}, Text: {result[3]} \n" for result in results)
    system_prompt += "</context>"

# Build the history with validation for role
valid_roles = {"user", "assistant", "system", "tool"}
    messages = [{"role": "system", "content": system_prompt}] + [
        {"role": role, "content": content} for role, content in history if role in valid_roles
    ] + [{"role": "user", "content": message}]

# Call the LLM model API with the user question and system prompt
    response = requests.post(ovhcloud_llm_endpoint_url, json={"max_tokens": 512, "messages": messages, "model": "Mixtral-8x22B-Instruct-v0.1", "temperature": 0}, headers={"Content-Type": "application/json", "Authorization": f"Bearer {ovhcloud_ai_endpoint_api_key}"})

# Handle response
    return response.json()["choices"][0]["message"]["content"] if response.status_code == 200 else f"{response.status_code} {response.text}"

# Launch the gradio interface
gr.ChatInterface(rag_response).launch(server_name="0.0.0.0", server_port=8080)
Step 9 – Write the requirements.txt files
For each script we need to create a requirements.txt file that will contain the list of python libraries that will be installed via pip before the python scripts are run. We will call them “requirements-generate.txt” and “requirements-query.txt”
Content of requirements-generate.txt should be :
boto3 requests PyPDF2 psycopg2 markdownify time- Boto3 is used to read the object storage files.
- Requests is used to do the API calls to the AI Endpoints.
- PyPDF2 is used to open PDF files and extract the texts.
- Psycopg2 is used to connect to PostgreSQL
- markdownify is used to read the markdown (md) files
- time is used for the wait() function to not do too many api calls too fast
Content of requirements-query.txt should be :
requests psycopg2 gradio- Gradio is used for the chatbot interface.
Step 10 – Upload the pdf documents & scripts to the object storage
We now need to upload into an object storage bucket both the python scripts, requirements.txt and the files that will be ingested into the knowledge base. Note that the second set of documents (the ovhcloud documentation from github) the job will directly read the files from github (no need to download/upload)
You have several ways to upload documents into the bucket.
- If you only have a few documents you can do it manually via the ovhcloud manager interface.
- Using any S3 compatible tool (Ex : Cyberduck)
- Command line via a CLI (Ex : ovhai or aws cli).
We will use the CLI method to upload the PDF (into “rag-knowledge-files” bucket ) and the manual method via the manager for the requirements & python scripts (into “rag-scripts” bucket)
Step 10.1 – Check that the ovhai CLI correctly sees your buckets
ovhai bucket list <your datastore name>Exemple :
ovhai bucket list S3GRAStep 10.2 – Upload the files from the local folder to the bucket
This should list the bucket “rag-knowledge-files” and “rag-scripts” we created previously.
Add your files in the same folder as the CLI and run the following command :
ovhai bucket object upload <Your bucket name>@<Your datastore name>Example :
ovhai bucket object upload rag-knowledge-files@S3GRAYou should see something similar to this :
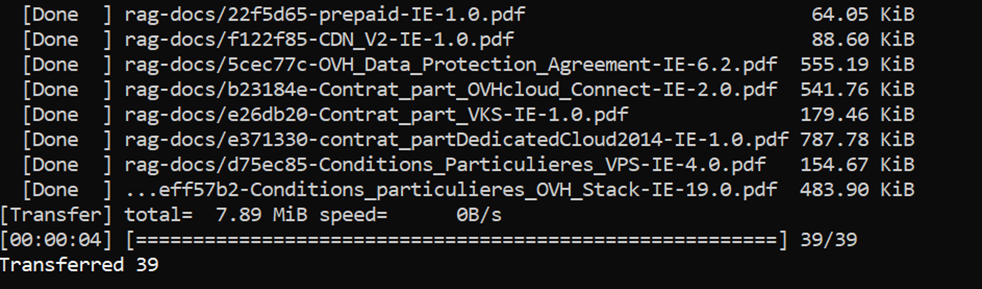
10.3 – Check files have been uploaded
Using ovhai bucket object list command, check that the files are correctly listed :
ovhai bucket object list <Your bucket name>@<Your datastore name>Exemple :
ovhai bucket object list rag-knowledge-files@S3GRA10.4 – Upload the requirements & python script files in the Navigate to the OVHcloud Manager : https://www.ovh.com/manager/#/hub Select Object Storage

Select your “rag-scripts” object storage bucket. Click on “Add objects” :
Select & upload your files.

It should look like this :

Step 11 – Optional : Test the scripts via Jupyter AI Notebooks
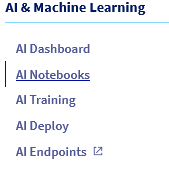
11.1 – Go to the OVHcloud Manager and select AI Notebooks
11.2 – Select “Create a Notebook”

11.3 – Complete the notebook creation process :
- Give a meaningful name (ex : rag_notebook)
- Select the “JupyterLab” editor
- Select any python notebook (in our case we don’t need AI libraries so any will do). Ex : Miniconda
- Select Restricted Access for Privacy Settings.
- Select a Data Center location (same as your bucket)
- Select the “AI Notebooks Standard (CPU resources)” use case – We do not need GPU in this case.
- Select 4 vCore (that’s enough for this tutorial)
- IMPORTANT STEP : click on “Attach a public Git repository”. We will add the OVH Docs github so it’s synced locally to the notebook. For this, add “https://github.com/ovh/docs.git“ in the URL and “/workspace/docs” in Mount Directory and select “Read-only” for Permission

- Do not attached a SSH key (for this tutorial)
Once launched, wait a few minutes and the notebook should show as “In service” and provide a link to the JupyterLab :

Open the JupyterLab link.
Here you will need to log in using an open stack user with the “AI Training” role, so you can use Ops_reader that we created earlier.
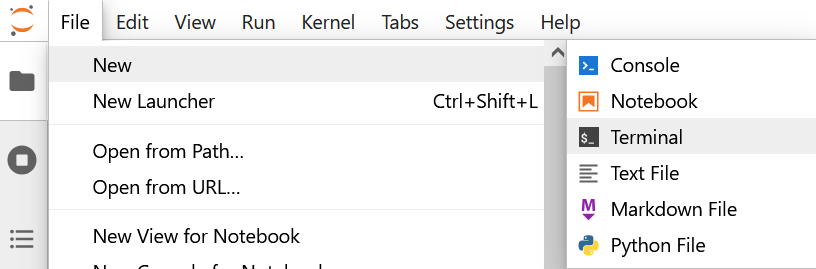
11.4 – Install the needed libraries Once in JupyterLab, go to File menu and select “New”, then “Terminal”
In the new terminal run the following command to install all the needed libraries :
pip install boto3 requests PyPDF2 psycopg2-binary markdownify gradio11.5 – Create a notebook and include the necessary code In the File menu, select “New”, then “Notebook”

Once inside the notebook add the following code. The best would be to split it into several cells so you can run it step by step. In the notebook we will not be using Environment variables so make sure to complete with the correct values for the variables.
import os
import gradio as gr # for the chat interface
import boto3 # to read the files in the Object Storage
from PyPDF2 import PdfReader # to open the pdfs and extract the texts
import requests # to do the API calls
import psycopg2 # to connect to postgreSQL
from psycopg2.extras import execute_values
from psycopg2 import OperationalError
from markdownify import markdownify as md # to open and split the markwdown files
import time # for the wait function

S3_endpoint = "https://s3.gra.io.cloud.ovh.net/"
S3_container_name = "rag-knowledge-files"
ovhcloud_embedding_endpoint_url = 'https://multilingual-e5-base.endpoints.kepler.ai.cloud.ovh.net/api/text2vec'
ovhcloud_llm_endpoint_url = 'https://mixtral-8x22b-instruct-v01.endpoints.kepler.ai.cloud.ovh.net/api/openai_compat/v1/chat/completions'
postgre_host = 'postgresql-xxxxxxx-xxxxxx.database.cloud.ovh.net'
postgre_db = 'xxxxx'
postgre_port = '20184'
sslmode = "require"
S3_secret_key = "xxxx"
S3_access_key = "xxxx"
ovhcloud_ai_endpoint_api_key = "xxxx"
postgre_password = "xxxxx"
postgre_user = "xxxx"

# Connect to PostgreSQL
try:
    conn = psycopg2.connect(
        dbname="defaultdb",
        user=postgre_user,
        password=postgre_password,
        host=postgre_host,
        port=postgre_port,
        sslmode=sslmode
    )
    print("Connection to PostgreSQL DB successful")
except OperationalError as e:
    print(f"The error '{e}' occurred")

cur = conn.cursor()
# check if the pgvector extension exists, if not activate it. Without this Postgre will now accept vectors and you won’t be able to do vector similarity search
cur.execute("CREATE EXTENSION IF NOT EXISTS vector")
conn.commit()

# check if the embeddings table exists, if not create it
# embeddings table stores the embeddings but also the document name, the page number and the text itself
cur.execute("CREATE TABLE IF NOT EXISTS embeddings (id SERIAL PRIMARY KEY, document_name TEXT, page_number INT, text TEXT, embedding VECTOR)")
conn.commit()
# we make sure the table is empty. This means every time we launch this job it will regenerate the full tabled based on all the documents in the object storage.
cur.execute("TRUNCATE TABLE embeddings;")
conn.commit()

# Connect to object storage and print the list of files
s3 = boto3.client('s3',
                  endpoint_url=S3_endpoint,
                  aws_access_key_id=S3_access_key,
                  aws_secret_access_key=S3_secret_key)
bucket = s3.list_objects(Bucket=S3_container_name)

# only select the pdf files and then for each count the number of pages and display the nb
for obj in bucket['Contents']:
    if obj['Key'].endswith('.pdf'):
        # Download the PDF file
        s3.download_file(S3_container_name, obj['Key'], 'temp.pdf')

        # Read the PDF file
        with open('temp.pdf', 'rb') as file:
            reader = PdfReader(file)
            print(f"Number of pages in {obj['Key']}:", len(reader.pages))
            # for each page, extract the text and send it to the embedding endpoint
            for page_num in range(len(reader.pages)):
                page = reader.pages[page_num]
                text = page.extract_text()
                # Generate embeddings
                response = requests.post(ovhcloud_embedding_endpoint_url, json={"text": text}, headers={'Authorization': f'Bearer {ovhcloud_ai_endpoint_api_key}'})
                embeddings = response.json()
                data = [(obj['Key'], page_num, text, embeddings)]
                # Insert embeddings into PostgreSQL
                try:
                    execute_values(
                        cur,
                        "INSERT INTO embeddings (document_name, page_number, text, embedding) VALUES %s",
                        data
                    )
                    conn.commit()
                except Exception as e:
                    print(f"Error inserting data for {obj['Key']} page {page_num}: {e}")
                    print("INSERT INTO embeddings (document_name, page_number, text, embedding) VALUES %s" % data)
                    conn.rollback()
                # 3 second wait in order now to reach API limit calls
                time.sleep(3)

            # close the file and then delete the temp file
            file.close()
        # delete the temp file temp.pdf
        os.remove('temp.pdf')
# check how many rows are in the embeddings table and print it
cur.execute("SELECT COUNT(*) FROM embeddings")
print("DB now has", cur.fetchone()[0], " embeddings")

# Function to get all 'guide.en-ie.md' files in a directory and its subdirectories
def get_guide_md_files(directory):
    guide_files = []
    for root, _, files in os.walk(directory):
        for file in files:
            if file == 'guide.en-ie.md':
                guide_files.append(os.path.join(root, file))
    return guide_files

# Function to extract sections from markdown text
def extract_md_sections(md_text):
    sections = []
    current_section = []
    lines = md_text.split('\n')

    for line in lines:
        if line.startswith('#'):
            if current_section:
                sections.append('\n'.join(current_section))
                current_section = []
        current_section.append(line)

    if current_section:
        sections.append('\n'.join(current_section))

    return sections


# Local directory containing markdown files
local_directory = 'docs/pages/'

# Process 'guide.en-ie.md' files in the local directory
guide_files = get_guide_md_files(local_directory)

for guide_file in guide_files:
    with open(guide_file, 'r', encoding='utf-8') as file:
        md_text = file.read()

    sections = extract_md_sections(md_text)

    for section_num, section_text in enumerate(sections):
        # Add folder structure at the beginning of the text
        folder_structure = os.path.relpath(guide_file, local_directory)
        text_with_structure = f"{folder_structure}\n\n{section_text}"

        # Generate embeddings
        response = requests.post(ovhcloud_embedding_endpoint_url, json={"text": text_with_structure}, headers={'Authorization': f'Bearer {ovhcloud_ai_endpoint_api_key}'})
        embeddings = response.json()

        data = [(folder_structure, section_num, text_with_structure, embeddings)]
        # Insert embeddings into PostgreSQL
        try:
            execute_values(
                cur,
                "INSERT INTO embeddings (document_name, page_number, text, embedding) VALUES %s",
                data
            )
            conn.commit()
        except Exception as e:
            print(f"Error inserting data for {guide_file} section {section_num}: {e}")
            conn.rollback()

        # 3-second wait to avoid reaching API rate limits
        time.sleep(3)

# Check the number of rows in the embeddings table
cur.execute("SELECT COUNT(*) FROM embeddings")
print("DB now has", cur.fetchone()[0], " embeddings")

# Close the connection
cur.close()
conn.close()

def rag_response(message, history):
    print(history)
   # Get the embeddings of the query text
    response = requests.post(ovhcloud_embedding_endpoint_url, json={"text": message}, headers={'Authorization': f'Bearer {ovhcloud_ai_endpoint_api_key}'})
    query_embedding = response.json()

    # Connect to the PostgreSQL db and run a similarity query on this embedding to get the top 5 most similar texts
    with psycopg2.connect(dbname=postgre_db, user=postgre_user, password=postgre_password, host=postgre_host, port=postgre_port, sslmode=sslmode) as conn:
        with conn.cursor() as cur:
            cur.execute("SELECT document_name, page_number, embedding <-> %s::vector as distance, text FROM embeddings ORDER BY distance LIMIT 5", (query_embedding,))
            results = cur.fetchall()

    # Build the context string for the LLM model by concatenating the top 5 most relevant texts
    system_prompt = "You are a nice chatbot and you have to answer the user question based on the context provided below and no prior knowledge. If the answer was found in a context document, provide the document name and page number. \n <context>"
    system_prompt += ''.join(f"\n Document: {result[0]}, Page: {result[1]}, Text: {result[3]} \n" for result in results)
    system_prompt += "</context>"

    # Build the history with validation for role
    valid_roles = {"user", "assistant", "system", "tool"}
    messages = [{"role": "system", "content": system_prompt}] + [
        {"role": role, "content": content} for role, content in history if role in valid_roles
    ] + [{"role": "user", "content": message}]

    # Call the LLM model API with the user question and system prompt
    response = requests.post(ovhcloud_llm_endpoint_url, json={"max_tokens": 512, "messages": messages, "model": "Mixtral-8x22B-Instruct-v0.1", "temperature": 0}, headers={"Content-Type": "application/json", "Authorization": f"Bearer {ovhcloud_ai_endpoint_api_key}"})

    # Handle response
    return response.json()["choices"][0]["message"]["content"] if response.status_code == 200 else f"{response.status_code} {response.text}"

gr.ChatInterface(rag_response).launch(share=True)
11.6 – Execute each cell step by step
If everything worked fine you should have, for the last step (launching the gradio server) a link to your web app :

Step 12 – Run the Generate Knowledge Base job with AI Training
In the ovhai CLI, launch the job by running the ovhai job run command.
ovhai job run ovhcom/x
  --cpu x # X beeing the number of CPU. We do not need a GPU in this case.
  --env S3_SECRET_KEY=x # secret key for the user which has access to the rag files object storage
  --env S3_ACCESS_KEY=x # access key for the same S3 user
  --env OVHCLOUD_AI_ENDPOINT_API_KEY=x # token for the AI endpoints service.
  --env POSTGRE_PASSWORD=x # password for the postgre user
  --env POSTGRE_USER=x # user for postgre. In this tutorial it's avnadmin
  --volume rag-scripts@S3GRA/:/workspace/scripts:RO:cache # to copy locally the scripts from the S3 bucket into the scripts folder
  --volume https://github.com/ovh/docs.git:/workspace/docs:RO # to copy locally the content from the github
  -- bash -c "pip install -r /workspace/scripts/requirements.txt # this will launch the installation, via pip of the python libraries listed in requirements.txt
    && python /workspace/scripts/generate_knowledge_base.py" # this will launch the python script to generate the knowledge base
# x beeing the name of the pre-build container. In this case it could be any python one.
Example :
ovhai job run ovhcom/ai-training-pytorch
  --cpu 4
  --env S3_SECRET_KEY=7211fc346d85460cbefa221gggg47a26
  --env S3_ACCESS_KEY=9e4406756ecssd0916ac456ffac7
  --env OVHCLOUD_AI_ENDPOINT_API_KEY=eyJhbGciOiJsdsfg5R5cCI6IkpXVCJ99YLKK
  --env POSTGRE_PASSWORD=TKIm3dssdyn9JLLvV2Ww
  --env POSTGRE_USER=userpg
  --volume rag-scripts@S3GRA/:/workspace/scripts:RO:cache
  --volume https://github.com/ovh/docs.git:/workspace/docs:RO
  -- bash -c "pip install -r /workspace/scripts/requirements-generate.txt
    && python /workspace/scripts/generate_knowledge_base.py"
If launch correctly the job will execute (should take about 2h due to the number of docs) and finish by the following message in the logs :

Note that you can check the status of the job and it’s logs either in the manager :

Or via the CLI with with
ovhai job logs <job id>Example :
ovhai job logs 7ce50758-36b3-4d02-953f-79d0ae3fb2e2Step 13 – Build & upload the chatbot web app container
For this step you need the “requirements-query.txt” and “query_knowledge_base.py” files.
13.1 – Write the Dockerfile
As we will be using Gradio, we must use python 3.8 or higher. File content should look like this :
# define the base image. In this case python in version 3.13
FROM python:3.13 # add the workspace directory WORKDIR /workspace ADD . /workspace # install the python libraries declared in the requirements file RUN pip install -r requirements-query.txt # necessary for the container to work in OVHcloud AI products RUN chown -R 42420:42420 /workspace ENV HOME=/workspace # launch the web app when container is ready CMD [ "python3" , "/workspace/query_knowledge_base.py" ]13.2 – Build the container image Make sure you have the Dockerfile, requirements-query.txt and query_knowledge_base.py in a single folder and that docker is installed, then run the docker build command :
docker build . -t <container name>:latestExample :
docker build . -t rag_query:latest13.3 – Push the image to the Managed Private Registry (or your own registry) Run the following command :
docker login -u <user> -p <password> <shared-registry-address>
docker tag rag_query:latest <shared-registry-address>/<container name>:latest
docker push <shared-registry-address>/<container name>:latest
Example :
docker login -u XXGSFCXNBy -p G222379Pl8c65 https://87152q74.c1.gra9.container-registry.ovh.net
docker tag rag_query:latest 87152q74.c1.gra9.container-registry.ovh.net/rag_query:latest
docker push https://87152q74.c1.gra9.container-registry.ovh.net/rag_query:latest
You can check if the container was pushed correctly in the harbor web UI (use the URL of the registry and log in).
Step 14 – Deploy the chatbot app via AI Deploy
We will use the OVHAI CLI to launch de deployment of the web app from the container image we just created. This will run the gradio app that we can then access via the brower.
Use the following command in the ovhai cli :
ovhai app run 87152q74.c1.gra9.container-registry.ovh.net/rag_containers/rag-query:latest --cpu <nb of CPU> --env OVHCLOUD_AI_ENDPOINT_API_KEY=<endpoint token> --env POSTGRE_PASSWORD=<password for postgresql> --env POSTGRE_USER=<user for postgresql>Example :
ovhai app run 871524374.c1.gra9.container-registry.ovh.net/rag_containers/rag-query --cpu 1 --env POSTGRE_PASSWORD=TKImGj5kkkkFvb2Ww --env POSTGRE_USER=avnzzdin --env OVHCLOUD_AI_ENDPOINT_API_KEY=eyJybGciOisdsdLHJhgnnnStep 15 – Chat with your documents !
If the AI Deploy app was launched correctly you can get the URL to access it via : OVHai Cli (should display it after you run the app run command)

Or in the OVHcloud Manager :
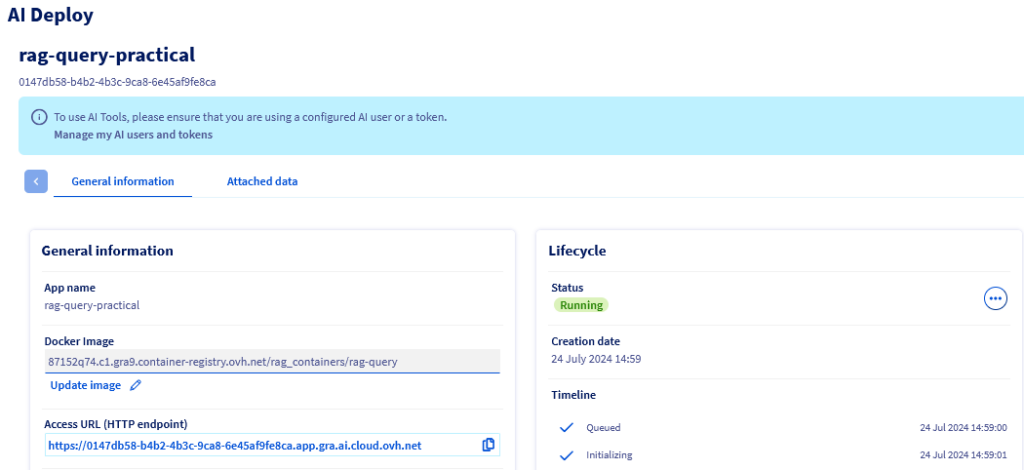
When accessing that URL you should be able to display the gradio chat interface and start asking questions :
* S3 is a trademark of Amazon Technologies, Inc. OVHcloud’s service is not sponsored by, endorsed by, or otherwise affiliated with Amazon Technologies, Inc.

Director of Engineering - AI